•
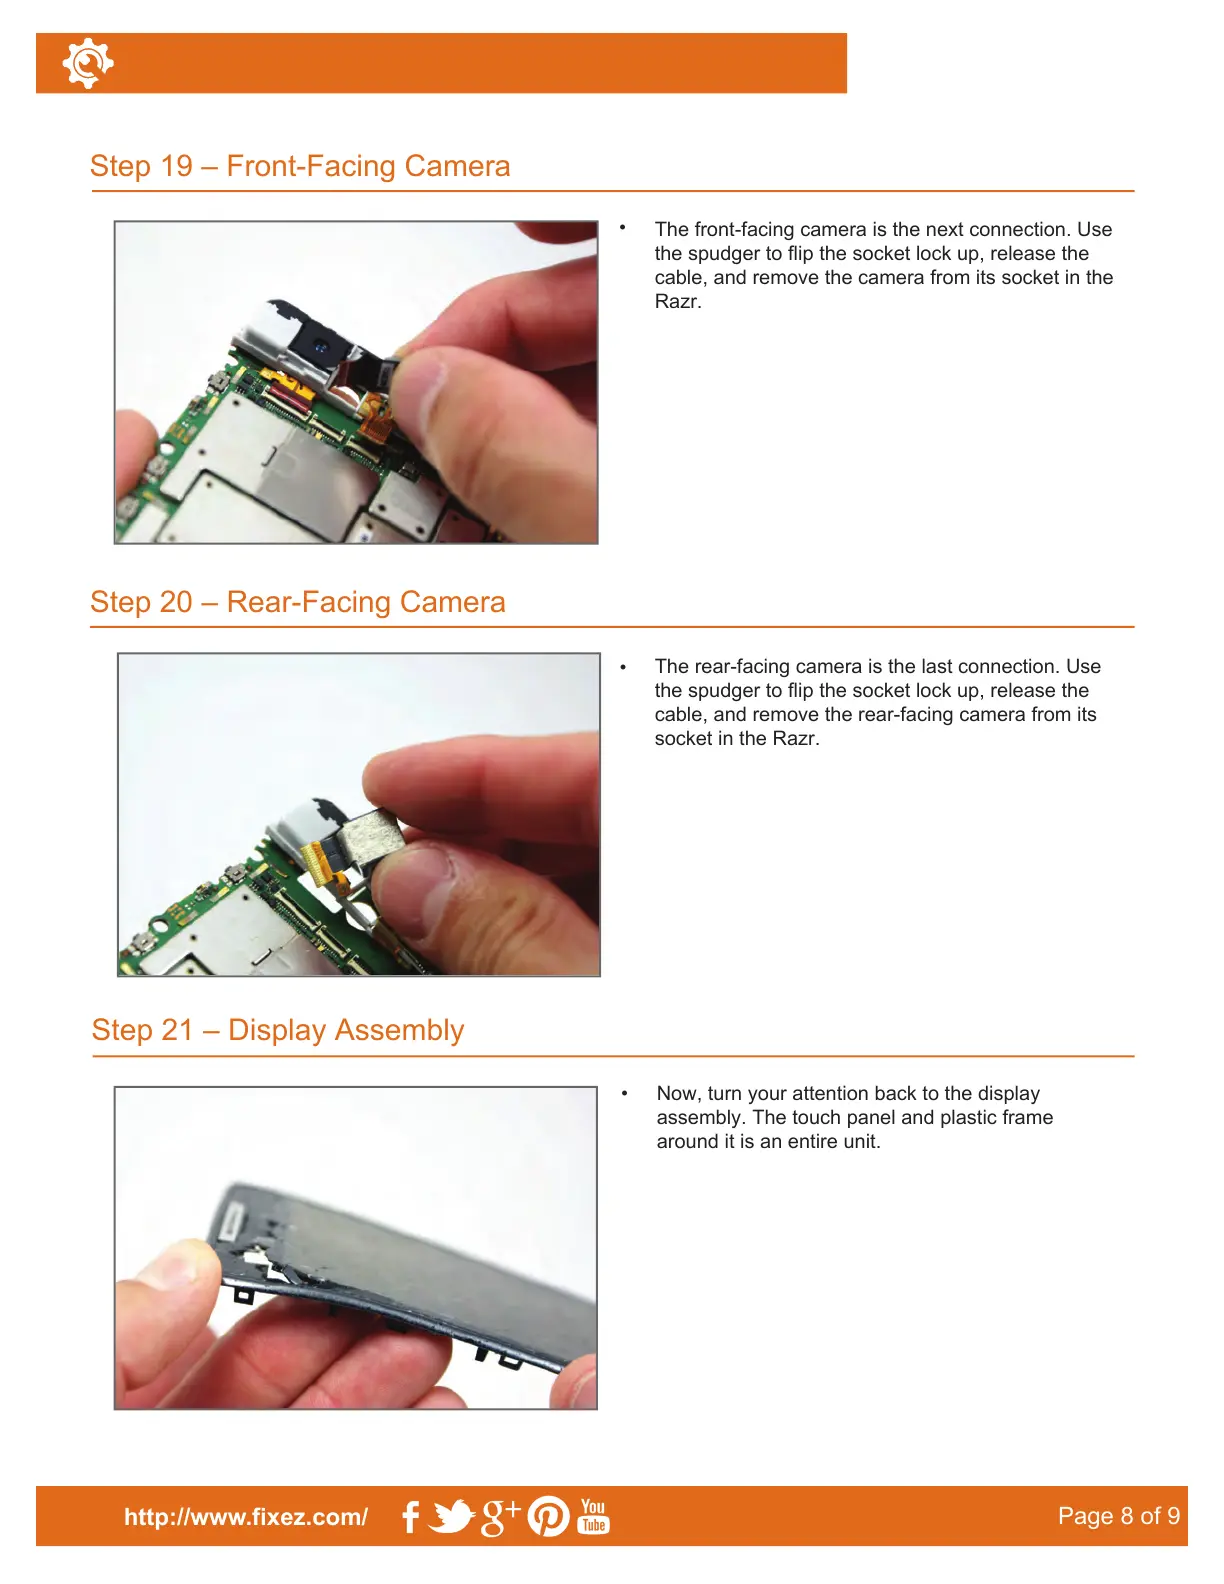
The front-facing camera is the next connection. Use
the spudger to flip the socket lock up, release the
cable, and remove the camera from its socket in the
Razr.
Step 21 – Display Assembly
Step 19 – Front-Facing Camera
Step 20 – Rear-Facing Camera
http://www.fixez.com/
Page 8 of 9
•
The rear-facing camera is the last connection. Use
the spudger to flip the socket lock up, release the
cable, and remove the rear-facing camera from its
socket in the Razr.
•
Now, turn your attention back to the display
assembly. The touch panel and plastic frame
around it is an entire unit.
Motorola Droid Razr–Disassemble Guide
•
To replace the plastic frame only, the two pieces
need to be separated from each other. A small
amount of adhesive is holding the touch screen/
front panel and frame together.
•
Use the heat gun/blow dryer and the spudger
to separate these two for replacement.

 Loading...