CPU & Cooler Installaton
When you are nstallng the CPU, make sure the CPU has a cooler attached on the top
to prevent overheatng. Meanwhle, do not forget to apply some thermal paste on CPU
before nstallng the heat snk/cooler fan for better heat dsperson.
Follow the steps below to nstall the CPU & cooler correctly. Wrong nstallaton wll
cause the damage of your CPU & manboard
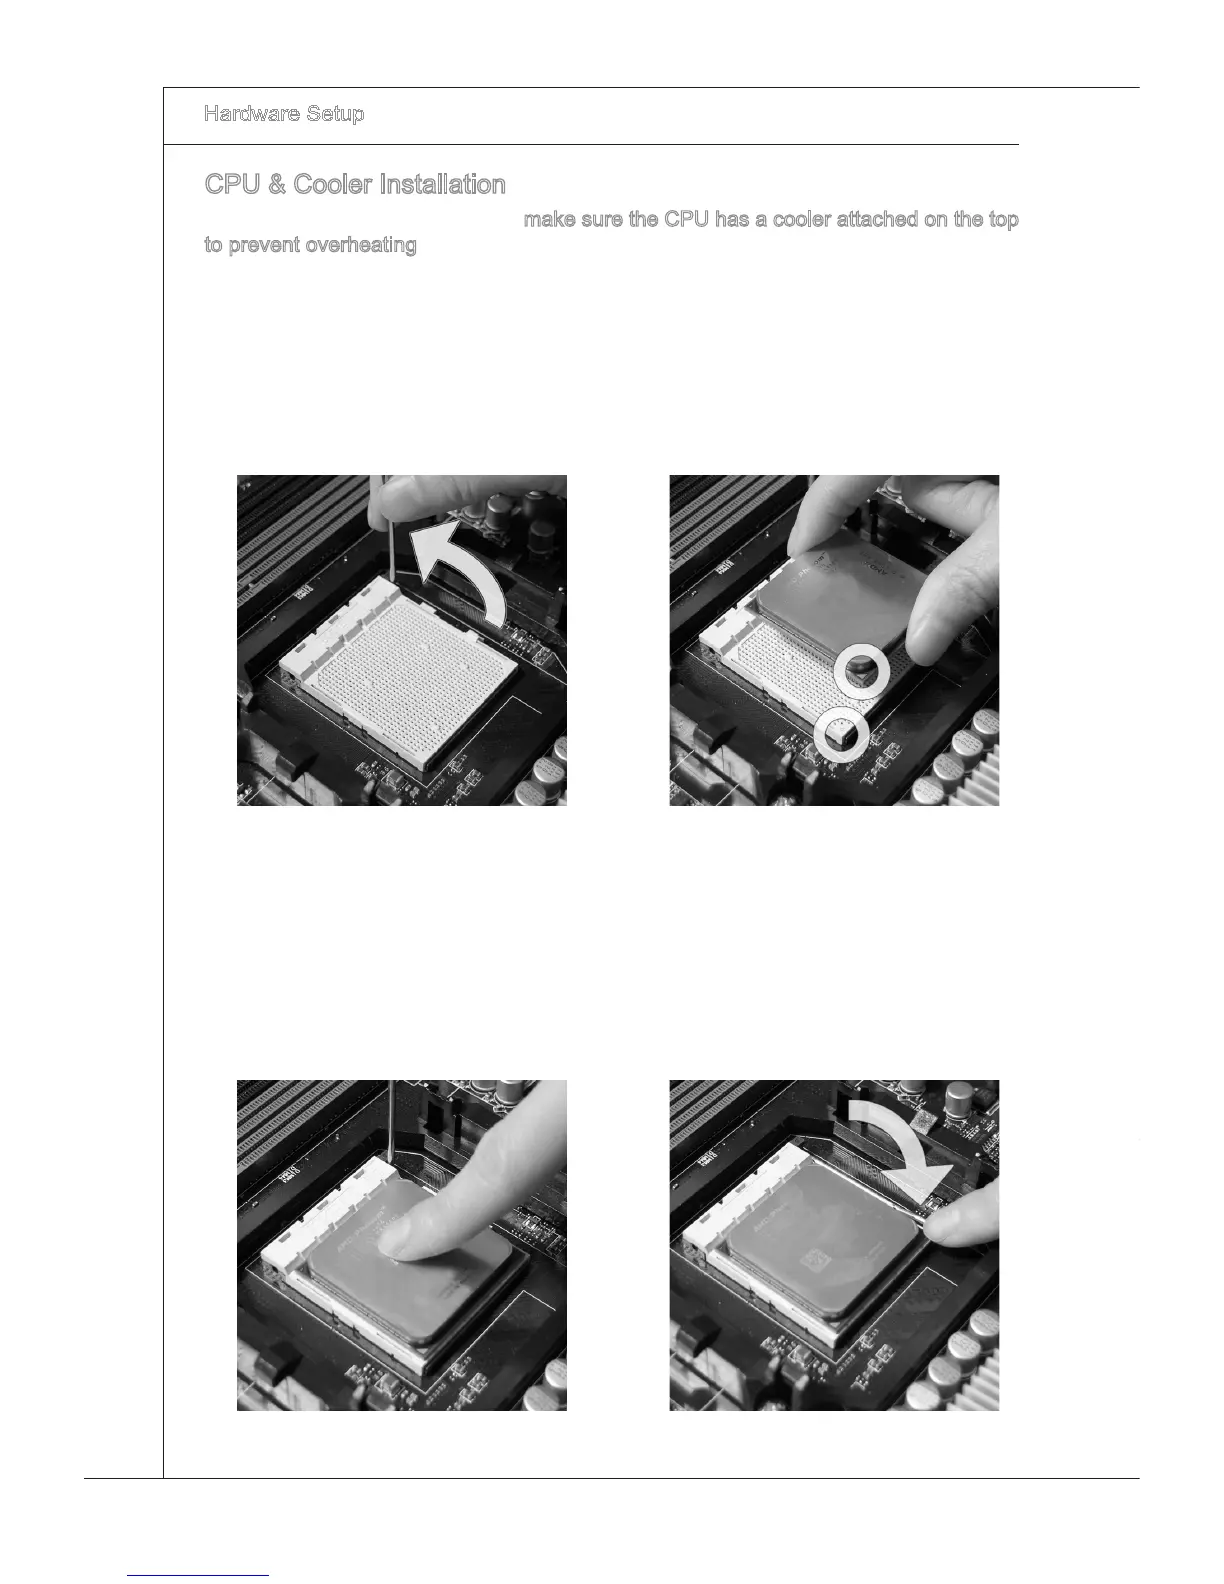
If the CPU s correctly nstalled, the
pns should be completely embedded
nto the socket and can not be seen.
Please note that any volaton of the
correct nstallaton procedures may
cause permanent damages to your
manboard.
3. Press the CPU down rmly nto the
socket and close the lever. As the
CPU s lkely to move whle the lever
s beng closed, always close the le-
ver wth your ngers pressng tghtly
on top of the CPU to make sure the
CPU s properly and completely em-
bedded nto the socket.
4.
Pull the lever sdeways away from
the socket. Make sure to rase the
lever up to a 90-degree angle.
1.
Look for the gold arrow of the CPU.
The gold arrow should pont as shown
n the pcture. The CPU can only t n
the correct orentaton.
2.
 Loading...