English−15
English
Flexible Arm Installation
This monitor is designed for use with a flexible arm. Contact NEC for more information.
Follow the instructions provided by the manufacturer of the display mount. Remove the monitor stand before mounting.
CAUTION: To meet the safety requirements, the monitor must be mounted to an arm that supports the weight of the
monitor. See the Specifications - “E172M” on page 22 for details.
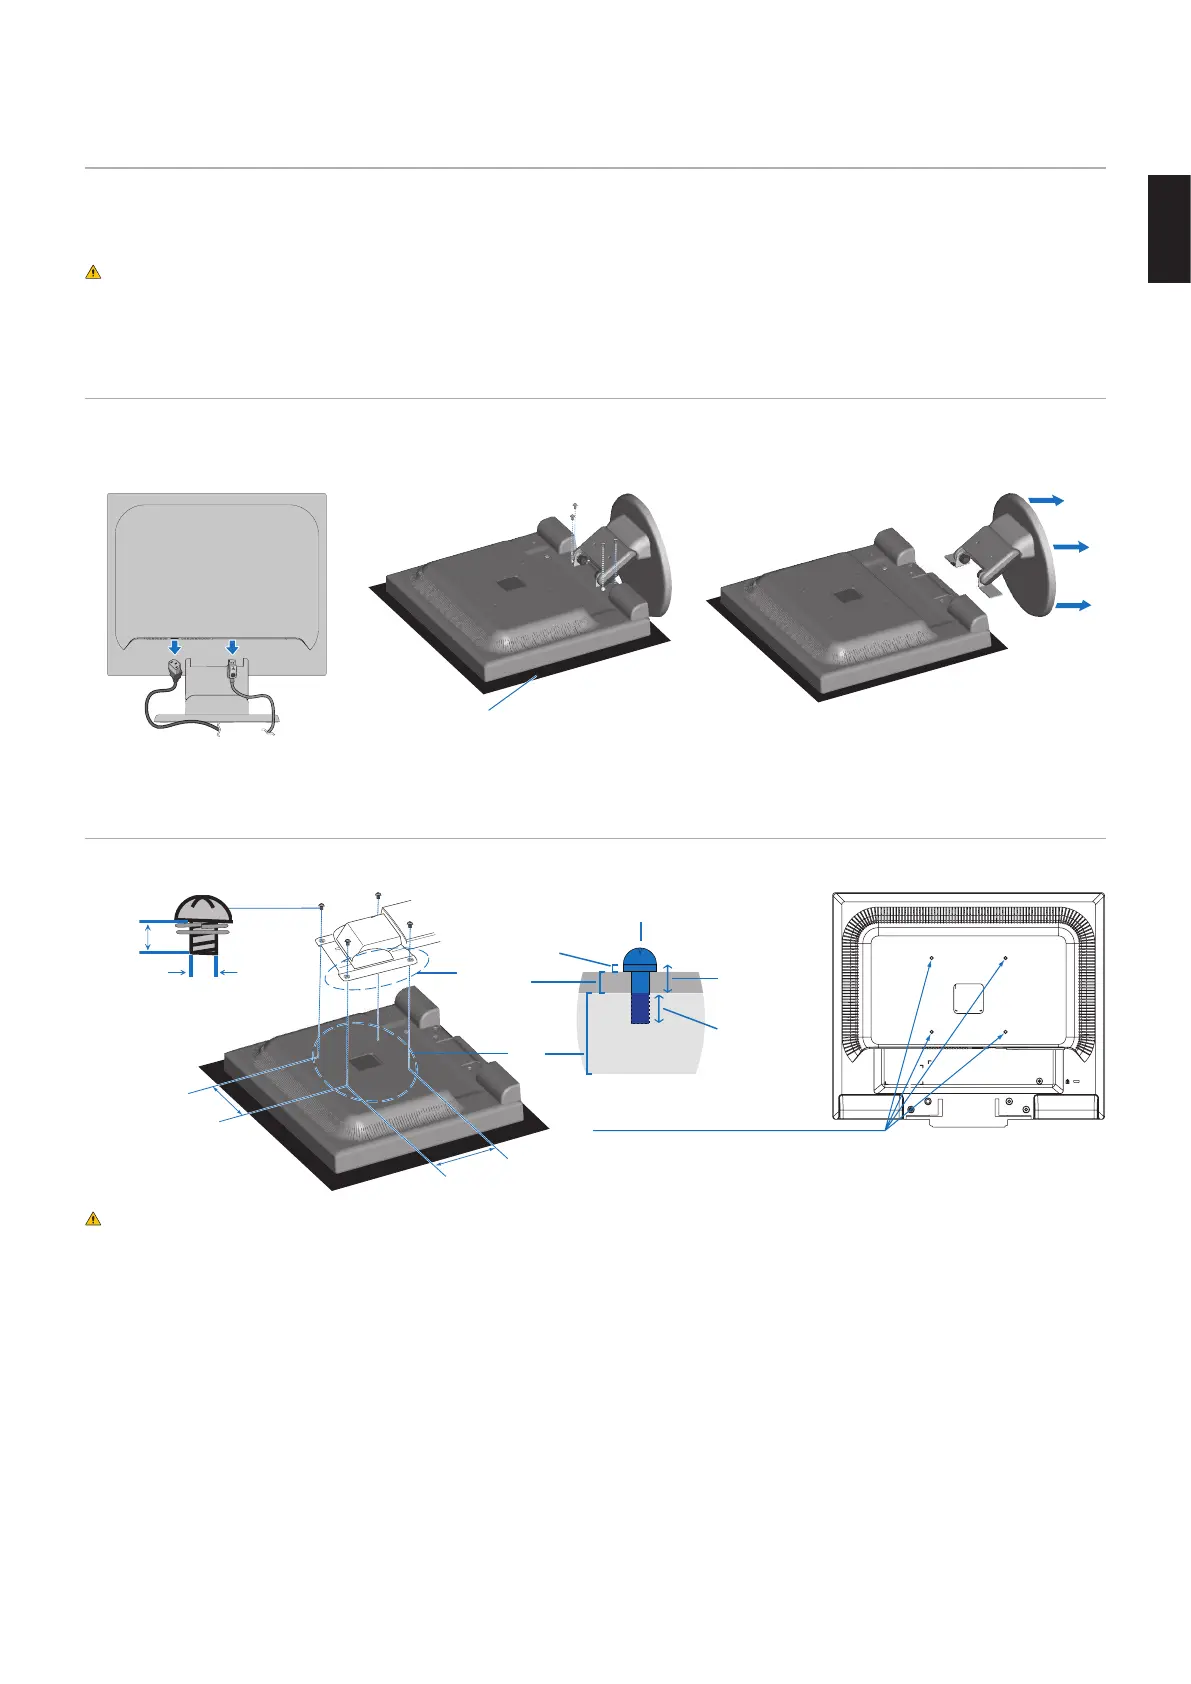
Remove the Monitor Stand for Mounting
NOTE: Handle with care when removing the monitor stand.
1 2 3
Non-abrasive surface
Mount the Flexible Arm
Using four screws that meet the specifications listed below, attach the arm to the monitor.
100 mm
100 mm
Mounting
Bracket
(2.0 - 3.2 mm)
Screw (M4)
Lock washer
and flat washer
Unit
6 - 8 mm
Thickness of
bracket and
washer
M4
4 x 12 mm with lock
washer and flat washer
12 mm
4-SCREWS (M4)
MAX depth: 8.0 mm
If use other screw,
check depth of hole.
Weight of LCD assembly: 3.0 kg (MAX)
CAUTION: • The monitor should only be used with an approved arm (e.g. TUEV GS mark).
• Tighten all screws (recommended fasten torque: 98 - 137 N•cm).
• Attaching the flexible arm should be done by two or more people if the monitor cannot be placed face down
on a flat surface for installation.
• The monitor must be used in the landscape position. When mounting on a flexible arm, please set the
monitor in the landscape position with the LED indicator on the bottom bezel.
 Loading...