Keypad Interface
Bolt Mechanism
Shared & Assigned Use Functionality
Product Guide
Programming Instructions
4
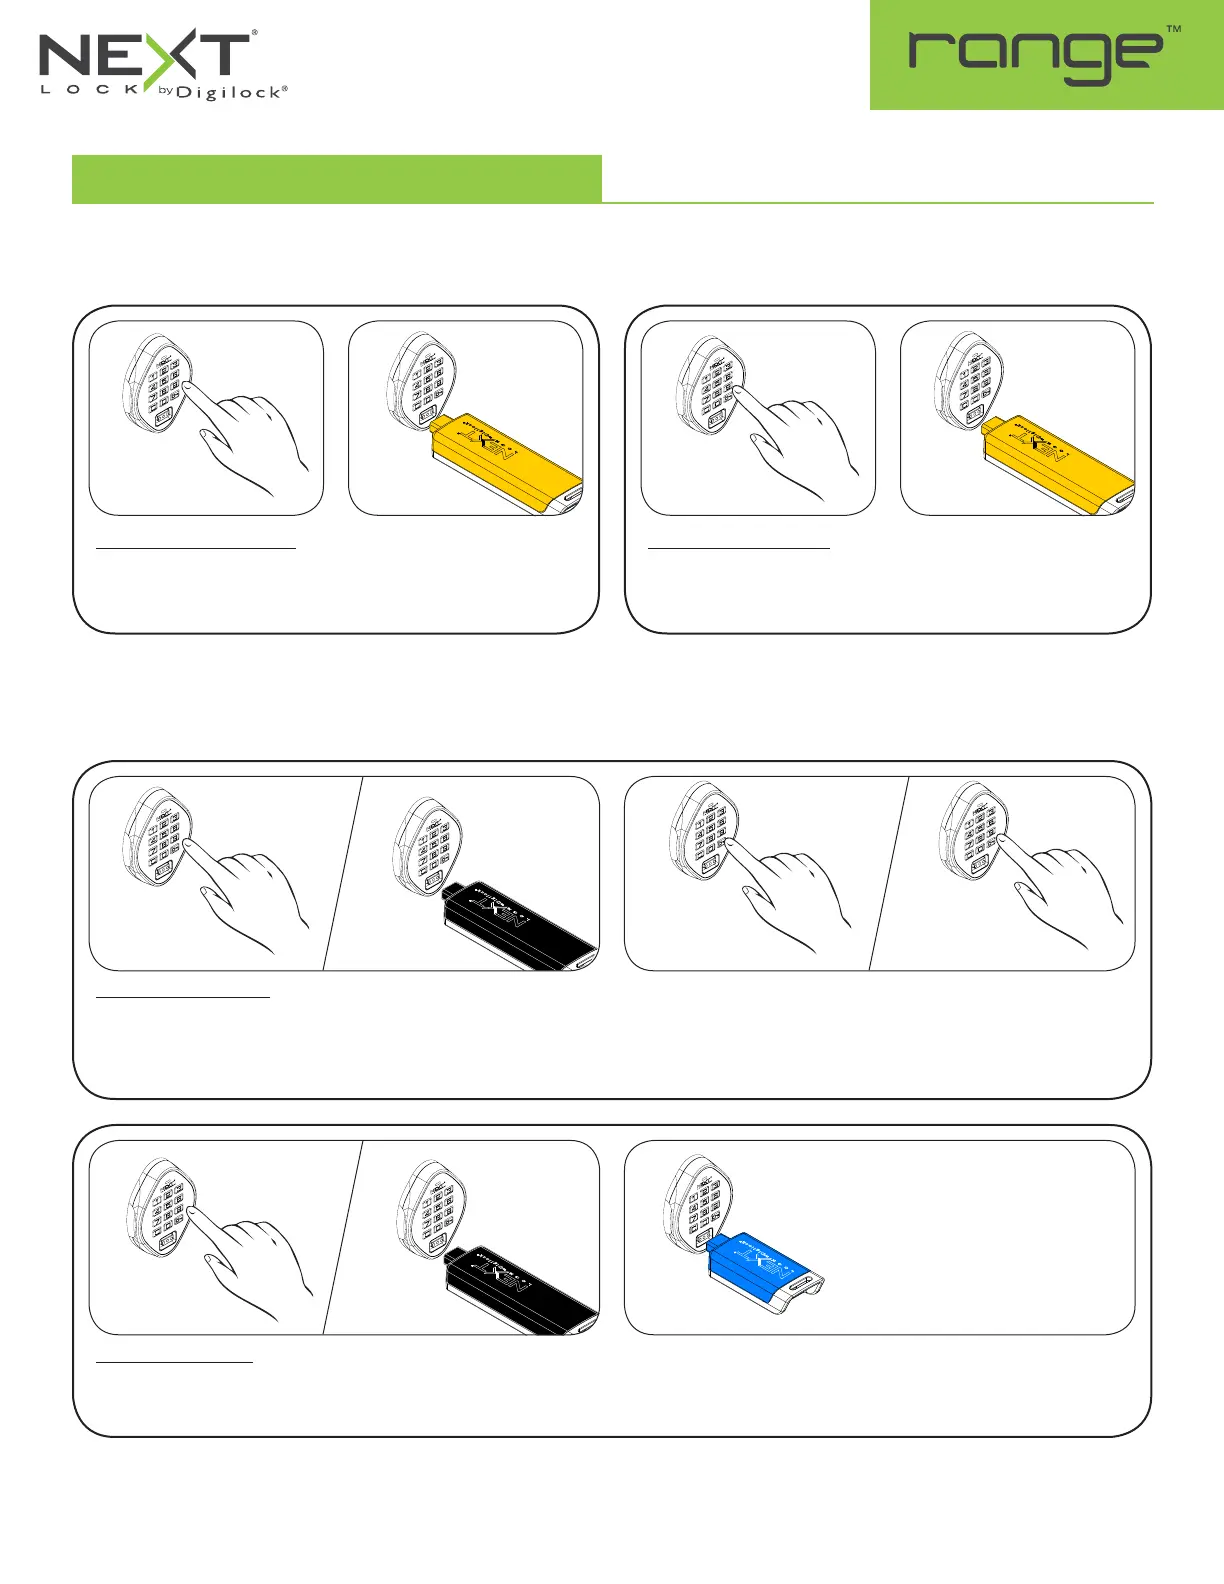
Set Lock Functionality
Each lock can be set for either shared or assigned use functionality. Press
=
to check functionality. If in shared use, LED is red. If in assigned
use, LED is green.
To set for assigned use:
Press
=` 65 `
.
The LED will turn on.
While the LED is on, insert the
Programming Key.
A two-tone beep will be heard
and the LED will turn off.
Assign User Credentials (for assigned use functionality only)
Make sure that the lock is set for assigned use functionality. Once a user credential is assigned, the previously assigned user credential will no
longer operate the lock.
Assign a User Code:
Default User Code:
1 2 3 4
Press
= `
then insert a valid Manager Key.
The LED will turn on.
While the LED is on, press
=
[new 4-digit code]
`
. A two-tone
beep will be heard.
Press
=
[the same 4-digit code]
`
.
Two sets of two-tone beeps will be heard and the LED will turn off.
Assign a User Key:
Press
= `
then insert a valid Manager Key.
The LED will turn on.
While the LED is on, insert a User Key.
A two-tone beep will be heard and the LED will turn off.
To set for shared use:
Press
=` 56 `
.
The LED will turn on.
While the LED is on, insert the
Programming Key.
A two-tone beep will be heard
and the LED will turn off.
1a
1 12 2
1a
2a
2
1b
1b
2b
 Loading...