EN
4 – English
These are the most important phases of automation set-up for ensuring maxi-
mum system safety. The test can also be performed as a periodic check of
automation devices. Testing and commissioning of the automation must be
performed by skilled and qualified personnel, who are responsible for the tests
required to verify the solutions adopted according to the risks present, and for
ensuring observance of all legal provisions, standards and regulations, and in
particular all requirements of the standard EN 12445, which establishes the test
methods for checking automations for doors and gates.
The additional or optional devices must undergo a specific test for functionality
and correct interaction with POA1. Refer to the instruction manuals of the indi-
vidual devices.
3.1 - Testing
The testing sequence refers to the control unit programmed with the preset
functions. See paragraph 5.1:
• Make sure that the activation of the STEP-BY-STEP input generates the fol-
lowing sequence of movements: “Open, Stop, Close, Stop”.
• Make sure that the activation of the AUX input (Type 1 partial opening function)
manages the “Open, Stop, Close, Stop” sequence of the motor of the upper
leaf only, while the motor of the lower leaf remains in the closed position.
• Perform an opening manoeuvre and check that:
- the gate continues the opening manoeuvre when PHOTO is engaged
- the opening manoeuvre stops when PHOTO1 is engaged and only continues
when PHOTO1 is disengaged
- The manoeuvre stops when PHOTO2 (if installed) is engaged and the closing
manoeuvre starts
• Make sure that the motor switches off when the door reaches the mechanical
stop.
• Perform an opening manoeuvre and check that:
- The manoeuvre stops when PHOTO is engaged and the opening manoeuvre
starts
- The manoeuvre stops when PHOTO1 is engaged and the opening manoeu-
vre starts again when PHOTO1 is disengaged
- the gate continues the closing manoeuvre when PHOTO 2 is engaged
• Check that the stopping devices connected to the STOP input immediately
stop all movement.
• Check that the level of the obstacle detection system is suitable for the appli-
cation:
- During both the opening and the closing manoeuvres, prevent the leaf from
moving by placing an obstacle and check that the manoeuvre inverts before
exceeding the force set down by law
• Other checks may be required depending on which devices are connected to
the inputs.
Warning – If an obstacle is detected as moving in the same direction for 2
consecutive manoeuvres in the same direction, the control unit partially
inverts both motors for just 1 second. At the following command, the leafs
begin the opening manoeuvre and the first current sensitivity cut-in for
each motor is considered as a mechanical stop during the opening cycle.
The same happens when the mains power supply is switched on: the first
command is always an opening manoeuvre and the first obstacle is
always considered as a mechanical stop during the opening cycle.
3.2 - Commissioning
Commissioning can only be performed after positive results of all test
phases.
1 Prepare the automation technical documentation, which must contain the
following documents: overall drawing of the automation, electrical wiring
diagram, risk assessment and relative solutions adopted (refer to the rele-
vant forms on our website www.niceforyou.com), manufacturer’s declara-
tion of conformity for all devices used and installer’s declaration of con-
formity.
2 Affix a dataplate on the gate, specifying at least the following data: type of
automation, name and address of manufacturer (responsible for commis-
sioning), serial number, year of construction and CE mark.
3 Before commissioning the automation, ensure that the owner is adequately
informed of all associated risks and hazards.
TESTING AND COMMISSIONING
3
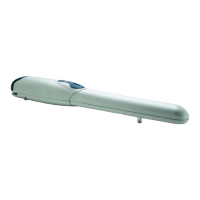
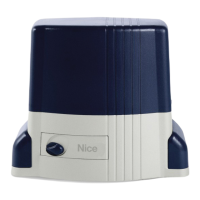
The diagnostics LED P2 (fig. 2) indicates any problems or malfunctions re -
vealed by the control unit during the manoeuvre.
A sequence with a certain number of flashes indicates the type of problem and
remains active until the following manoeuvre begins. The table below sum-
marises this information:
Number Type of malfunction
Led P2 flashes
1 M1 current sensitivity device triggering
2 M2 current sensitivity device triggering
3 STOP input cut-in during the manoeuvre
4 Phototest error
5 Output overcurrent gate open indicator or electric lock
DIAGNOSTICS
4
The POA1 control unit features some programmable functions. These functions
are pre-set in a typical configuration which satisfies most automatic systems.
These functions can be changed at any time, both before and after searching
automatically for limit switches, by carrying out the relevant programming pro-
cedure; see paragraph 5.3.
5.1 - Preset functions
• Motor movement: fast
• Automatic closing: enabled
• Condominium function: disabled
• Pre-flashing disabled
• Close after photo: disabled
• Opening delay: level 2 (10%)
• Everything in stand by / Phototest: Everything in stand by
• Gate open indicator/Electric Lock: Gate open indicator
• STOP input: NC type
• Heavy gates: disabled
• Proportional gate open indicator: disabled
• Pause time: 20 seconds
• Auxiliary input: type 1 partial opening (only the
upper leaf motor is activated)
• Current sensitivity: Level 2
5.2 - Programmable functions
To ensure the system is best suited to the user’s requirements, and safe in the
various different conditions of use, the POA1 control unit offers the possibility to
programme several functions or parameters, as well as the function of a num-
ber of inputs and outputs.
5.2.1 - Direct programming
• Slow/rapid movement: The user can choose the speed of movement of the
gate, at any time (with the motor arrested) simply by operating the P3 key (fig.
2) at any time the control unit is not being programmed. If LED L3 is off, this
shows that the slow movement has been set, if on the fast one has.
5.2.2 - Level one programming: part one
• Automatic closing: This function features an automatic closing cycle after
the programmed pause time; the pause time is factory set to 20 seconds but
it can be modified to 5, 10, 20, 40 or 80 seconds.
If the function is not activated, the system will run “semi-automatically”.
• “Condominium” function: This function is useful when the automatic sys-
tem is radio-commanded by many different people. If this function is active,
each command received triggers an opening manoeuvre that cannot be inter-
rupted by further commands. If the function has been deactivated, a com-
mand causes: OPEN-STOP-CLOSE-STOP.
• Pre-flashing: This function activates the flashing light before the manoeuvre
begins for a time that can be programmed to 3 seconds.
If the function is disabled, the light will start flashing when the manoeuvre
starts.
• Close after photo: During the automatic closing cycle, this function reduces
the pause time to 4 seconds after the PHOTO photocell has disengaged, i.e.
the gate closes 4 seconds after the user has passed through it. If the function
is disabled, the whole programmed pause time will pass.
• Opening delay: During opening, this function causes a delay in the activation
PROGRAMMING
5
 Loading...