39
Basic Photography and Playback: A (Auto) Mode
Adjusting Brightness (Exposure Compensation)
By adjusting exposure compensation when taking pictures, overall image
brightness can be adjusted to make images brighter or darker. It can be used in
A (Auto) mode or in scene modes.
• To adjust exposure compensation in A, B and C modes, use the creative slider
(A69).
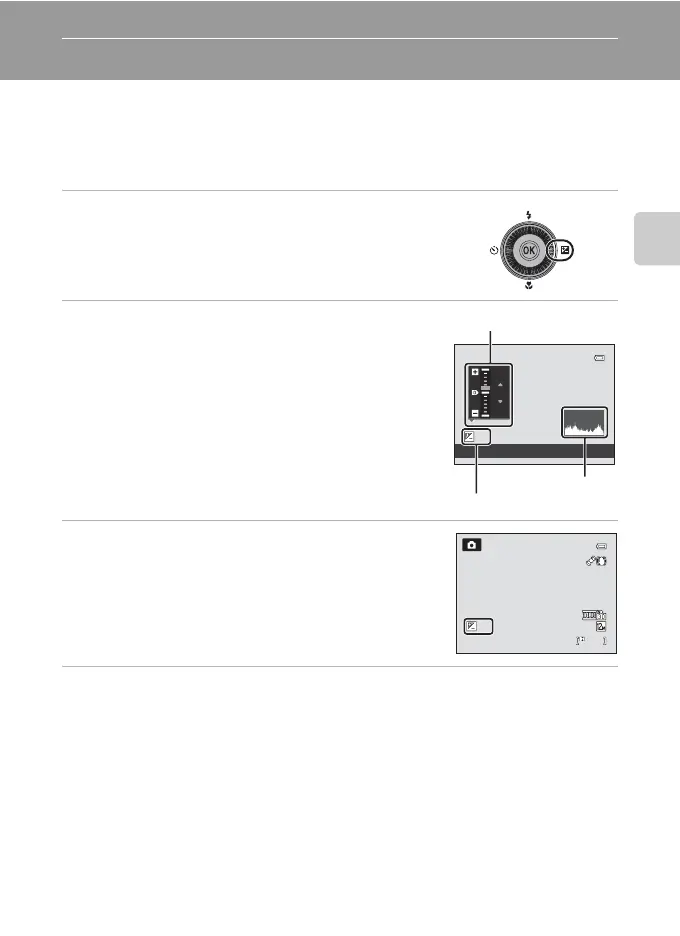
1
Press the rotary multi selector o (exposure
compensation).
• The exposure compensation guide and histogram are
displayed.
2
Use the rotary multi selector to select a
compensation value.
• To make the image brighter, apply positive (+)
exposure compensation.
• To make the image darker, apply negative (–)
exposure compensation.
3
Press the k button to set the compensation
value.
• If the k button is not pressed within a few seconds, the
selection is set and the setting menu disappears.
• When an exposure compensation value other than 0.0 is
applied, the value is displayed with the H indicator on
the monitor.
4
Press the shutter-release button to take a picture
.
• To cancel the exposure compensation setting, return to step 1 and change the value
to 0.0.
C Exposure Compensation Value
In shooting mode D (Manual) (A67) or when the scene mode is Fireworks show (A54), the
exposure compensation cannot be used.
D Using the Histogram
A histogram is a graph showing the distribution of tones in the image. Use as a guide when using
exposure compensation and shooting without the flash.
• The horizontal axis corresponds to pixel brightness, with dark tones to the left and bright tones to
the right. The vertical axis shows the number of pixels.
• Increasing exposure compensation shifts tone distribution to the right, and decreasing it shifts
tone distribution to the left.
+0.3
0.0
Exposure compensation
Histogram
Exposure compensation guide
Exposure compensation value
26
26
+0.3
 Loading...