L
EN
fi sk will, of their own choice, either repair the defects,
replace the unit or refund the purchase price upon
return of the unit. Opening the unit housing causes
the warranty to become void. Further claims may not
be made on the basis of the warranty. The statutory
warranty rights of the customer remain unaffected.
Manufacturer warranty claims shall be made to the
manufacturer. Statutory warranty rights also remain
unaffected in this case.
Addendum Australia:
Our goods come with guarantees that cannot be ex-
cluded under the Australian Consumer Law. You are
entitled to a replacement or refund for a major failure
and for compensation for any other reasonably
foreseeable loss or damage. You are also entitled to
have the goods repaired or replaced if the goods fail
to be of acceptable quality and the failure does not
amount to a major failure.
Nilfi sk vacuum cleaners for domestic use are war-
ranted for 2 years from the date of purchase by:
Nilfi sk-Advance Pty Ltd
Unit 1/13 Bessemer Street
Blacktown NSW 2148
Phone: 1300 556 710
E-mail: sales@nilfi sk.com.au
Find your local service agent here:
http://www.nilfi sk.com.au.
The bene fi ts under this warranty are in addition to
your national law of sale.
Picking up liquids
Before liquids are picked up, always remove the
fi lter bag. Insert fi lter for wet operation. Check that
the fl oat works properly. If foam develops or liquid
emerges from the machine, stop work immediately
and empty the dirt tank.
Connecting electrical appliances
Use the socket on the vacuum cleaner for the pur-
pose defi ned in the operating instructions only. Be-
fore plugging an appliance into the appliance socket:
1. Switch off the vacuum cleaner.
2. Switch off the appliance to be connected. CAU-
TION! Follow the operating instructions and
safety instructions for appliances connected to
the power tool socket. Always unwind the cable
of the vacuum cleaner completely before use.
The power consumption of the connected appliance
must never exceed the value stated on the type
plate of the vacuum cleaner.
The operating voltage shown on the rating plate
must correspond to the voltage of the mains power
supply.
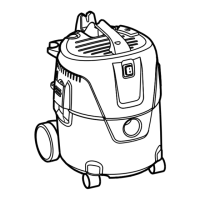
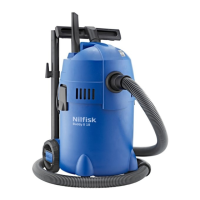
Parts identifi cation (ref. illu. 1&2, page 4)
A. On/off switch
B. Connection of powertool*
C. Connection of suction hose
D. Connection to blow function
E. Accessory storage
F. Cable storage
G. Quick park
* Varies depending on model.
Technical specifi cations
Model Buddy II 12 Buddy II 18 Buddy II 18 Inox Buddy II 18T
EU, UK, ZA,
AU, (CN)
EU, UK, ZA,
AU, (CN)
EU, UK, ZA,
AU, (CN)
EU, UK, ZA,
AU, (CN)
12 l 12 l 18 l 18 l with elec. outlet
Voltage (V)
220 - 240 220 - 240 220 - 240 220 - 240
PIEC (W) 1150 1150 1150 1150
Pmax (W) 1250 1250 1250 1250
Power socket
max (W)
NA NA NA 1100
IP X4 X4 X4 X4
Tank capacity (l) 12 18 18 18
Tank material Plastic Plastic Metal Plastic
Supply cord - length (m) 4 4 4 6
 Loading...
