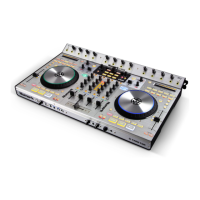
SPECIFICATION
FUNCTION
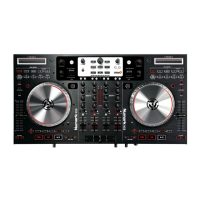
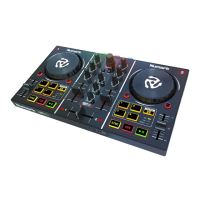
1. POWER SWITCH – Turns 4TRAK on and off. Turn on 4TRAK after all input devices have been connected and
before you turn on amplifiers. Turn off amplifiers before you turn off 4TRAK.
2. POWER INPUT – Use the included power adapter to connect the 4TRAK to a power outlet. While the power is
switched off, plug the power supply into the 4TRAK first, then plug the power supply into a power outlet.
3. USB PORT – Connect the 4TRAK to the included 4TRAK FX KOMMAND CONSOLE and your 4TRAK can be
used as a software controller device using USB MIDI protocol or as a pass-through audio interface.
4. MASTER OUTPUT (XLR) – Connect this XLR output to a PA system or powered monitors.
5. MASTER OUTPUT (RCA) – Use standard RCA cables (not included) to connect this output to a speaker or
amplifier system.
6. BOOTH/ZONE – Use standard RCA cables (not included) to connect this output to a monitoring system.
7. RCA INPUT – Connect audio sources to these inputs.
8. LINE/MIC SWITCH – Flip this switch to the appropriate position, depending on the device connected to the
RCA inputs. If using a line-level device, such as a CD player or sampler, set this switch to "LINE." If using a
microphone, set this switch to “MIC”.
9. MIC INPUT – Connect a 1/4" mic to this input.
10. LINE/PHONO SWITCH – Flip this switch to the appropriate position, depending on the device connected to the
RCA inputs. If you are using phono-level turntables, set this switch to "PHONO" to provide the additional
amplification needed for phono-level signals. If using a line-level device, such as a CD player or sampler, set
this switch to "LINE."
11. GROUND – If using phono-level turntables with a grounding wire, connect the grounding wire to these
terminals. If you experience a low "hum" or "buzz", this could mean that your turntables are not grounded.
12TAP – Pressing this button in time with the beat will help determine the BPM of the track.
13. LOOP LENGTH – Halves or doubles the length of your Auto Loops or currently selected loop.
14. BEATJUMP – Changes the function of the Loop Shift buttons to Beatjump.
SERVICE MANUAL
MODEL:4TRAK