5. Activate Battery
One Lithium CR2032 battery (included) is required to retain the
program in memory during power loss. Annual replacement is
recommended.
Remove the plastic strip to activate the pre-installed battery.
(See page 12 for battery replacement)
Note: The battery alone will not operate the valves in your
sprinkler system. The sprinkler timer has a built-in transformer
that must be connected to an AC voltage source.
Section 3: Programming with
Easy-Set Logic
®
A note about multiple programs
Your sprinkler timer provides the flexibility of using 3
independent programs (A,B,C). A program is where you store
all of your sprinkler settings. It consists of a group of stations
set to specific start times and run times. Multiple programs
allow you to run different valves on different days with
different run times. While many applications only require one
program (A), using multiple programs can be useful for drip
areas, newly planted lawn, or rotary sprinkler stations. Using
programs to group stations with similar water needs will
maximize irrigation efficiency.
Primary programming can be accomplished in just a few basic
steps.
Primary Programming
Press the [RESET] to clear any previous factory programming
1. Set Clock
• Turn dial to [SET CLOCK]
eNGlIsH
PROGRAM
RAIN DELAY
AUTO
OFF
SET
CLOCK
SET
DATE
BUDGET
HOW
OFTEN
RUN
TIME
START
Remove plastic
strip to activate
battery
conduit and electrical fittings be used to connect exterior wall-
mounted equipment to AC power. Please check local codes. Any
permanent connection should be made by a licensed electrical
contractor in accordance with the requirements of the National
Electrical Code and other state and local codes.
This sprinkler timer has two holes at the bottom for wire access.
Use a 1/2” Nipple to connect the sprinkler timer to a standard
electrical junction box. Both connector and junction box must be
UL Listed or equivalent or comply with IEC or EN standards or
equivalent.
The wire can be buried in the ground; however, for more
protection wires should be pulled through electrical conduit and
buried underground. Be careful to avoid burying the wires in
locations where they could be damaged by digging or trenching in
the future.
Caution: Do not connect the sprinkler timer to one phase of a
three phase power system used by a pump or other electrical
equipment.
Note: For outdoor applications it is recommended that a qualified
electrician complete the installation in accordance with electri-
cal codes and regulations. When used outdoors this sprinkler
timer is intended for use with a Ground Fault Interrupter (GFI)
protected circuit.
1/2" Connector
Junction
Box
3 Wire
Connectors
Figure 5: Using a Junction Box
• Press the [+/–] buttons to set the current time of day
Tip: To increase or decrease more rapidly, hold down either the
[+] or [-] buttons until the display goes into rapid advance mode.
• Press the [ ] buttons to set am/pm
• Turn dial to accept time
2. Set Date
• Turn dial to [SET DATE]
• Y/M/D will appear (blinking letter indicates selection)
• Press the [+/–] buttons to set the correct year, then
press [ENTER] or [ ]
• Press the [+/–] buttons to set the correct month, then
press [ENTER]
• Press the [+/–] buttons to set the correct date
• Turn dial to accept date
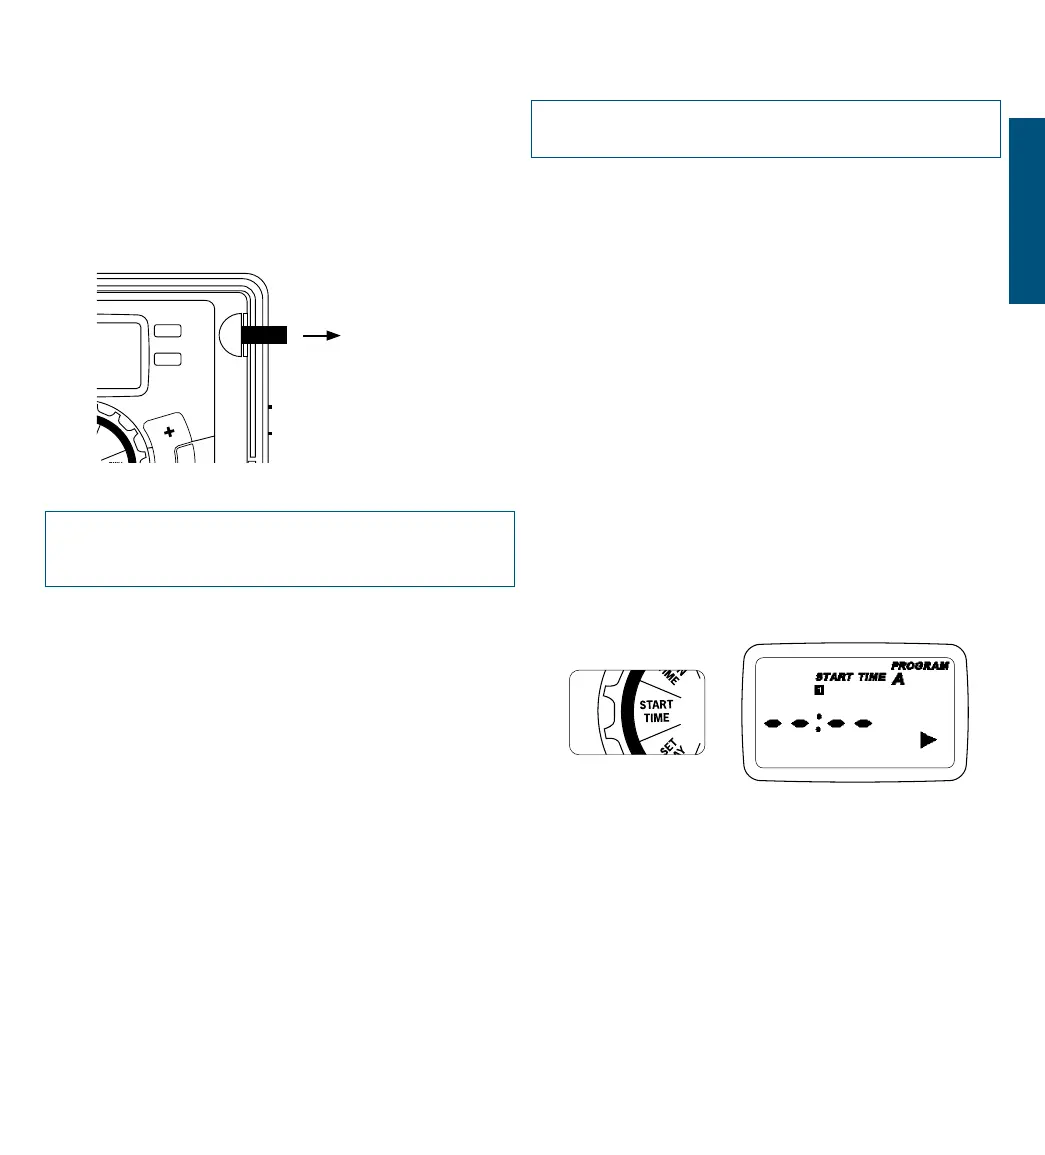
3. Start time
• Turn dial to [START TIME]
• Press the [+/–] buttons to select time you’d like your
watering to begin
(time will adjust in 1 minute increments)
The display will show
Please note that [START TIME] is the time of day that your
programmed watering starts. You can set up to 4 start times.
All stations that have a programmed run time (how long) will
run in sequence at these times
Note: Start-Time Stacking
When a start time is set before the previous program has
completed, that start time will be “stacked” or delayed, and will
start upon completion of the previous program.
9
 Loading...