10
SINGLE STATION—WITH WATERING DURATION
1. Follow steps 1 and 2 above.
2. Move the station Watering Duration Slide Switch to the
desired watering duration.
3. When watering is complete, return the Watering Duration
Slide Switch to the Watering Duration previously set for
automatic operation.
Multiple Stations
This option is most commonly used during unseasonably dry or hot
weather. This option allows you to manually water without adjusting
and resetting the
Watering Duration Slide Switches.
MANUAL TEST
This feature allows the homeowner to run each station 1 minute to
confirm all stations are working properly.
To Run a Test Cycle:
1. Ensure the rotary selector is on the
AUTO position.
2. Press the MANUAL button once [See Figure 16]
3. Press ENTER to begin, and CLEAR to stop test cycle.
Note: This function will activate all stations even those with the slide con-
trol in the manual off position.
MULTIPLE STATIONS—WATER ALL STATIONS ONCE
This can be especially helpful if you happen to experience unusually
warm weather. Each station will water once, in sequence, based on
each station’s
Watering Duration setting.
Note: Program settings (A, B, or C) will not affect whether a station
waters or not. If you do not want a station to water, move the Watering
Duration Slide Switch
to the MANUAL OFF position.
1. Ensure the rotary selector is on the AUTO position.
2. Press the
MANUAL button once.
3. Continue to press the NEXT button until you see “A B C
Extra All” [See Figure 17].
4. Press the ENTER button, within 30 seconds, to activate
manual watering.
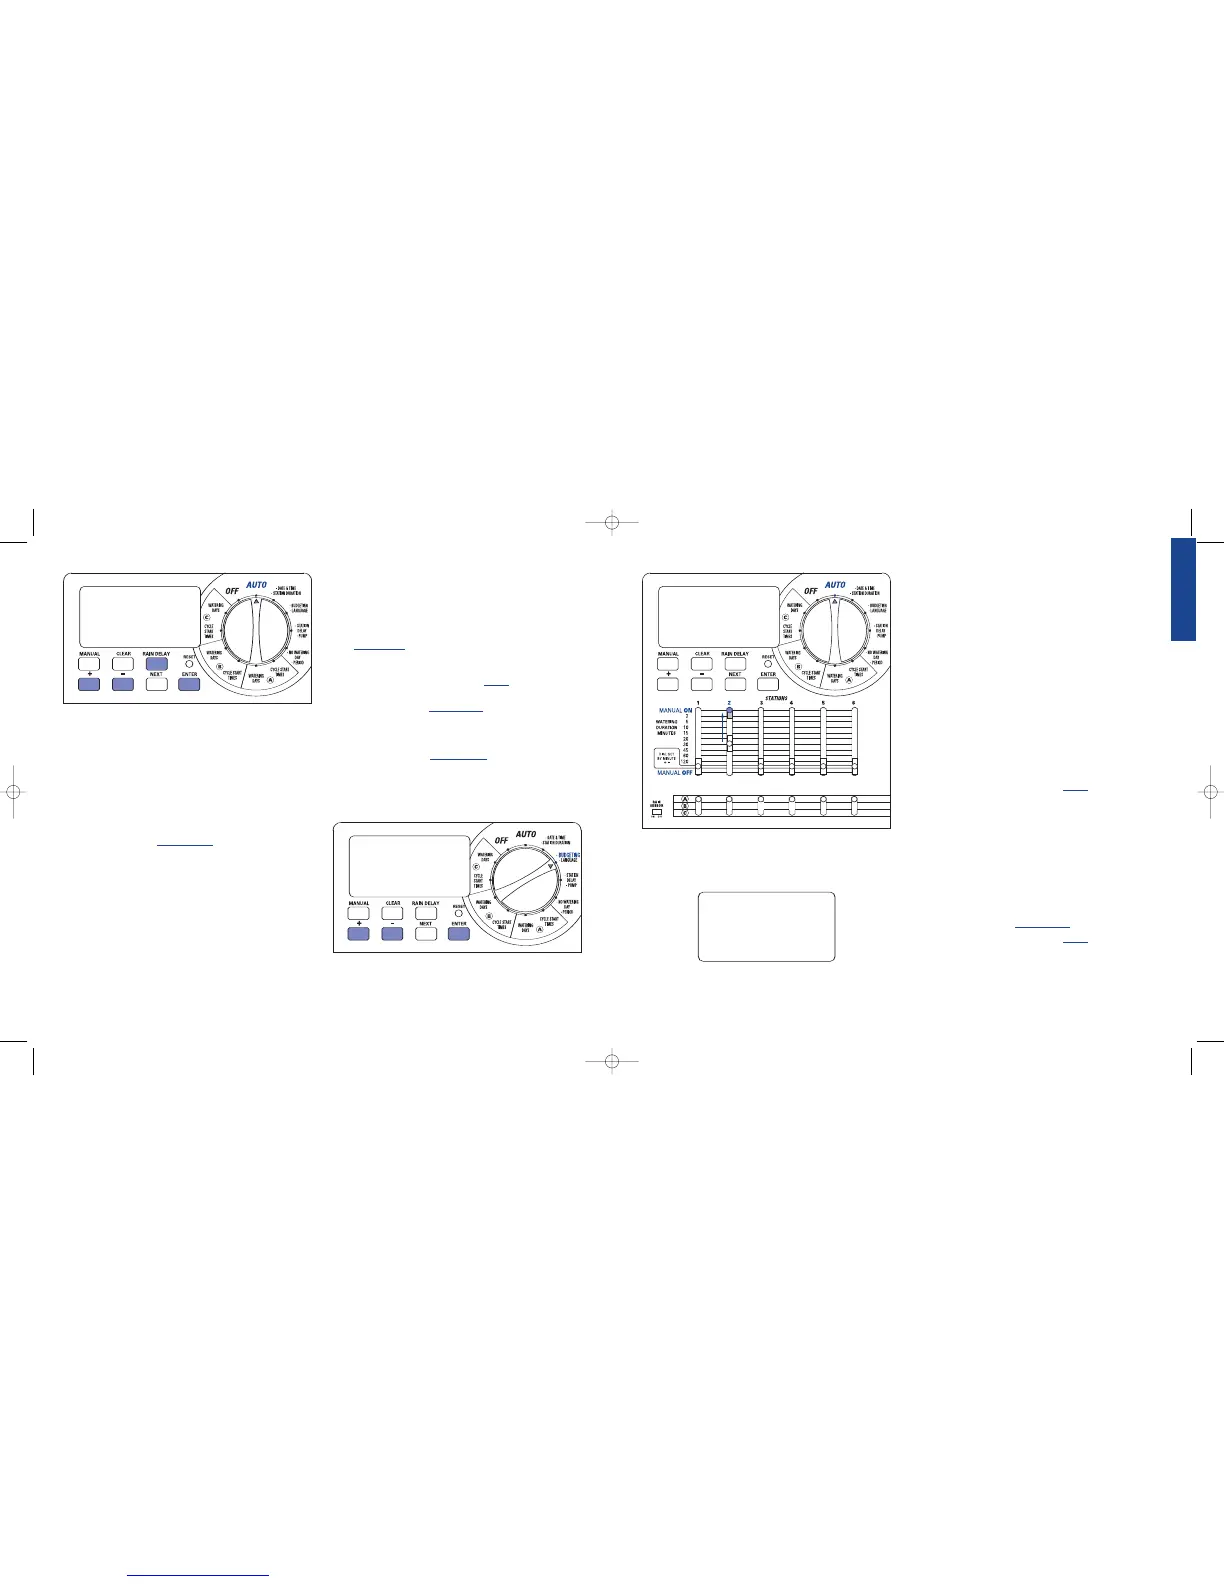
Figure 15: Manual Watering One Station
MANUAL ON
STATION 2
6:30
AM
T
H
Water Budgeting
Water Budgeting is a simple way to adjust your watering duration to
match seasonal watering needs. Water Budgeting works by increasing
or decreasing watering duration for all stations in all programs.
Adjustment range is from 20% to 200% by increments of 10%. The
default value is 100%.
TO SET BUDGETING:
1. Turn rotary dial to •BUDGETING position [See Figure 14]
2. To increase or decrease the percentage, press the + or - button.
3. Press ENTER to save setting.
Section 5: Manual Operation
The Orbit
®
sprinkler timer allows you 2 options to operate your
sprinklers manually.
Single station
Multiple stations
Note: If a manual operation is started during an automatic program
cycle, the automatic program cycle will be cancelled.
Single Station
This option is most commonly used for testing a specific station or
for additional watering of a specific station. Manual operation is
accomplished by using the Watering Duration Slide Switches.
Important: Only one station will be active at a time. The last station set
to the
MANUAL ON position will be active (watering).
SINGLE STATION—WITHOUT WATERING DURATION
1. Ensure the rotary selector is on the AUTO position.
2. To activate the station, move the station Watering Duration
Slide Switch to the MANUAL ON position (fully up). The
display will indicate “
MANUAL ON” and the station number
being activated. [See Figure 15]
3. To turn off manual watering, move the Watering Duration
Slide Switch to the MANUAL OFF position.
4. Remember to return the
Watering Duration Slide Switch to
the Watering Duration previously set for automatic operation.
RAIN DELAY
01 JAN 2004
0ff
HRS
24
Figure 13: “Rain Delay” set for 24 hours
Figure 14: Set “Water Budgeting”
Figure 16: Display – “Test Cycle” selected
ENGLISH
11
07WTM002887 57004-24 rJ.qxd 2/13/07 11:51 AM Page 10
 Loading...