ThunderBay 4 mini – Thunderbolt 2
Installation
5
INSTALLATION
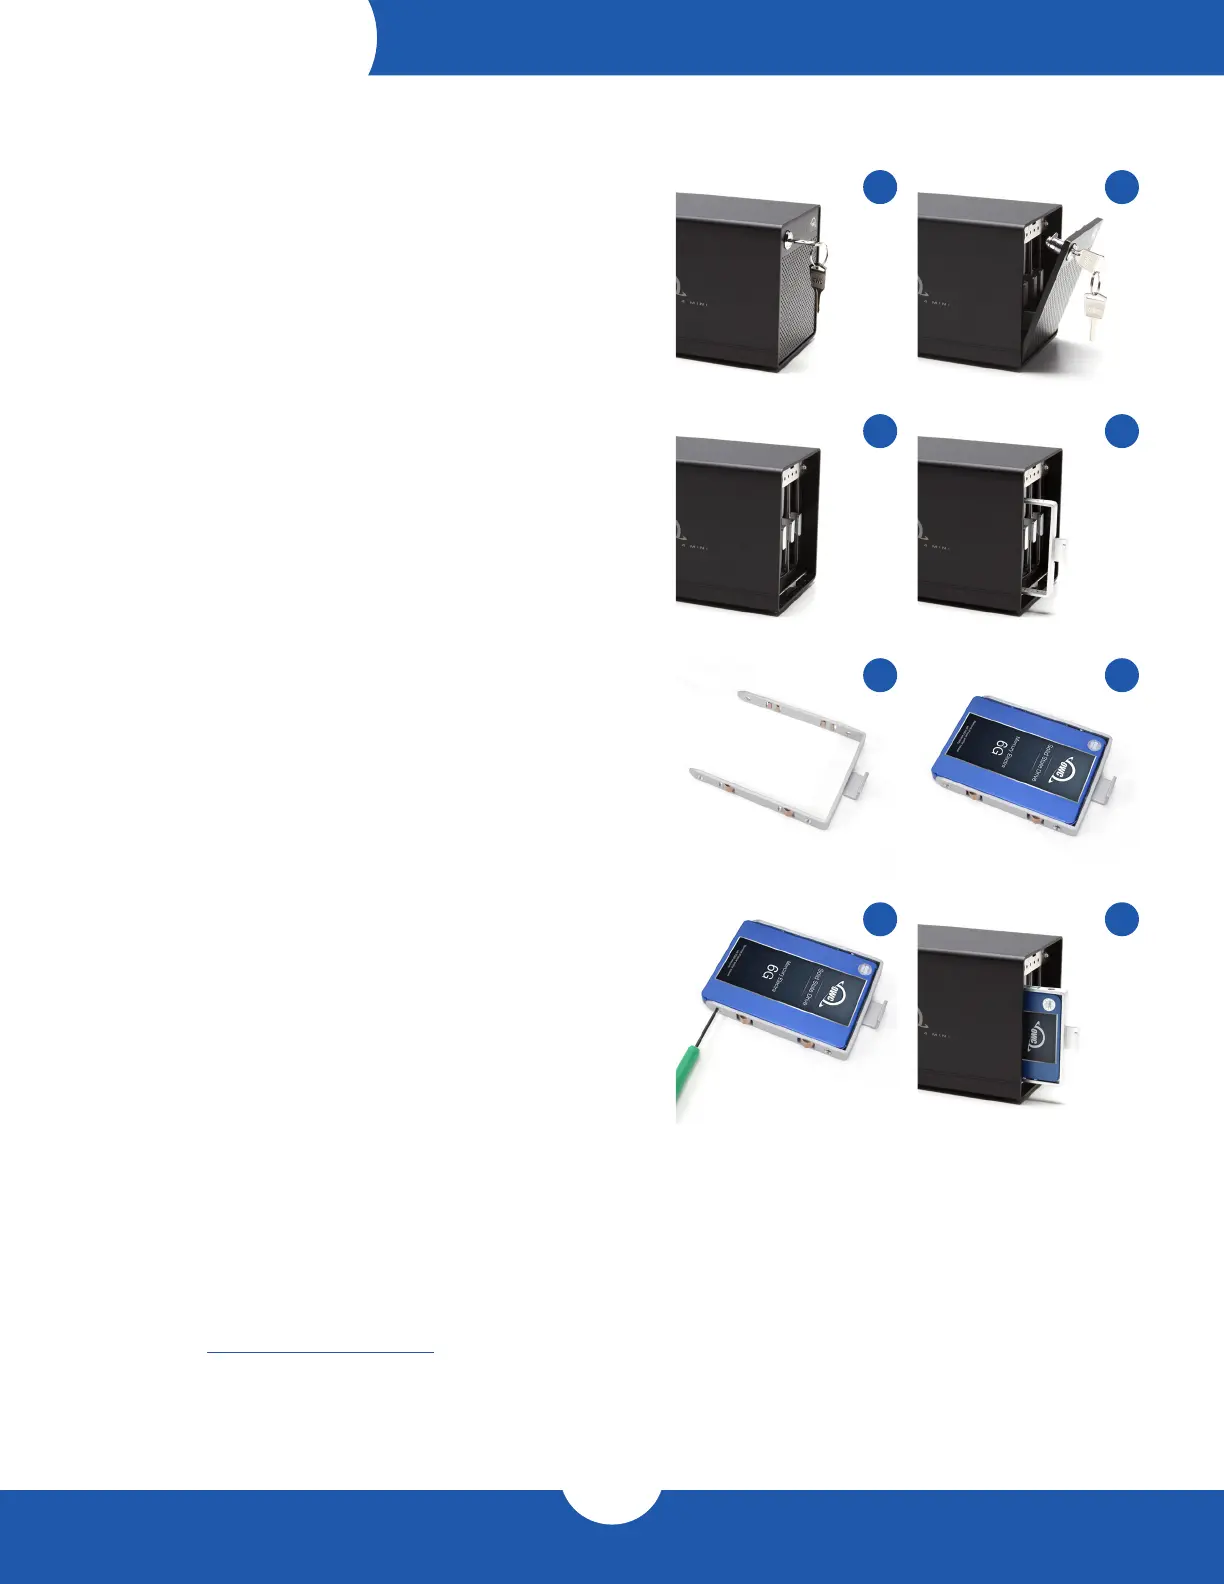
2.1 Drive Installation
1. Insert one of the keys into the lock on the top left of the
faceplate.
2. Turn the key clockwise, then pull it towards you. The
faceplate will swing open.
3. Pull up on the faceplate to remove it.
4. Pull on the tab at the center of an empty drive tray to
remove the tray from the enclosure.
5. Set the drive tray on your work surface. If you are
replacing an existing drive, unscrew it from the drive tray.
6. Place the drive inside the drive tray as shown. The SATA
connectors should be on the end opposite the tray handle.
7. Fasten the drive into the drive tray using four of the
included Philips screws.
8. Slide the tray into the ThunderBay 4 mini. If you feel
resistance, do not force the tray. Remove it, verify the
alignment of the tray and the corresponding track, then
try again.
2.2 Quick Start
1. Install drives into the ThunderBay 4 mini according to the
instructions in Section 2.1.
2. Connect the power supply between the ThunderBay 4 mini
and a power outlet.
3. Connect the included Thunderbolt cable to the
ThunderBay 4 mini and your computer. When you do this,
the ThunderBay 4 mini will power on and the drives will be
available for use with your operating system.
4. If the ThunderBay 4 mini shipped with drives and was
purchased as part of a SoftRAID bundle, the drives are
already set up and formatted as a RAID 0 or RAID 5
volume. Double-click the ThunderBay icon on the Desktop
or in the Finder, then install SoftRAID.
5. If you purchased your own drives for use with the
ThunderBay 4 mini and they have not been set up before,
they need to be formatted before they can be used.
6. Please visit www.owcdigital.com/format for tips on
formatting drives for Mac or Windows. Once formatted,
the drives are ready to use.
1
3
5
7
2
4
6
8
 Loading...