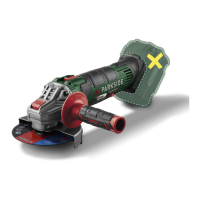
PMDS 100 B1
GB
│
IE
│
17 ■
■ Never press on the spindle locking button
while the grinding disc
4a
,
4b
is turning
♦ Switch the appliance on by pressing the
ON/OFF switch
.
♦ Set a speed suitable for the work using the
speed control
.
♦ Switch the appliance off by pressing the
ON/OFF switch
again.
Fitting the polishing mandrel
WARNING! RISK OF INJURY!
► Always remove the power plug from the
wall socket before carrying out any work
on the appliance.
■
WARNING! Never use grinding discs
on the brush side of the machine!
CAUTION!
♦ Never press on the spindle locking button
while the grinding disc
4a
,
4b
is turning.
♦ Remove the cap
.
♦ Press the spindle locking button
to block the
shaft.
♦ Screw in the polishing mandrel
(see fig. B).
♦ Screw the desired polishing tool
4c
,
4d
,
4e
,
4f
or
4g
onto the polishing mandrel (see fig. B).
♦ Completely cover the grinding disc
4a
,
4b
using
the protective cover (see fig. B).
♦ After finishing work, remove the polishing man-
drel
by working in the reverse order.
NOTE
► Do not apply any lateral pressure to the brushes.
Replacing the grinding disc
WARNING! RISK OF INJURY!
► Always remove the power plug from the
wall socket before carrying out any work
on the appliance.
WARNING!
► The grinding disc
4a
,
4b
used may not be
any larger than the prescribed diameter.
♦ Unscrew the fixing screw
on the side cover
and remove the cover (see fig . C).
♦ Never press on the spindle locking button
while the grinding disc
4a
,
4b
is turning.
♦ Press the spindle locking button
to block the
shaft.
♦ Unscrew the union nut
from the appliance
using a monkey wrench.
♦ Take the tension disc
, union nut , grinding
disc
4a
,
4b
and the centring flange off (see
fig. C).
♦ Place a new grinding disc on the centring flange
and push this onto the shaft (see fig. C).
♦ Screw the tension disc
and the union nut
back onto the shaft .
♦ Keep the spindle locking button
pressed in
and re-tighten the union nut .
WARNING! RISK OF INJURY!
► Never use a grinding disc
4a
,
4b
without the
protective cover.
♦ Replace all side covers and fasten them securely
in place by tightening the fixing screws
firmly.
■
Direction of rotation of the tool!
 Loading...

