PFBS 12 B2
■ 10
│
GB
│
IE
│
NI
Charging the integrated battery
NOTE
► A new battery or a battery which has not
been used for a long time will need to be
charged before first use/reuse. It will reach its
full capacity after 3–5 charge cycles.
The charging process lasts around 180
minutes.
Starting charging:
♦ Connect the charger
to the charging socket
on the appliance.
♦ Connect the charger
to a mains power
socket.
The battery is fully charged when the battery
LED
shows RED/ORANGE/GREEN.
Stopping charging:
♦ Disconnect the charger
from the mains
power supply.
♦ Disconnect the charger
from the charging
socket
on the appliance.
CAUTION!
► Never recharge a battery again immediately
after charging. There is a risk that the battery
will become overcharged.
Checking the battery charge level
If the appliance is switched on, the remaining
charge will be shown on the battery LED
as
follows:
RED/ORANGE/GREEN = maximum charge
RED/ORANGE = medium charge
RED = low charge – charge the battery
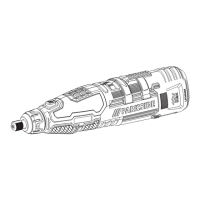
Changing/inserting the tool/collet
chuck
♦ Press the spindle lock and hold it down.
♦ Turn the tensioning nut
until the lock clicks
into place.
♦ Undo the tensioning nut
from the thread
using the combination spanner
.
♦ Remove any attached tool.
♦ First push the intended tool through the tensioning
nut
before inserting it into the appropriate
collet chuck
for the tool shaft.
♦ Press the spindle lock
and hold it down.
♦ Push the collet chuck
into the thread insert
and screw the tensioning nut
tight with the
combination spanner
.
NOTE
► Use the screwdriver side of the combination
spanner
to undo and tighten the screw on
the mandrel .
Switching on and off/setting speed
range
Switching on/setting the speed range:
♦ Set the On/Off switch
to the position "I".
♦ Set the speed control
to a position between
"1" and "MAX".
Switching off:
♦ Set the On/Off switch
to the position "O".
Notes on working with materials/
tools/speed range
■ Use the milling bits for working on steel and
iron at maximum speed.
■ Determine the rotational speed range for working
on zinc, zinc alloys, aluminium and copper by
trying it out on test pieces.
■ Use a low rotational speed for work on plastics
and materials with a low melting point.
■ Use a high rotational speed for working on
wood.
■ Carry out cleaning, polishing and buffing work
in the medium speed range.
The following are recommendations only and not
binding. When carrying out practical work, carry
out your own tests to see which tool and which
settings are ideal for the material you are working
on.
 Loading...