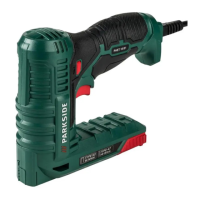
PET 25 C3
■ 6
│
GB
│
IE
Setting the impact force
NOTE
► Select the lowest impact force sufficient for
stapling. Take into account the length of the
staples or nails you are using as well as hard-
ness of the material you are working with.
Impact force control
Increasing the impact force
♦ Turn the impact force control
anticlockwise.
Reducing the impact force
♦ Turn the impact force control
clockwise.
Use
Switching on and off
♦ Set the ON/OFF switch to the position "I" to
switch the appliance on.
♦ Set the ON/OFF switch
to the position "0" to
switch the appliance off.
Stapling/nailing
♦ Switch the appliance on by moving the ON/
OFF switch
to the position "I".
♦ Press the face plate
of the appliance onto
the location on the material that you want to
staple/nail.
♦ Press the trigger
.
NOTE
► The integrated safety switch on the face plate
prevents accidental triggering.
Working with the rip fence
If you want to tack with nails or staples at a
constant distance to an edge, proceed as follows:
♦ Pull out the rip fence
in the direction of the
arrow.
♦ Move the rip fence
along the scale until it
is at the required distance from the edge of the
object that you want to work on.
♦ Place the rip fence
onto the edge of the
object that you want to work on.
♦ Proceed as described in the section Stapling/
nailing.
 Loading...