Return to Table of Contents
STEP 3.
STEP 4.
STEP 5.
STEP 6.
Residential Refrigeration
and Front Venting Commercial Refrigeration
Service Manual
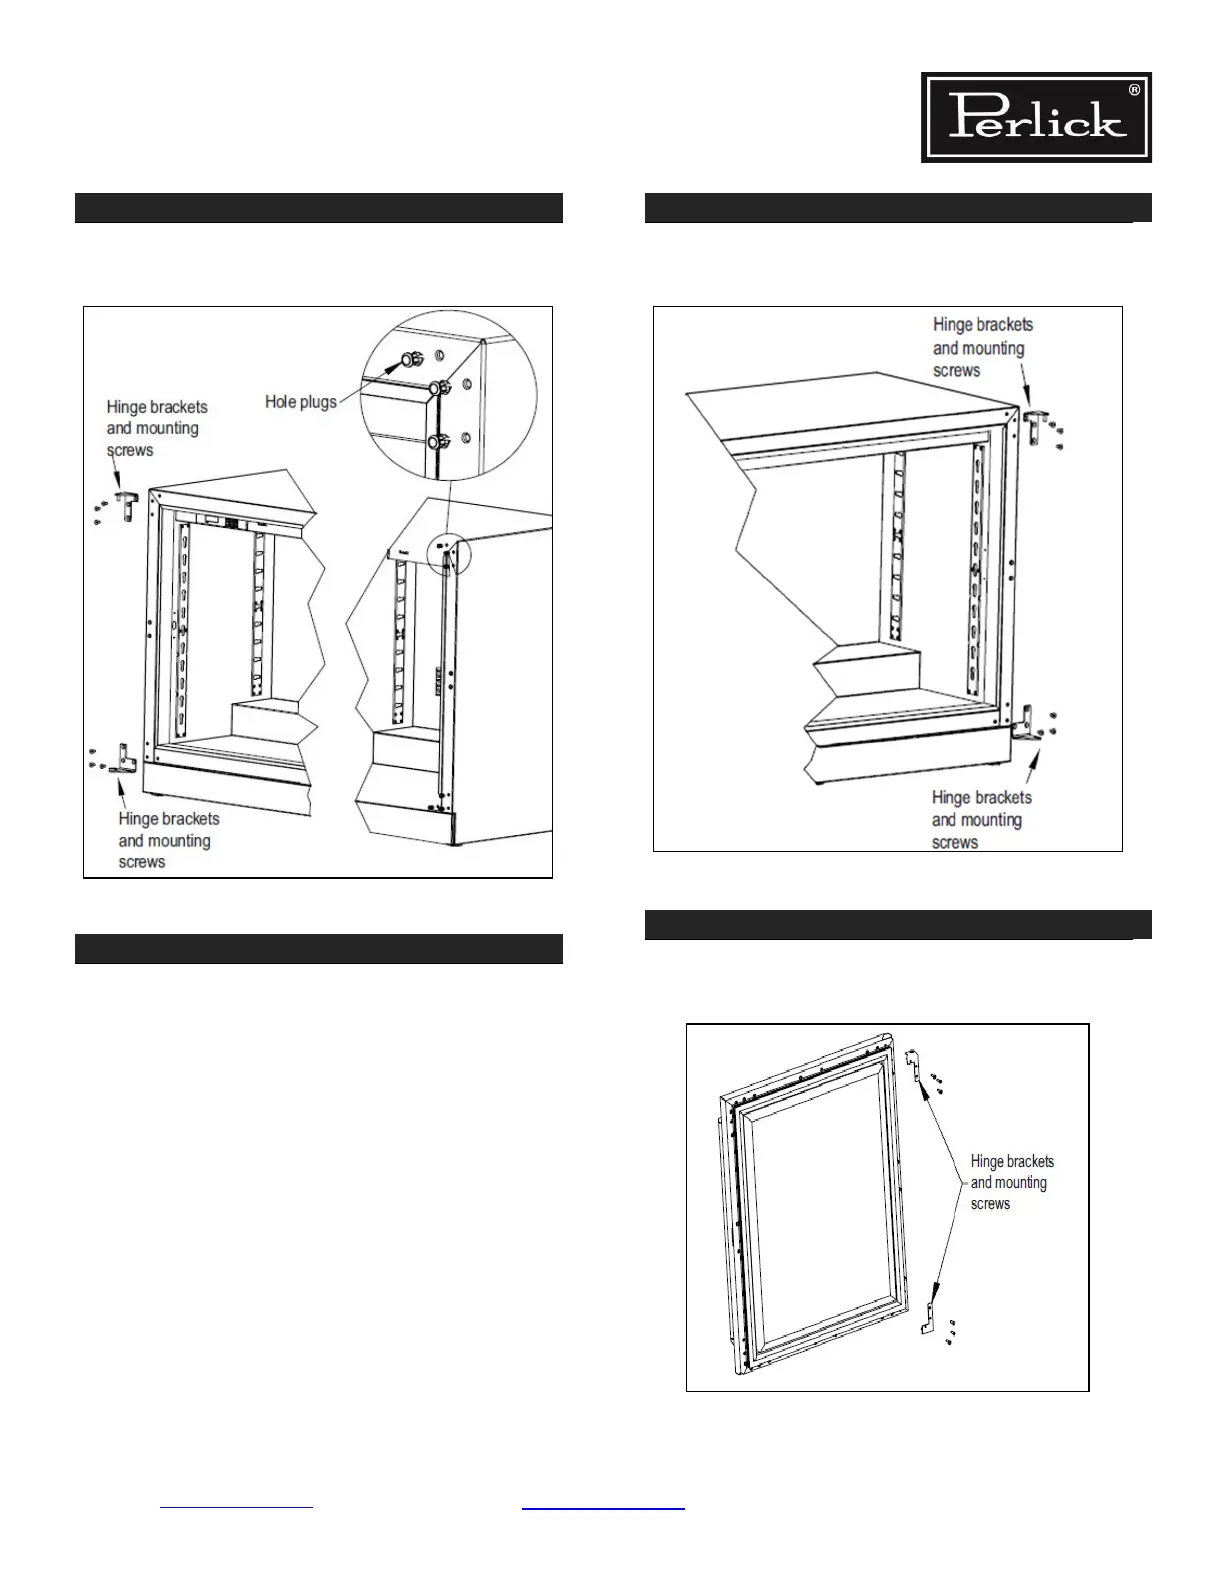
Remove top and bottom hinge brackets. Retain
screws for later use. See Figure 9-2.
Figure 9-2. Hinge Removal
Remove hole plugs from top and bottom hinge
bracket mounting holes. See Figure 9-2.
Place plugs in holes on opposite side made
vacant by removing hinges in step 3.
Using screws removed in step 3, install top and
bottom hinge brackets from kit. See Figure 9-3.
Figure 9-3. Hinge Installation
Remove top and bottom hinge brackets from
door (Figure 9-4). Retain screws for later use.
Figure 9-4. Door Brackets
Replacement Parts Page 9-2