EasyManua.ls Logo

Pioneer GM-4000 User Manual

Pioneer GM-4000
13 pages
To Next Page IconTo Next Page
To Previous Page IconTo Previous Page
Page #10 background imageLoading...
Page #10 background image
Installation
¢
Be
sure
to
use
the
parts
supplied
and
install
the
unit
securely.
If
Example
of
Positions
of
Installation
parts
other
than
those
supplied
(specified)
are
used,
they
may
loosen
or
cause
damage
to
internal
parts.
*
Be
sure
to
install
the
unit
in
a
place
where
the
driver
is
not
both-
ered
and
where
there
is
no
danger
of
passengers
being
injured
in
case
of
sudden
stops.
«
Be
sure
to
consult
your
dealer
before
making
any
holes
in
the
car.
*
Cooling
efficiency
is
degraded
by
making
installations
in
hot
places
such
as
near
the
heater
outlet,
in
the
glove
compartment
and
under
floor
mats
that
are
tightly
closed.
*
To
prevent
short-circuits,
be
sure
to
disconnect
the
negative
bat-
tery
terminal
before
wiring
the
system
up.
When
you
finish
the
installation,
be
sure
to
make
one
more
check
to
be
sure
everything
is
done
correctly.
Reinstall
all
car
parts
that
~
inside
the
trunk
ge
te
ae
ee
ee
Be
ee
ee
{Drill
a
hole
into
the
passenger
compartment
and
pass
the
leads
through
it.)
10
Question and Answer IconNeed help?

Do you have a question about the Pioneer GM-4000 and is the answer not in the manual?

Pioneer GM-4000 Specifications

General IconGeneral
BrandPioneer
ModelGM-4000
CategoryAmplifier
LanguageEnglish

Summary

Features

Controls and their Use

Input Level Control

Adjusts the input signal level to prevent distortion or low output.

Low Boost Switch

Enhances low-frequency sounds for improved bass response.

Connecting the Units

Low Pass Filter (LPF) Switch

Filters output to low frequencies, suitable for sub-woofers.

Mode Select Switch

Switches between stereo (2CH) and mono (1CH) amplifier modes.

Load Impedance Select Switch

Adjusts for speakers with an impedance less than 4 ohms.

Compulsory Fan Cooling Air Inlet

Air intake for the internal cooling fan to prevent overheating.

Power Indicator

Light that indicates when the unit is powered on.

Installation Guidelines and Connections

Connecting the Continuous Power Supply Lead

Guide for routing and connecting the main power supply wire.

Connecting Speaker Leads

Instructions for connecting speaker leads in stereo or mono modes.

When Combined with a Car Stereo with RCA Pin Jacks

Wiring instructions for connecting to car stereos with RCA outputs.

When Combined with a Car Stereo with DIN Sockets

Wiring instructions for connecting to car stereos with DIN sockets.

Installation

Example of Positions of Installation

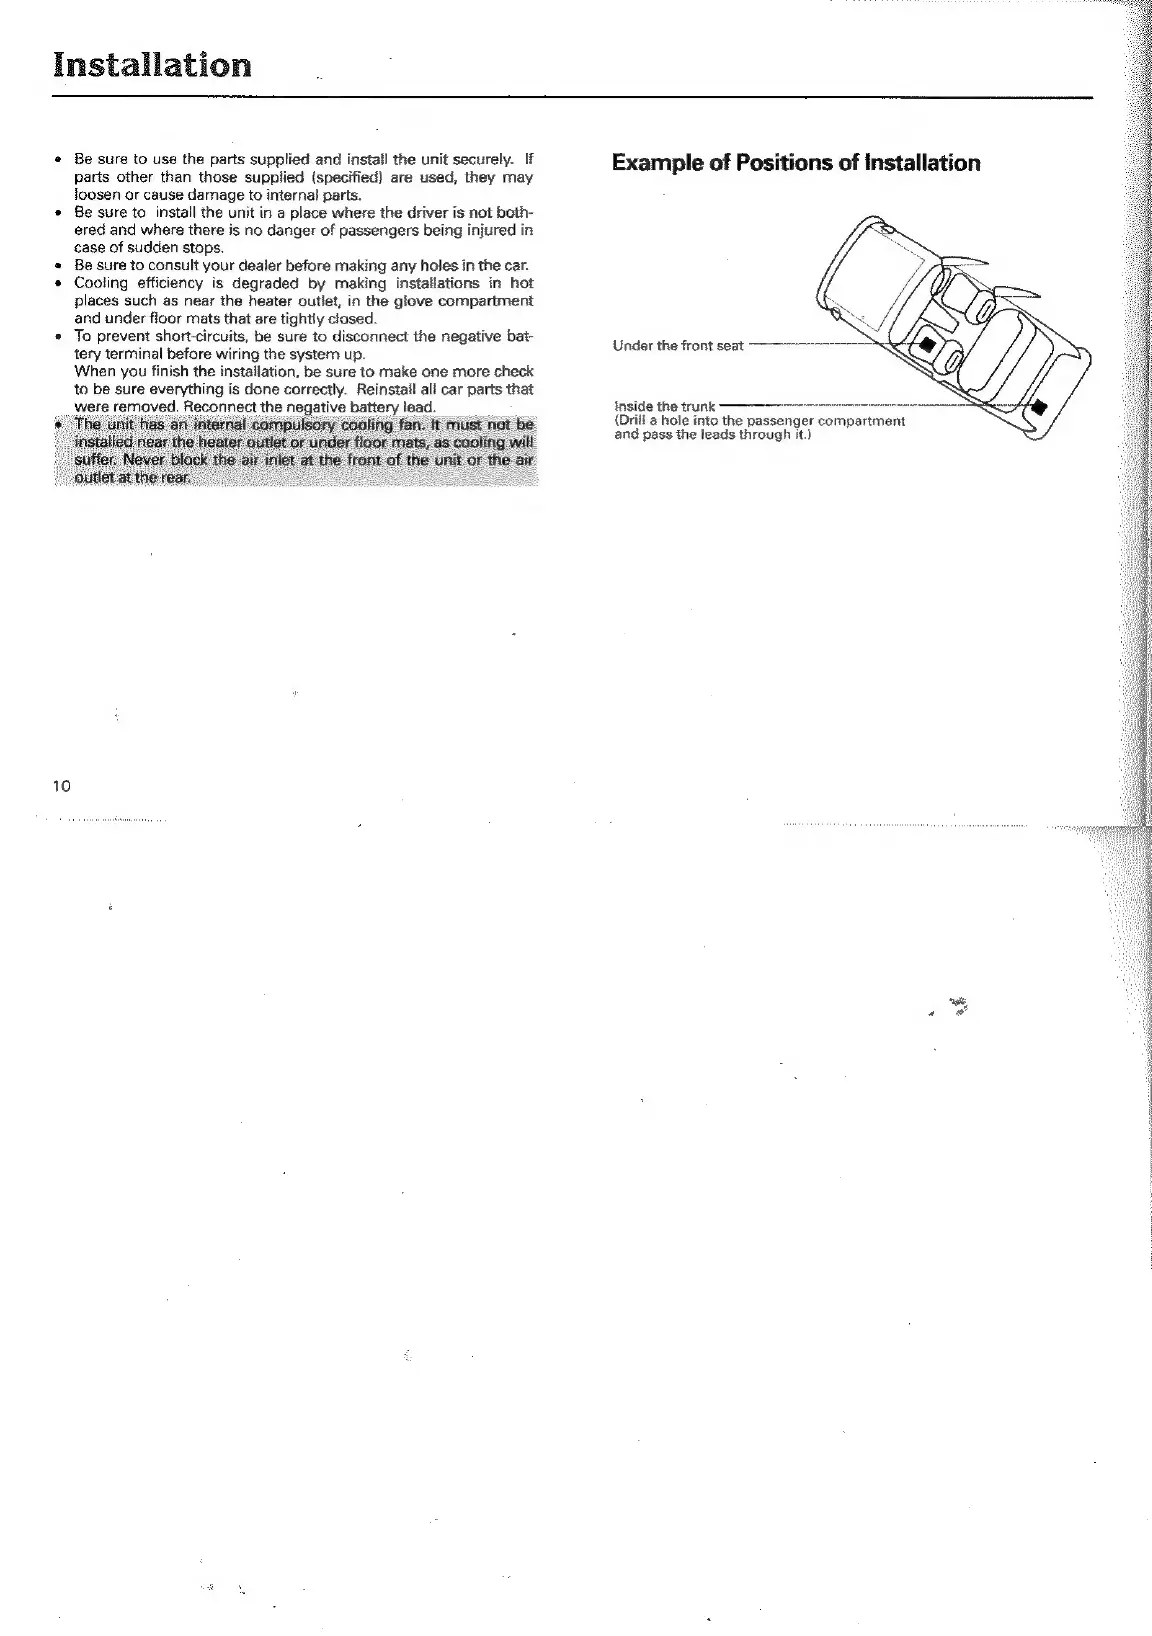
Visual guide showing recommended locations for mounting the amplifier.

Attaching the Brackets

Instructions for attaching mounting brackets to the amplifier unit.

For Installation on the Floor Mat or Chassis

Method for mounting the amplifier directly onto the car floor or chassis.

Care and Maintenance

In Case of Trouble

Troubleshooting guide for common operational issues and solutions.

Specifications

Related product manuals