16
Replace guide bar when the groove is worn,
the guide bar is bent or cracked, or when
excess heating or burring of the rails occurs.
If replacement is necessary , use only the guide
bar specified for your saw i n t he repair parts list
or on the decal located on the chain saw .
CHAIN SHAR PENING
WARNING: Improper chain sharp-
ening techniques and/or depth gauge mainte-
nance will increase the chance of kickback
which can result in serious injury .
WARNING: Wear protective gloves
when handling chain. The chain is sharp and
can cut you even when it is not moving.
Conditions which indicate the need for chain
sharpening:
S Reduction in size of wood chips. The size
of the wood chip will decrease as the chain
gets duller until it becomes m ore like a
powder than a chip. Note that dead or
rotted wood will not produce a good chip.
S Saw cuts to one side or at an angle.
S Saw has to be forced through the cut.
Tools required:
S 5/32 inch (4 mm) diameter round file and
file holder
S Flat file
S Depth gauge tool
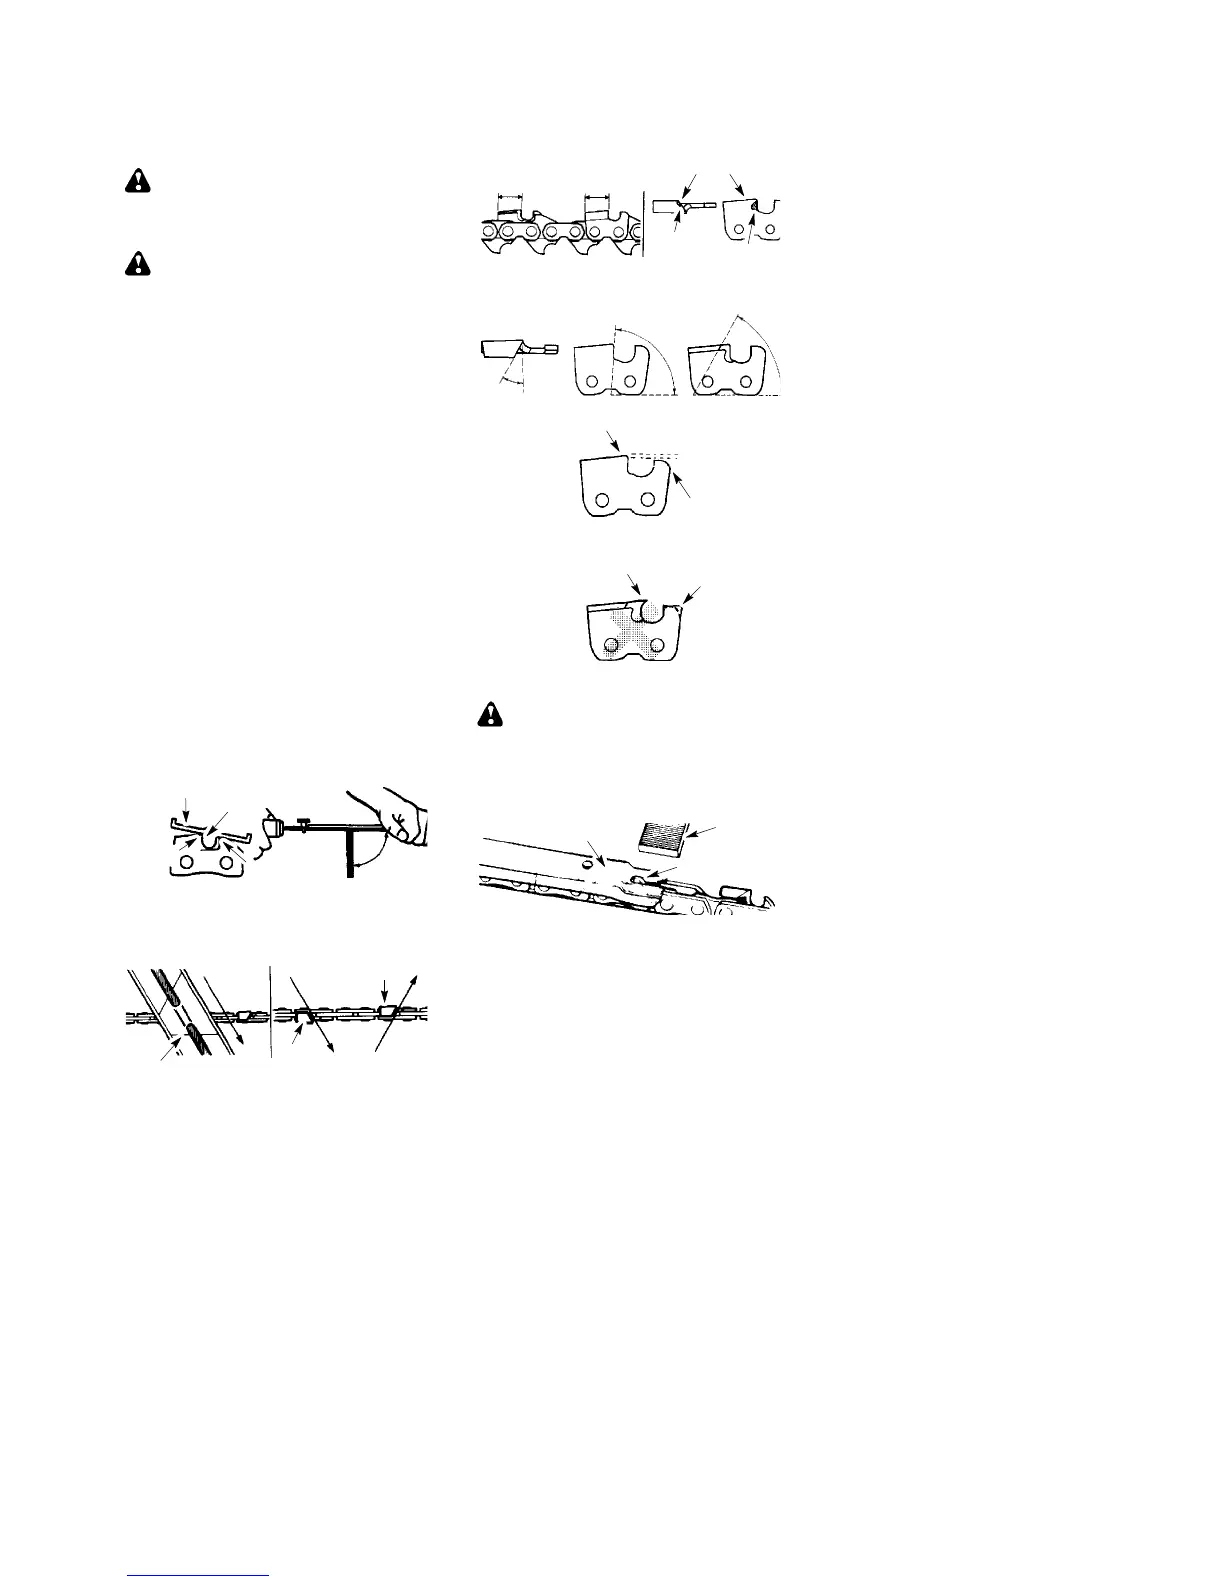
TO SHARPEN CHAIN:
1. MoveON/STOPswitchtotheSTOP
position.
2. Check chain for proper tension. Adjust
chain tension if necessary. See CHAIN
TENSION section.
3. Sharpen cutters.
S To sharpen the cutters, position the
file holder level (90˚) so that it rests
on the top edges of the cutter and
depth gauge.
NOTE: The chain has both left and
right hand cutters.
Depth Gauge
File
File Holder
Cutter
90˚
S Align the 30˚ file holder marks paral-
lel with the bar and to the center of the
chain.
Cutter
Cutter
30˚
File Holder Line
S Sharpen cutters on one side of the
chain first. File from the inside of each
cutter to the outside. Then, turn the
chain saw around and repeat the pro-
cess for the other side of the chain.
S File on the forward stroke only. Use 2
or 3 strokes per cutting edge.
S Keep all cutters the same length
when filing.
S File enough to remove any damage
to cutting edges (side plate and top
plate of cutter).
ngle
WARNING: Maintain the proper
hook angle according to the manufacturer’s
specifications for the chain you are using. Im-
proper hook angle will increase the chance of
kickback which can result in serious injury.
4. Check and lower depth gauges.
Depth Gauge Tool
Depth Gauge
File
S Place gauge tool on cutter.
S If the depth gauge is higher than the
depth gauge tool, file it level to the top of
the depth gauge tool.
S Maintain rounded front corner of
depth gauge with a flat file.
NOTE: The very top of the depth
gauge should be flat with the front
half rounded of f with a flat file.
If you require further assistance or are unsure
about performing this procedure, contact your
authorized service dealer or call our customer
assistance help line at 1--800--554--6723.
IGNITION TIMING
Ignition timing is fixed and nonadjustable.

 Loading...