PowerFix PEK 2.3 A1
12 - English
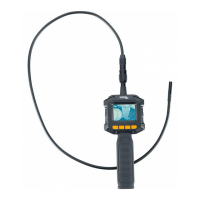
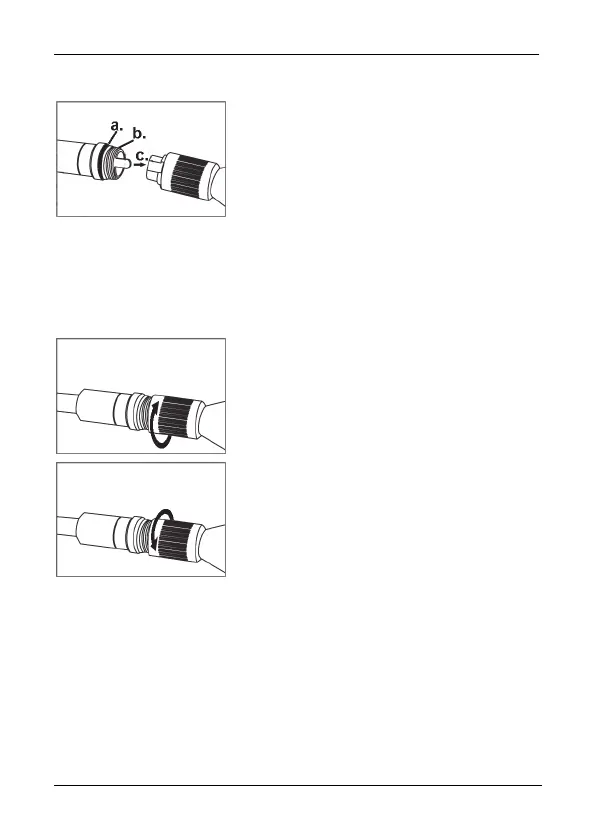
Attaching/detaching the gooseneck
Proceed as follows:
To ensure the tightness of the screw connection,
remove any impurities on the rubber ring (a.)
and on the screw thread (b.) with a slightly
damp cloth. To maintain the flexibility of the
rubber ring, you should lubricate it
occasionally, for example, with Vaseline. The
gooseneck can only be attached in one
direction due to the polarity protection feature.
Insert the polarity protection for this purpose
into the slot provided (c.).
The gooseneck can then be screwed on. Turn
the screw connection to the right until it is firmly
secured.
To detach the gooseneck, turn the screw
connection to the left until it is released. The
gooseneck can then be pulled off by exerting a
little force.
Use of the device
Switching the endoscope camera on and off
The endoscope camera is switched on and off by pressing the on/off switch
[3] for approximately 2 seconds. The power indicator [2] lights up green and,
after a short delay, the image is shown on the screen [1].
 Loading...