8
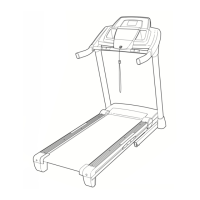
4. Hold the Right Upright (85) against the Base
(95). Be careful not to pinch the Upright
Wire (87). Insert two 3/8" x 4" Bolts (7) with two
3/8" Star Washers (11) and a 3/8" x 1 1/2" Bolt
(14) with a 3/8" Star Washer (11) into the Right
Upright.
Partially tighten the 3/8" x 4" Bolts (7) until the
heads of the Bolts touch the Right Upright (85);
do not fully tighten the Bolts yet. Partially
tighten the 3/8" x 1 1/2" Bolt (14).
95
85
87
11
11
14
7
4
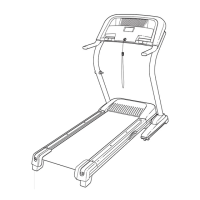
3. Identify the Right Upright (85), which is marked
w
ith a “Right” sticker. Hold the Right Upright
near the Base (95) as shown.
See the inset drawing. Tie the wire tie in the
Right Upright (85) securely around the end of
the Upright Wire (87). Then, pull the other end
o
f the wire tie until the Upright Wire is routed
completely through the Right Upright.
Wire Tie
87
85
95
87
3
Wire
Tie
85
87
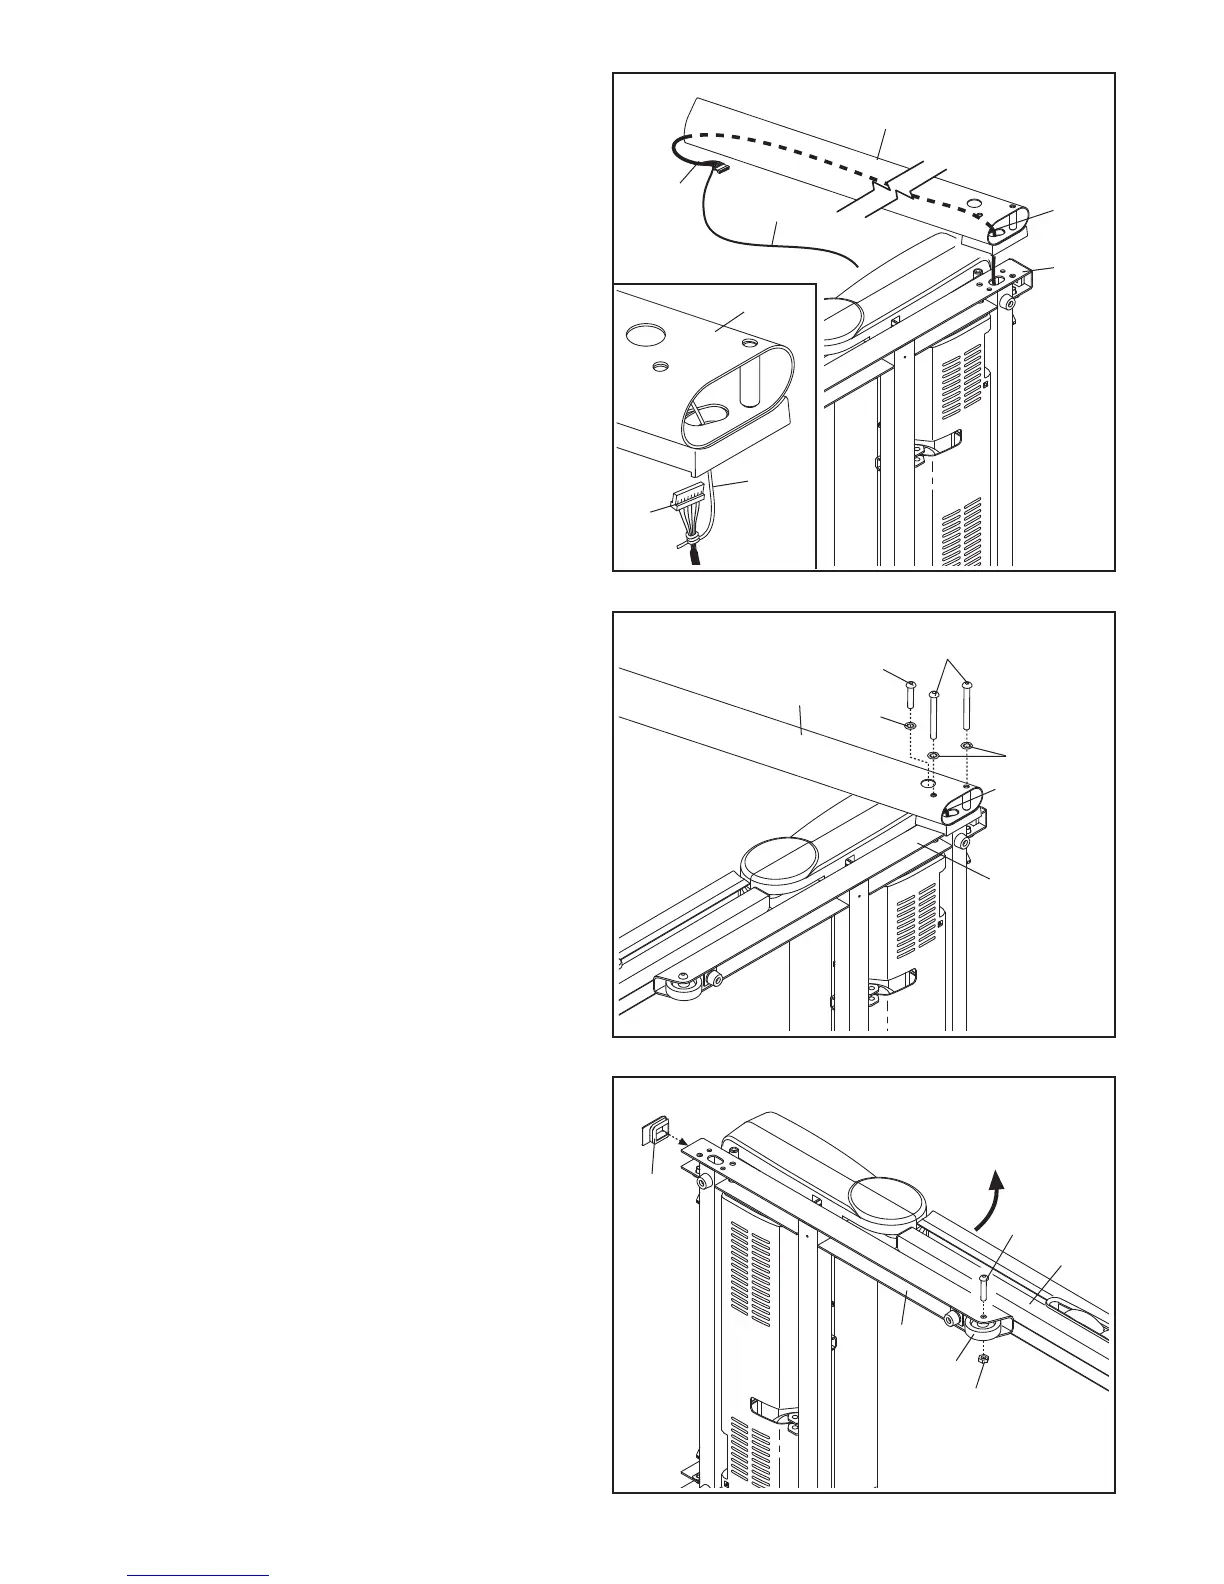
5. With the help of a second person, carefully tip
the treadmill onto its right side. Partially fold the
Frame (55) so that the treadmill is more stable;
do not fully fold the Frame yet.
Attach a Wheel (96) to the Base (95) with a 3/8"
x 2" Bolt (8) and a 3/8" Nut (10). Do not over-
tighten the Nut; the Wheel must turn freely.
Press a Base Cap (89) into the Base (95).
5
8
55
10
95
89
96
 Loading...