11
ASSEMBLY
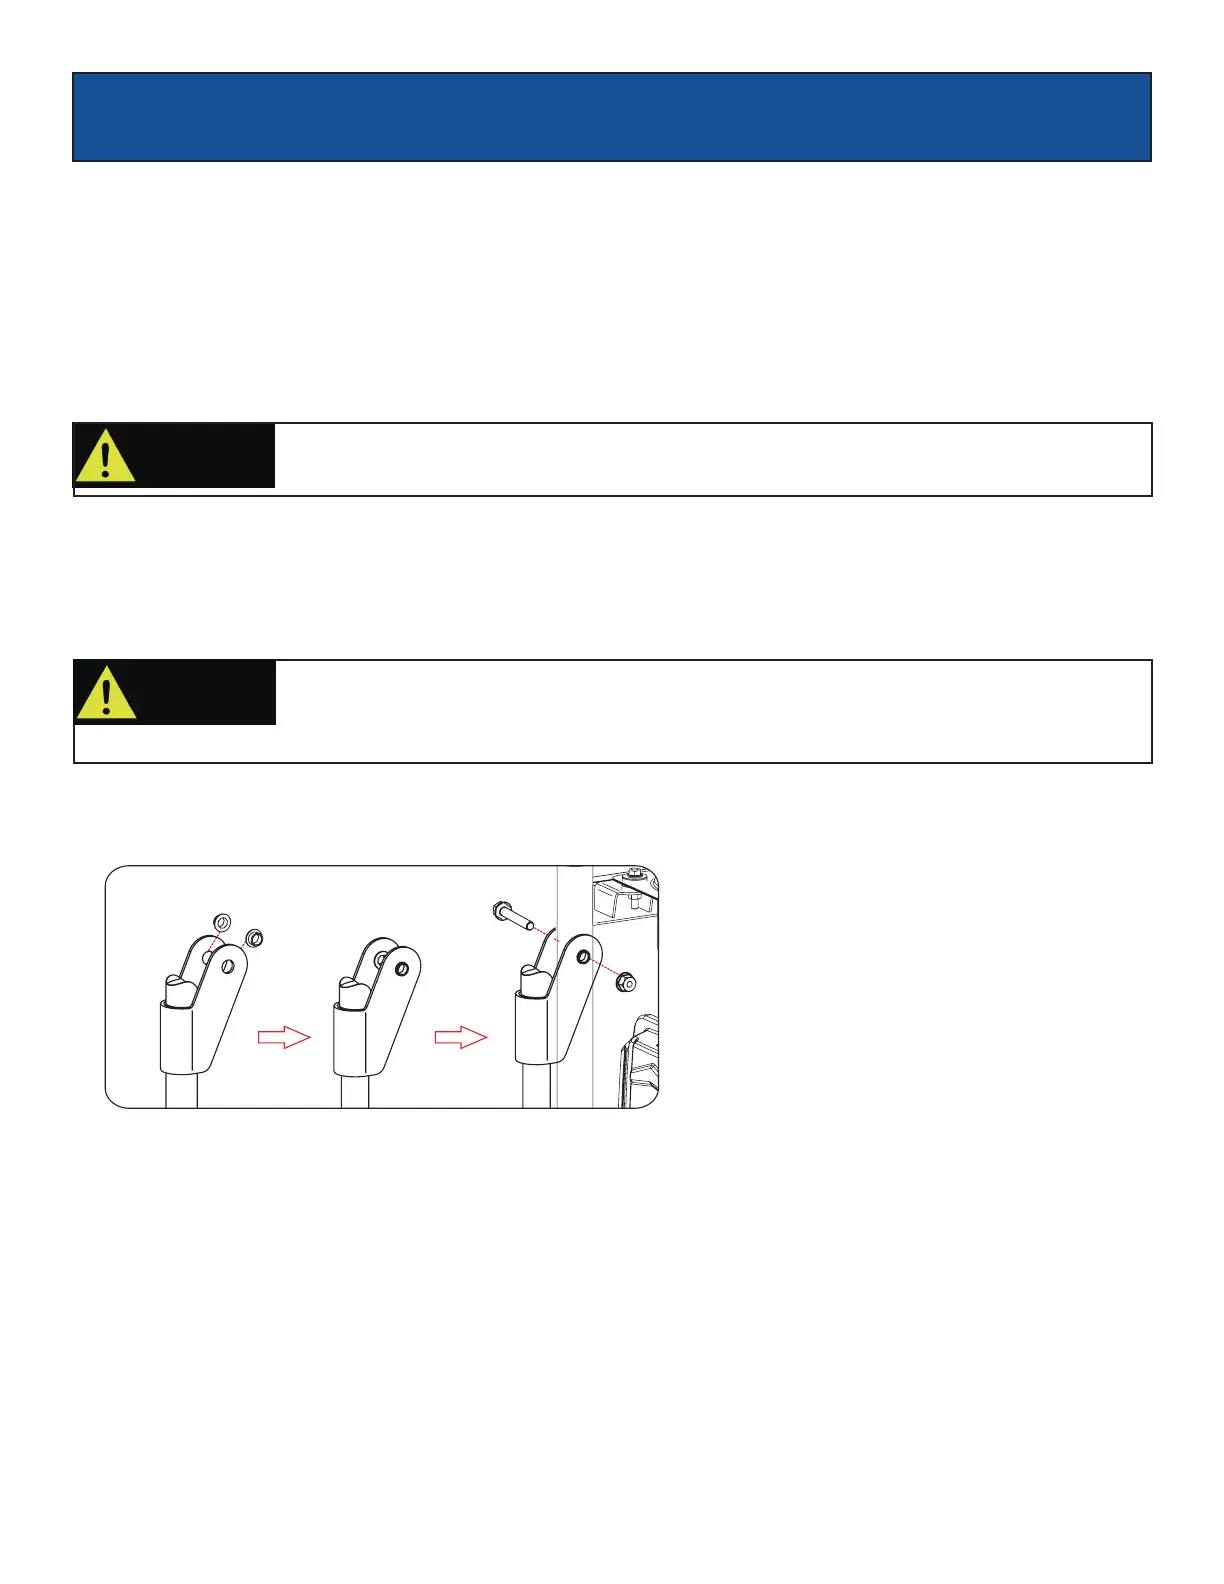
• Parts needed - Black and Red battery cable
• The Red (+) Connector should be attached to the battery first.
Remove the screw from the battery terminal.
•
• Place the screw through the eyelet and tighten the screw and make sure the terminal will not touch any part of the frame.
Install the Red protection boot.
•
• Repeat these steps for the Black (-) Terminal.
Attaching Battery Cable (See fig 3)
Fig 4
Intalling The Handles (See fig 4)
Cover the terminals with the rubber covers
When removing the battery for replacement: Remove the nut and bolt first from the negative (Black) post, then from the
positive (Red) post, being careful not to short across the terminals. Always abide by the safety warnings provided with the
battery. Remove the battery and dispose of it according to your local and state regulations.
Be careful not to short across the terminals when installing. Shorting the terminals together
can cause sparks, damage to the battery or generator, or even burns or explosions.
CAUTION!
• Always wash hands after touching battery.
WARNING!
Battery posts, terminals, and accessories contain lead and lead compounds known to cause
cancer and reproductive harm.
 Loading...