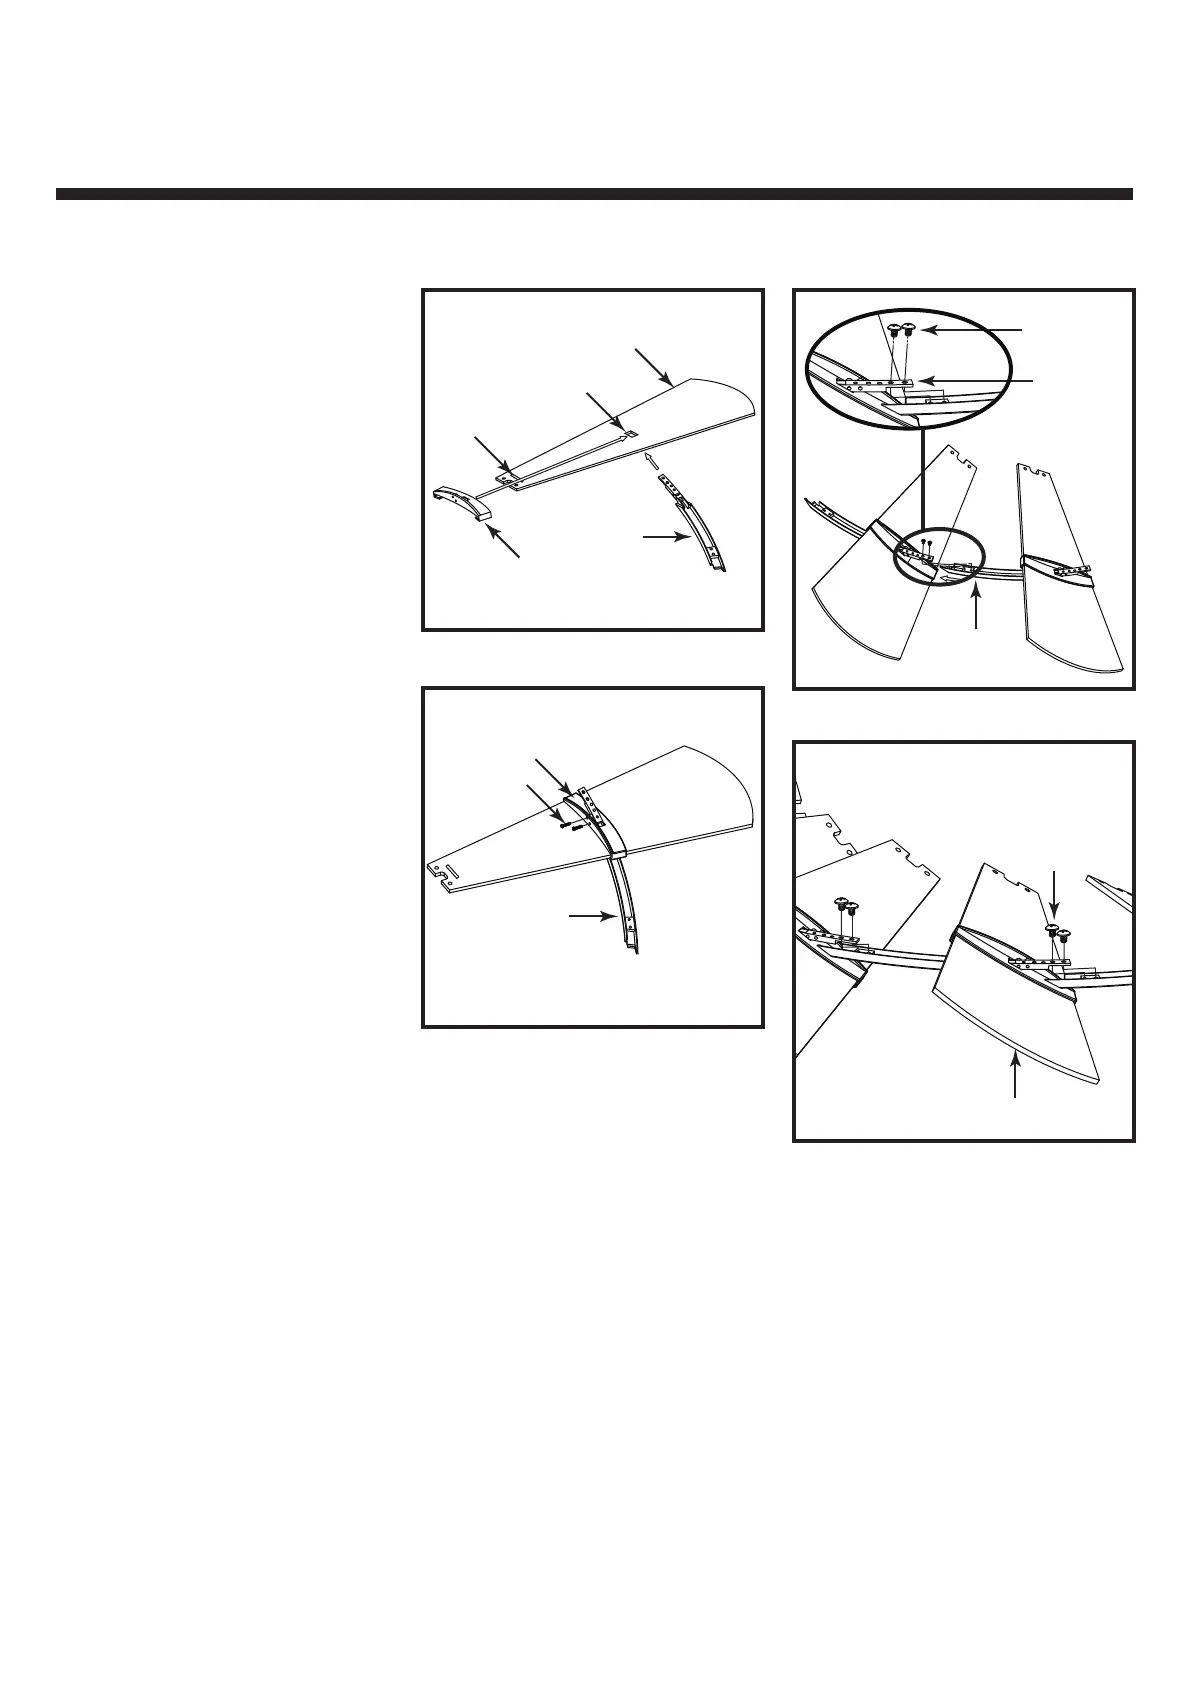
Fig. 10
WARNING -Turn off the power!
NOTE: Please see the label of the blade
side up as illustration shown for
assembly.
1. Slide the blade deco plate to position
the blade hole on the center of the blade.
Insert the blade deco bar into the hole in
the blade and secure with a blade deco
plate screws (Screw No. 1). (Fig. 8 & 9)
Caution: Do not tighten screws at this
point. All screws will be tightened after
the complete assembly of blades on the
fan.
2. Assemble each blade as in step 1/Fig.
8 & 9 to complete the blade circle. Align
the holes on the blade deco bars and
secure with the blade deco bar screws
(Screw No. 2), as show on Fig. 10.
Caution: Do not tighten screws at this
point. All screws will be tightened after
the complete assembly of blades on the
fan.
3. Follow the same assembly process
through the 14th blade.
4. Slightly lift the14th blade to position
the 15th blade and screw it to complete
the blade circle. (Fig. 11)
5. ATTACHING THE FAN BLADES
Fig. 8
Fig. 11
Fan blade
Screws
(Screw No. 1)
Hole
“This side up”
label
Blade deco bar
Blade deco bar
Blade deco plate
Blade deco plate
Fig. 9
Blade deco bar
screws
(Screw No. 2)
Blade deco bar
Blade deco bar
Blade deco bar
screws
(Screw No. 2)
15th Blade unit
 Loading...