QWIK TUNE LIMITED U.S.A.
WARRANTY
This product is warranted to the original
purchaser to be free from defects in material
and workmanship for a period of 12
months from the date of purchase,
provided you provide proof of purchase at
the time of requesting warranty service. In
the event of defect we will, at our option,
repair or replace the defective product with
a new or reconditioned product, provided
the defective product is returned before-
hand postage and insurance prepaid to
Evets Corporation at the address below.
This warranty does not cover batteries,
casings, or damage caused by accident or
misuse. Warranty valid in the USA. This
warranty gives you specific legal rights.
You may also have other rights which vary
from state to state. Please retain a copy of
this warranty and your sales receipt.
EVETS CORPORATION
P.O. Box 1327,
Camarillo, CA 93011
Telephone: (805) 389-4605
Fax: (805) 383-2050
1. For electric instruments, insert cable into
“IN” jack. For other instruments, position
the QT-9 so that the instrument sound
source is within 4-6 inches (100-150mm)
of the “MIC” hole on the front of tuner.
2. Press ON.
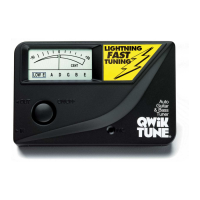
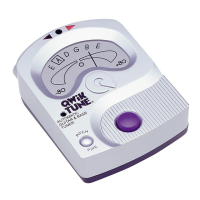
3. Play any note. The note played will show
at the bottom of the LCD meter.
4. While tuning, if the needle stops to the left
of “0” the pitch of the note is flat (
). Adjust
instrument tuning and play the note again.
Repeat until the meter needle lines up
under the “0” on the meter. The note is
then in tune.
5. If the needle stops to the right of the “0”
the note is sharp (#). Adjust instrument
tuning and play the note again. Repeat
until the meter needle lines up under the
“0” on the meter. The note is then in tune.
6. The QWIK TUNE
®
is more sensitive and the
meter is faster acting than many other
tuners. On some notes or instruments, the
needle on LCD meter may move rapidly
from one reading to another. If this hap-
pens, try playing the note more softly.
Also, when tuning a non-electric instru-
ment, make sure there is no background
noise in the room (voices, other musical
instruments, radio, etc.)
7. After 2 minutes of non use, QWIK TUNE
®
will automatically shut off to save battery
power.
QT-9
Instructions
®
M
ODE D’EMPLOI
1
. Pour les instruments éléctriques, insérez le
câble dans la prise “IN.” Pour les autres
i
nstruments, mettez le QT-9 de façon que
l’ouie soit a’ 100-150mm des quatre ori-
fices “MIC” au devant du bouton d’accord.
2. Appuyez sur “ON.”
3. Appuyez sur n’importe quelle note. Cette
note apparaîtra au fond du compteur LCD.
4. Si, pendant que vous essayez de realiser
l’accord, l’aiguille s’arrête a’ gauche du “0”
le ton de la note est bémol (
). Réglez l’ac-
cord de l’instrument et essayez la note une
autre fois. Répétez jusqu’a’ ce que l’aiguille
se trouve sous le “0” du compteur. La note
est alors accordée.
5. Si l’aiguille s’arrête a’ droite du “0”, le ton
de la note est do dièse (#). Réglez l’accord
de l’instrument et essayez la note une autre
fois. Répétez jusqu’a’ ce que l’aiguille se
trouve sous le “0” du compteur. La note est
alors accordée.
6. Le QWIK TUNE
®
est plus sensible et le
compteur agit plus vite que les autres
acordeurs d’instruments de musique. Sur
certaines notes ou instruments, l’aiguille
sur le compteur LCD pourrait se déplacer
plus rapidement d’une indication a’ l’autre.
Si cela arrive essayez de jouer la note plus
doucement. Aussi, lorsque vous accordez
un instrument qui n’est pas éléctrique,
assurez-vous qu’il n’y ait pas de bruit de
fond dans la salle (voix, autres instruments
de musique, radio, etc.)
7. Après deux minutes de non-usage, QWIK
TUNE
®
s’arrêtera automatiquement pour
conserver la puissance de la batterie.
8. Les prises IN et OUT sont disponibles pour
que QWIK TUNE
®
puisse être utilise’ “in
line” avec les instruments éléctriques
sans affecter le son de l’instrument.
Appréciez votre musique!
ANWEISUNGEN
1. Für elektrische Instrumente das
Kabel in die “IN”-Fassung steck-
en. Für andere Instrumente das
QT-9 so halten, daß sich die
Tonquelle des Instruments inner-
halb 100-150 mm der vier
“MIC”-Mündungen an der
Vorderseite des Stimmgeräts
befindet.
2. Auf ON drücken.
3. Irgendeine Note anschlagen. Die
gespielte Note zeigt sich unten
am LCD Messer an.
4. Sollte während des Stimmens die
N
adel zur linken von “O” anhalten, ist die
Note zu tief (
) gestimmt. Instrument neu
e
instimmen und die Note wieder spielen.
Wiederholen, bis die Nadel genau unter
d
em “O” des Messers steht. Die Note ist
dann einge-stimmt.
5. Sollte die Nadel zur rechten von “O” anhal-
ten, ist diese Note zu hoch (#) eingestimmt.
Instrument neu einstimmen und die Note
wieder spielen. Wiederholen, bis die Nadel
genau unter dem “O” des Messers steht.
Die Note ist dann eingestimmt.
6. Das QWIK TUNE
®
ist empfindlicher und der
Messer reagiert schneller als viele andere
Stimmgeräte. Bei manchen Noten oder
Instrumenten kann es sein, daß sich die
Nadel an dem LCD Messer schneller von
einer Messung zur anderen bewegt. Sollte
dies der Fall sein, die Note noch einmal
etwas leiser spielen. Vergewissern Sie sich
ebenfalls beim Einstimmen eines nicht-
elektrischen Instruments, daß der Raum
frei von Nebengeräuschen ist (wie z.B.
Stimmgeräusche, andere Musikinstru-
mente, Radio, etc.).
7. Nach Nichtgebrauch von zwei Minuten
stellt sich QWIK TUNE
®
automatisch ab,
um Batterien zu sparen.
8. IN und OUT Fassungen werden geliefert,
so daß QWIK TUNE
®
“in line” mit elek-
trischen Instrumenten benutzt werden
kann, ohne den Ton des Instruments zu
beeinflussen.
Viel Spaß beim Musizieren!
ISTRUZIONI PER L’USO
1. Per gli strumenti elettrici, inserire il cavo
nella presa “IN.” Piazzare tutti gli altri stru-
menti in modo che il loro suono sia a circa
100-150mm dai quattro microfoni “MIC”
situati davanti all’accordatore.
2. Premere “ON.”
3. Suonare una nota. Questa nota apparira’ in
fondo al misuratore LCD.
4. Se mentre si accorda l’indicatore si ferma a
sinistra dello “0,” la nota è un Si bemolle (
).
Riaccordare e suonare la nota un’altra volta.
Ripetere finchè l’indicatore sia sotto lo “0”
del misuratore. La nota è allora intonata.
5. Se l’indicatore si ferma a destra dello “0,” la
nota è diesis (#). Riaccordare e suonare la
nota un’altra volta. Ripetere finchè l’indica-
tore sia sotto lo “0” del misuratore. La nota
è allora intonata.
6. Il QWIK TUNE
®
è dotato di un misuratore
piu’ veloce di molti altri accordatori ed è
piu’ sensibile. Su qualche strumento o nota
musicale, l’indicatore potrebbe muoversi
rapidamente durante l’accordo. Se succede,
NEEDLE (Nadel, L’aguille, Aguja, l’indicatore, )
LCD METER (Messers, Computeur, Medidor, Misuratore, )
8
. IN and OUT jacks are provided so the
QWIK TUNE
®
can be used “in line” with
e
lectric instruments without affecting
instrument sound.
Enjoy your music!