14-1 14-2
14-3
14-4
14-6
14-5
14-7
8-1
8-3
8-4
8-3
8-2
8-1
8-2
A
B
C
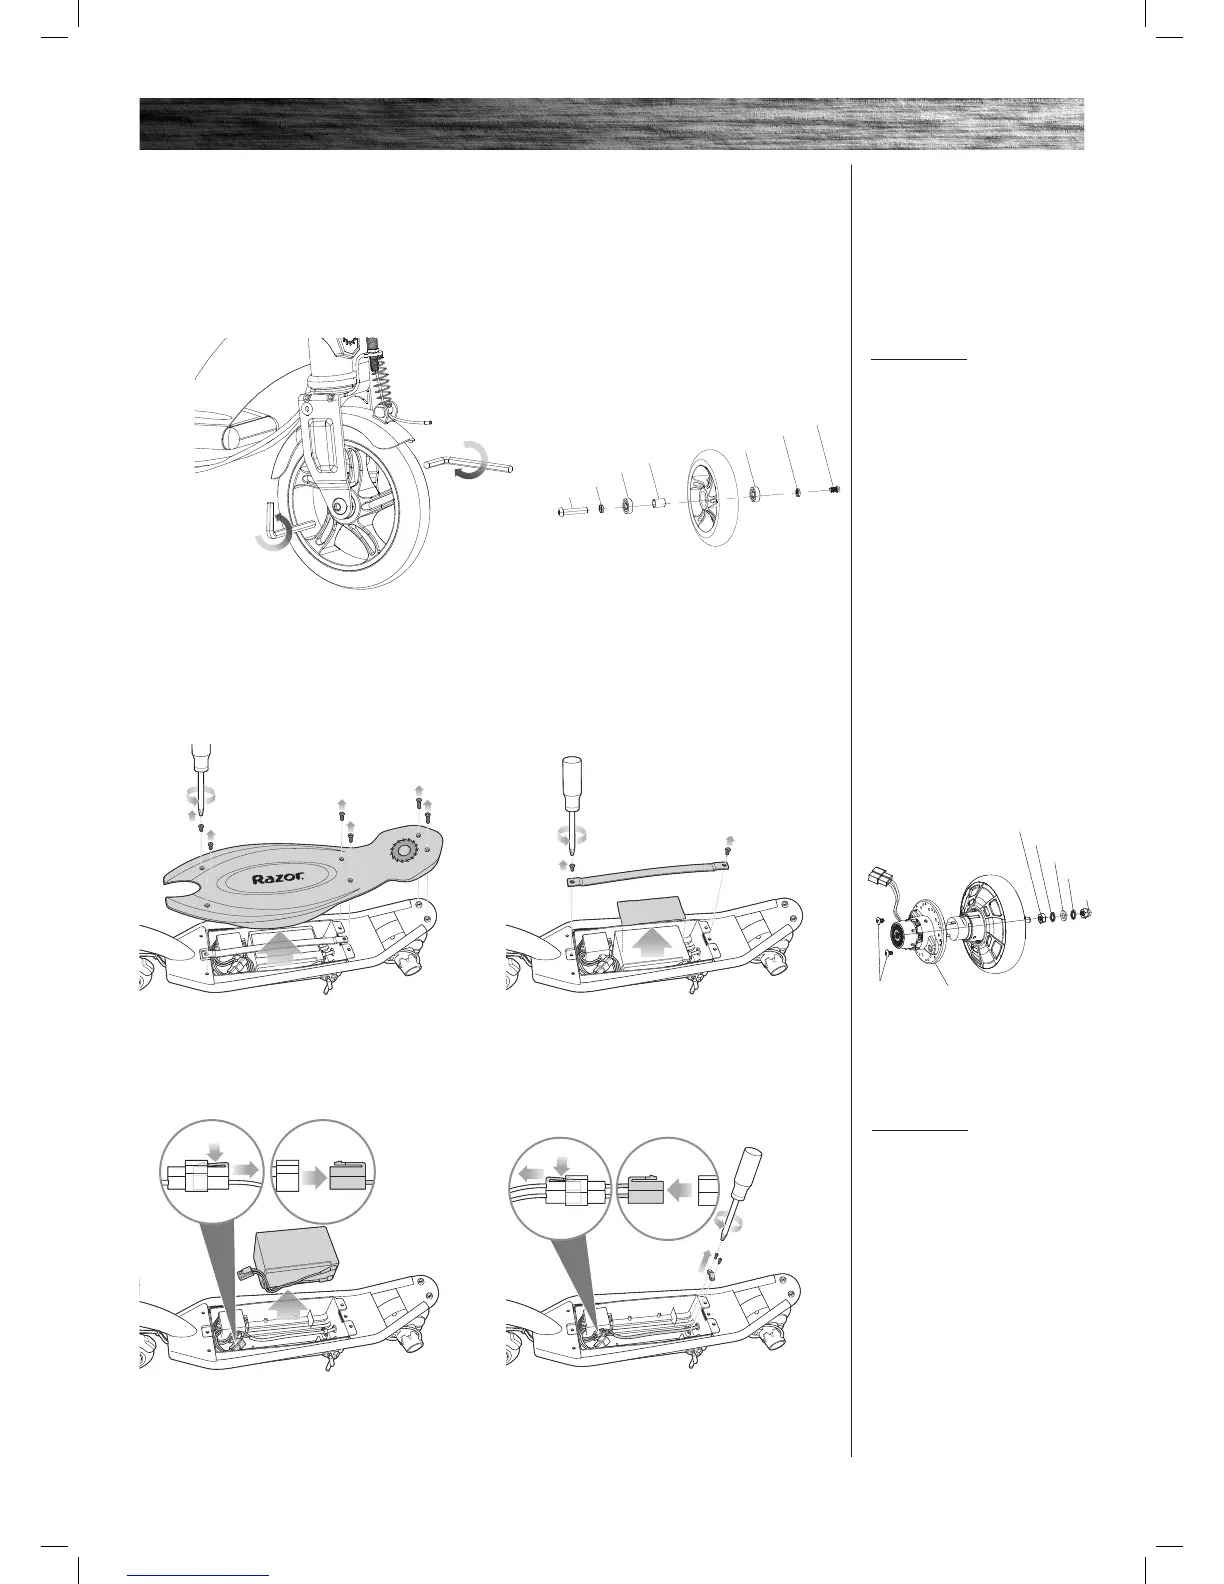
1 Using a Phillips screwdriver remove the six (6)
screws and remove the deck plate.
(Note: There are three (3) sizes of screws,
A-small, B-Medium, C-Large)
2 Using a Phillips screwdriver remove
the battery strap.
3 Disconnect the battery wire connector from the
control module and carefully remove the battery.
Note: If only replacing battery, install new battery
and reverse steps 1-3.
4 Using a Phillips screwdriver remove the cable
clamping block and disconnect the motor wire
connector from the control module.
5
REPAIR AND MAINTENANCE
Note: Rear wheel/motor
hardware sequence
Left Side
14-1 Phillips Screws (2)
14-2 Motor Housing
Right Side
14-3 Nut
14-4 Lock-Washer
Frame
14-5 Flat Washer
14-6 Lock-Washer
14-7 Locknut
Right Side
8-2 Spacer
8-3 Bearing
8-4 Big Spacer
Fork
8-1 Coupling Bolt
Left Side
8-2 Spacer
8-3 Bearing
Fork
8-1 Bolt
1 Using two (2) 5 mm Allen wrenches, loosen the axle bolt.
Remove wheel and install replacement wheel.
(Note the sequence of the hardware)
q Front Wheel Replacement
Tool Required: Two (2) 5 mm Allen Wrenches
Note: Front wheel
hardware sequence
Turn power switch “OFF” before beginning repair or maintenance:
• Read the instructions
• Remove charger plug
• Turn the power switch OFF
• Secure the unit under repair
• Exercise caution around
exposed parts
• Contact Razor customer service
if unsure about any repair or
maintenance
q Rear Wheel/Hub Motor/Battery Replacement
Tools Required: Phillips Screwdriver and Two (2) 13 mm Wrenches
(Battery Replacement Steps 1-3)
 Loading...