REPAIR AND MAINTENANCE
Need Help? Visit our website for replacement parts, product support, a list of authorized service centers in the US and customer service contact information
at www.razor.com. Please have the product I.D. code (located on the white label of your product) available for better assistance. Additional Customer
Service contact information is listed at the back of this manual.
7
7-1
7-3
7-47-37-27-1
7-2
Right Side
7-2 Spacer
7-3 Bearing
7-4 Large Spacer
Fork
7-1 Coupling Bolt
Left Side
7-2 Spacer
7-3 Bearing
Fork
7-1 Bolt
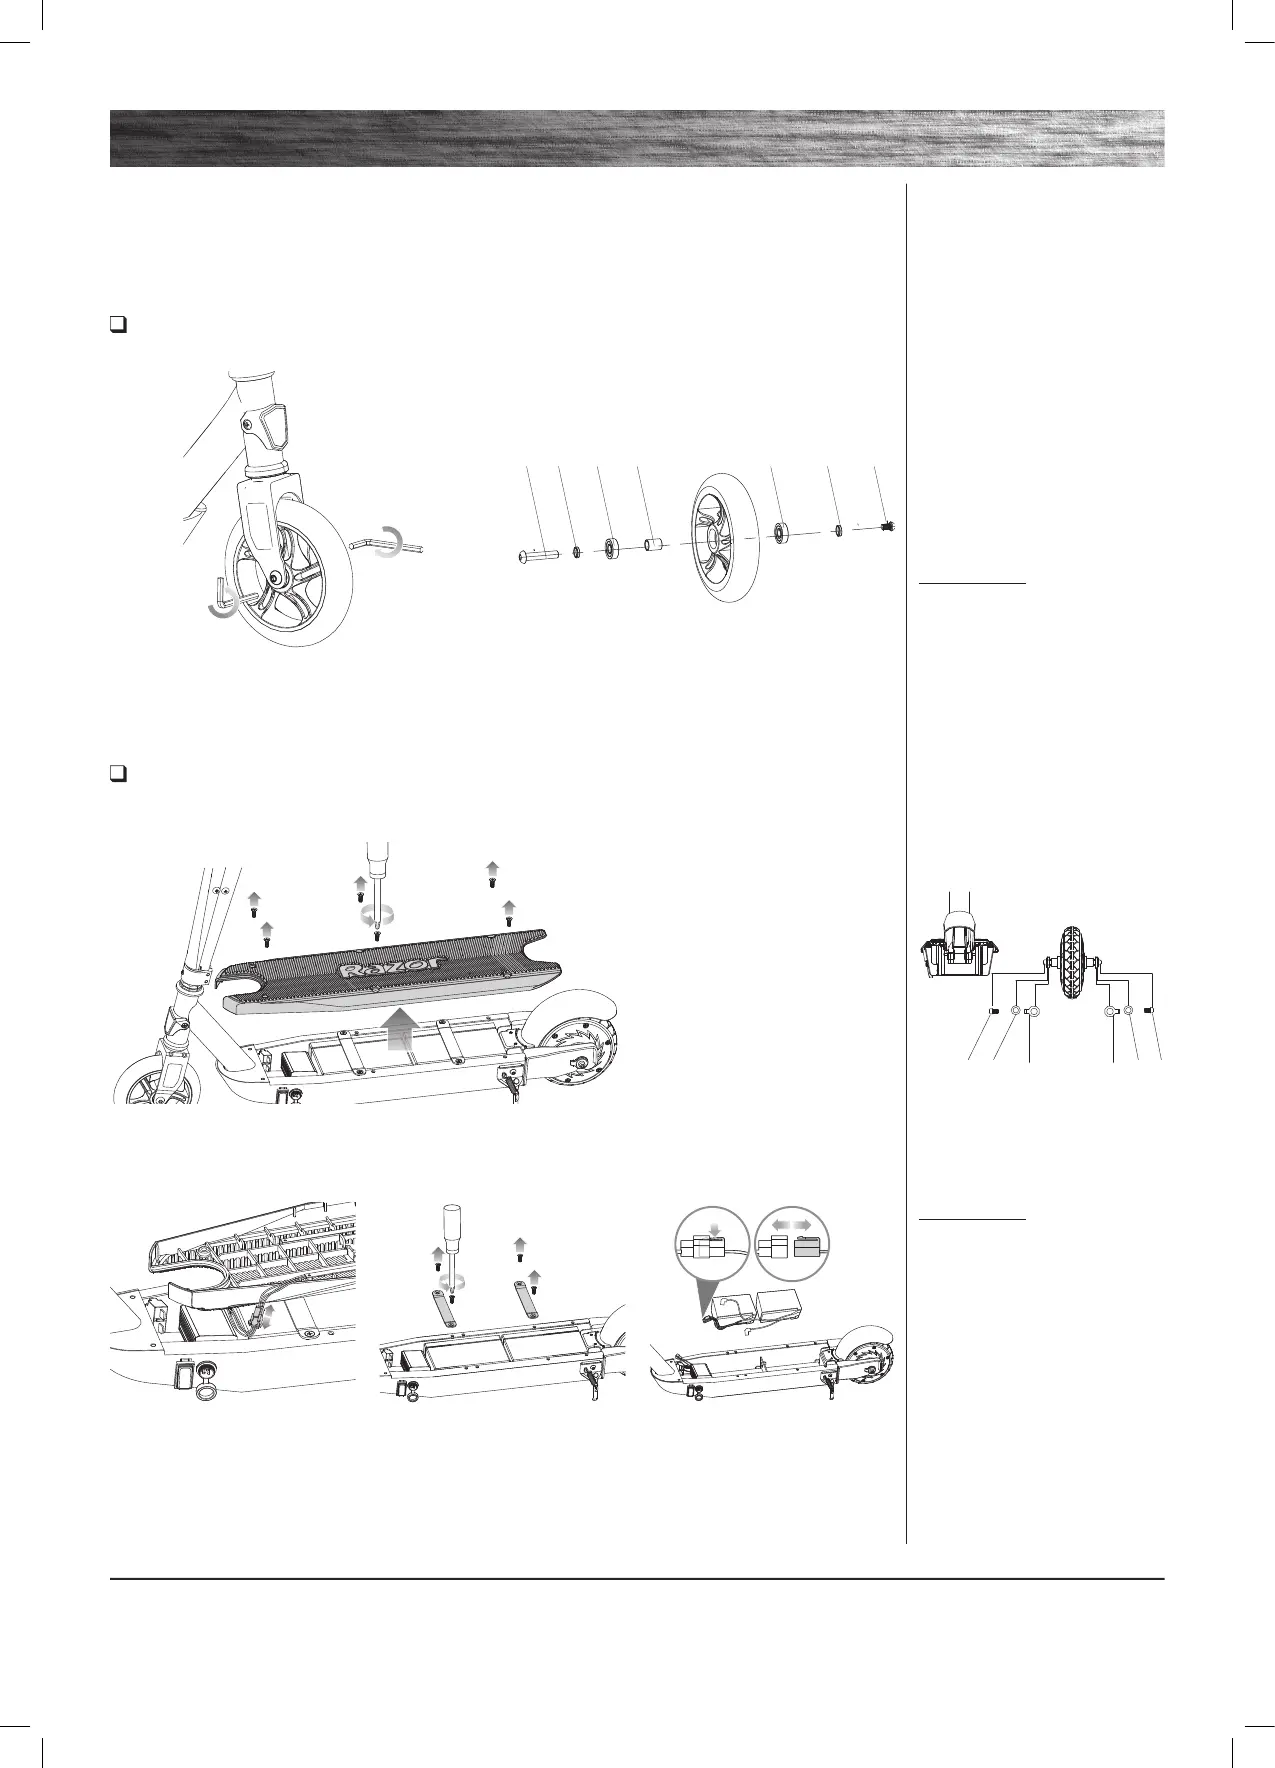
1 Using two (2) 5 mm Allen wrenches, loosen the axle bolt.
Remove wheel and install replacement wheel.
(Note the sequence of the hardware)
Front Wheel Replacement
Required Tools: Two (2) 5 mm Allen Wrenches (one included)
Note: Front wheel hardware
sequence
Turn power switch “OFF” before beginning repair or maintenance:
• Read the instructions
• Remove charger plug
• Turn the power switch OFF
• Secure the unit under repair
• Exercise caution around
exposed parts
• Contact Razor customer service
if unsure about any repair or
maintenance
9-1 9-19-2 9-29-3 9-3
1 Using a Phillips screwdriver, remove the six (6) screws and remove the
deck plate.
2 Disconnect the wire from
the controller to the deck. Set the
deck aside.
3 Using a Phillips screwdriver,
remove the four (4) screws and
remove the battery straps. (Note:
These are smaller screws than
step 1.)
4 Disconnect the batteries.
Note: Rear wheel/motor
hardware sequence
Left Side
9-1 Washer
9-2 Washer
9-3 Axle Bolt
Right Side
9-1 Washer
9-2 Washer
9-3 Axle Bolt
Battery/Rear Wheel/Hub Motor Replacement
Required Tools: Phillips Screwdriver and Two (2) 5 mm Allen Wrenches (only one wrench included)
(Battery Replacement Steps 1-3)
 Loading...