2. Connection
4. Connect the JLINK LITE ARM debugger module to the connector marked ‘CN14 ARM JTAG 20’ on the diagram
using the ribbon cable.
5. Connect the JLINK LITE ARM debugger module to a spare USB port of your PC. The green LED on the debugger
will flash.
6. Please follow the steps below to install the drivers. Note that administrator privileges are required to install the
drivers.
Windows™ 7 / 8
Windows
TM
7: A “Device driver software installed successfully” pop-up will appear in the Windows™
toolbar and installation will complete.
Windows
TM
8: An icon will appear in the Windows
TM
toolbar and installation will complete.
7. The green LED on the JLINK LITE ARM debugger will illuminate.
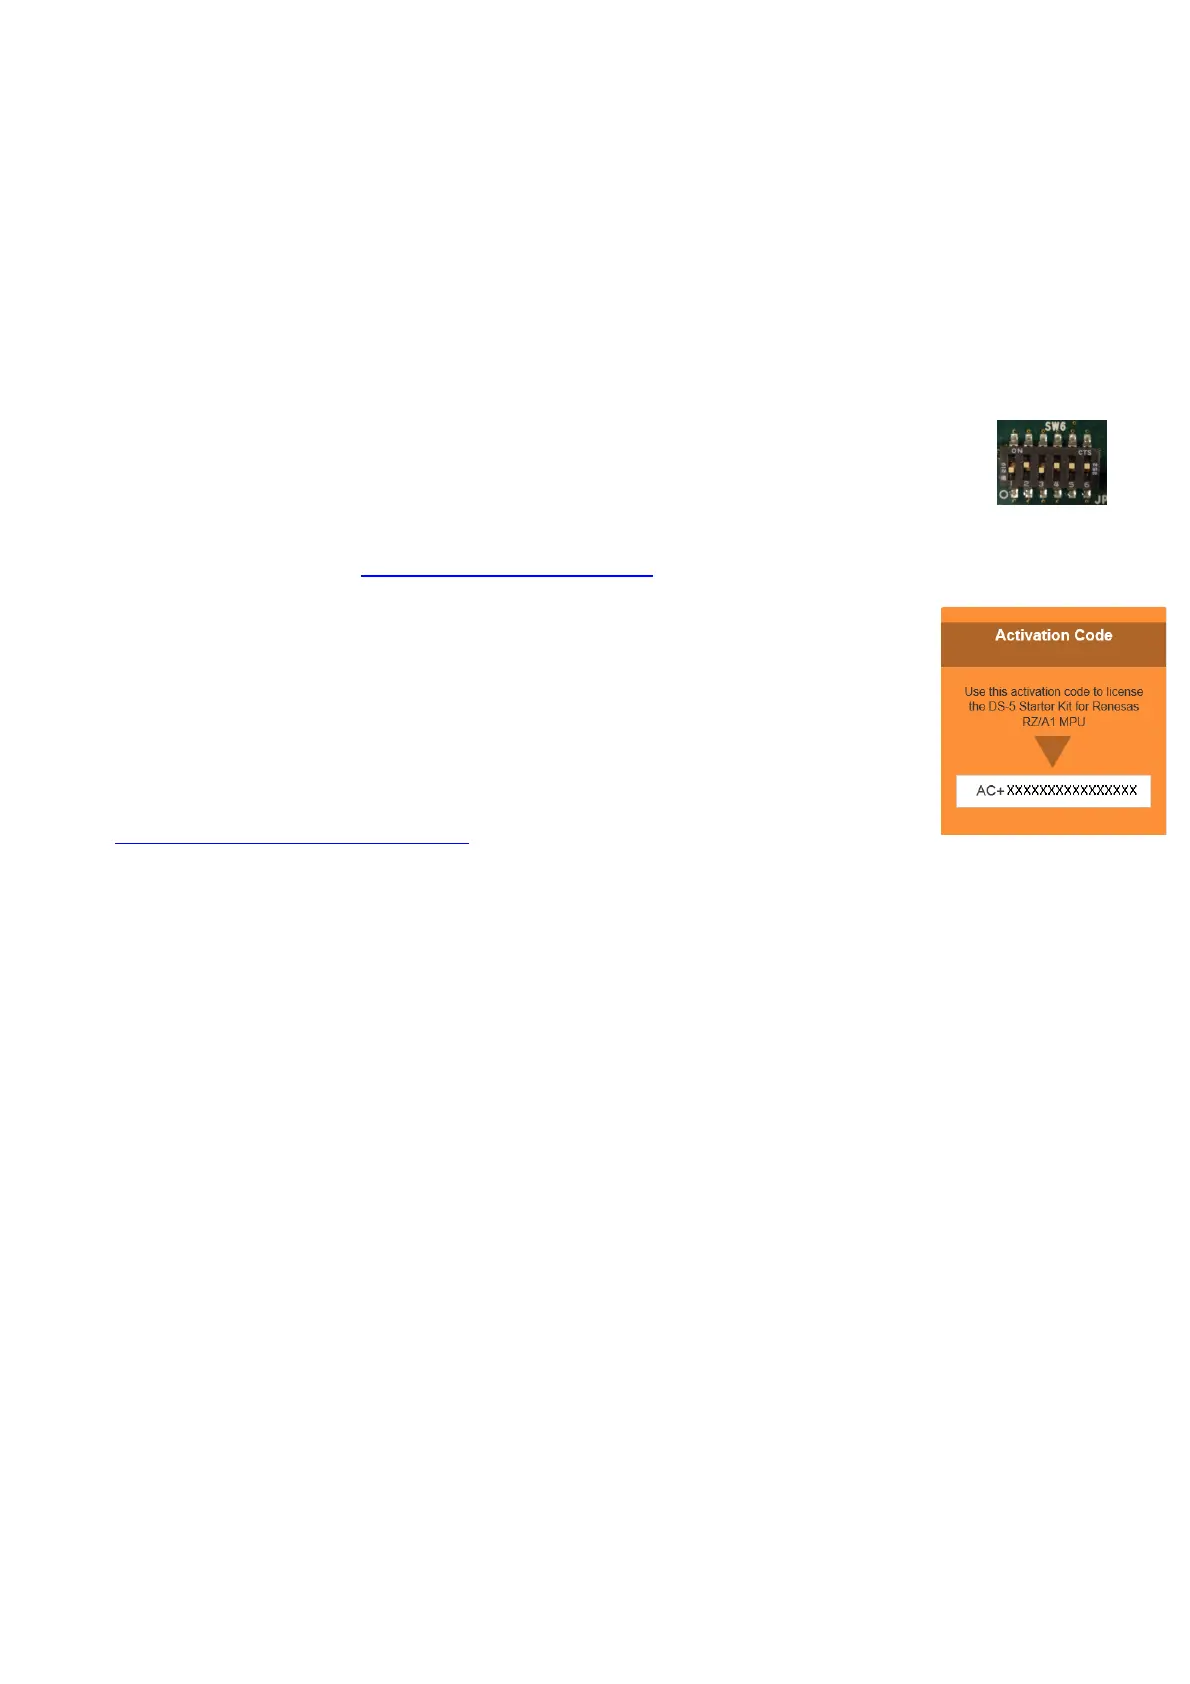
8. Ensure that SW6.1 and SW6.3 are set to the OFF position.
9. Connect a centre-positive +5V power supply to the connector marked PWR and apply the power.
3. Adding Sample Code into DS-5
An ARM developer account (see https://login.arm.com/register.php) is required to complete these steps.
DS-5 integrates various tools such as compiler, assembler, debugger and editor into a common
graphical user interface and requires a working internet connection for license activation. Start
DS-5 from the start menu:
Start > All Programs > ARM DS-5 -> Eclipse for DS-5
Note: Proxy settings in DS5 under ‘Window > Preferences > General > Network Connections’
may need to be configured when accessing the license server. Set the Active Provider to
‘Manual’ and configure the ‘Proxy entries’ and ‘Proxy bypass’ before clicking ‘OK’.
10. The first time DS-5 is started you will be asked to obtain a licence. Click ‘Ignore’. Go to
http://ds.arm.com/renesas/rza-starter-kit/
to get the activation code. Scroll down and copy
the activation code from the orange area. (xxxxxxxxxxxxxxxx represents a unique number).
11. From the DS-5 ‘Help’ menu, select ‘ARM License Manager’. In the ‘View and edit licenses’ dialog, click ‘Add
License’. In the "Obtain a new license" dialog, for the entry "Enter a serial number or activation code:" paste the
activation code. Click Next.
12. In the "Choose Host ID" dialog the data is automatically filled. Click Next.
13. In the "Developer Accounts Details" dialog enter the user name and password and click Next.
14. Click ‘Close’. In the ‘Confirm Restart Eclipse’ dialog click ‘Restart Eclipse’.
15. In the ‘Select a workspace’ folder that appears, browse a suitable location and folder name to save your new
workspace.
16. In the DS-5 welcome screen, click ‘Go to the workbench’, which is the last item under the 'DS-5 Resources'
heading.
17. Right-click in the Project Explorer window, and select ‘Import’.
18. Under ‘Import Source’ select General > Existing Projects into Workspace, and click ‘Next’.
19. Click the ‘Browse’ button, and locate the following root project directory:
‘C:\Renesas\Workspace\RSK\RSK+RZA1_V02’
20. Ensure the ‘Copy projects into workspace’ option is ticked and then click ‘Finish’.
4. Adding GNU Toolchain Support for DS-5
21. From the DS-5 ‘Help’ menu, select ‘Install New Software…’.
22. From the Install dialog, select ‘Add…’.
23. Click the ‘Archive…’ button and browse to C:\Renesas\Workspace\RSK\RSK+RZA1_V02\Renesas_ARM-
RZ_Update.zip. Click ‘OK’.
24. Back in the ‘Install’ dialog, ensure that the tick box ‘Renesas ARM-RZ Update’ is selected, then click ‘Next ’.
25. An 'Install Details' dialog appears. Review the licenses. Click 'Next'
26. The Install dialog will appear, select the option “I accept the terms of the license agreement”. Click ‘Finish’.
27. A security dialog will appear. Click ‘OK’. The toolchain will then be installed into DS-5
 Loading...