6English
5 English
Download and Launch the Reolink App or Client software, and follow the
onscreen instructions to finish initial setup.
Set up the Camera
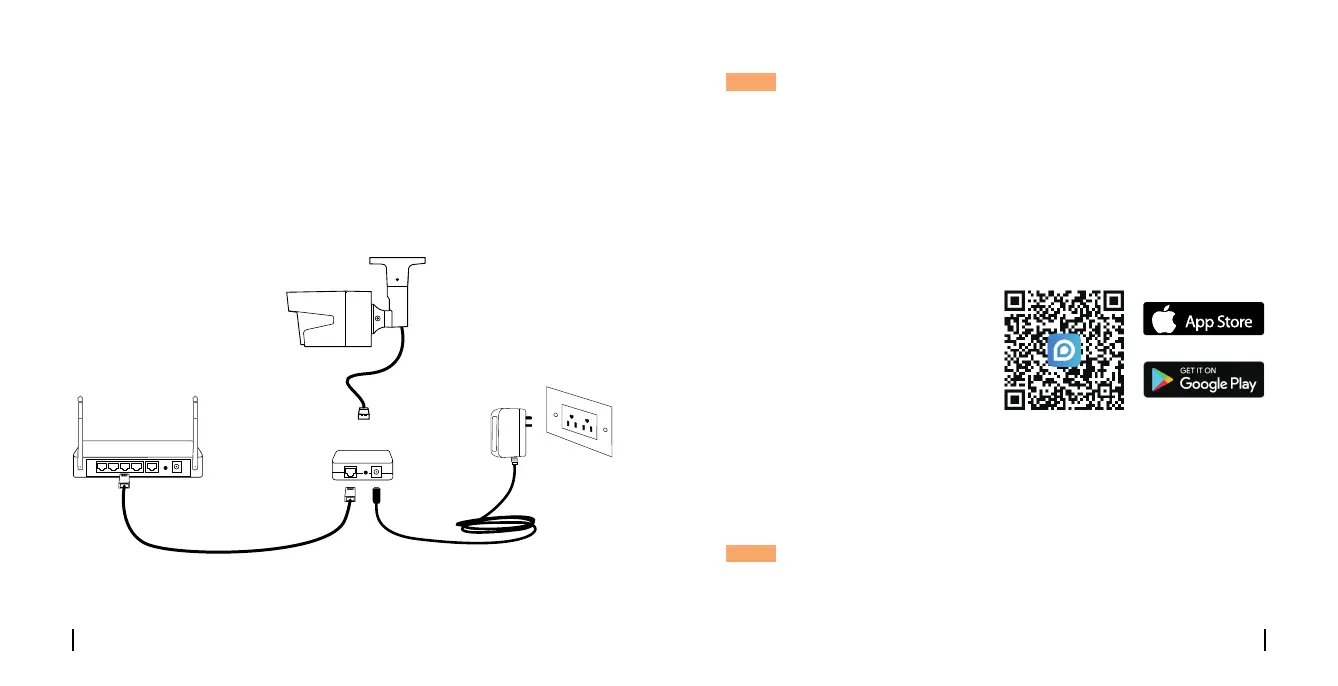
Connection Diagram
Before using the camera, please connect your camera as instructed
below to finish initial setup.
1. Connect the camera to a PoE injector with an Ethernet cable.
2. Connect the PoE injector to your router, and then power on the PoE
injector.
NOTE: The camera should be powered with a 12V DC adapter or a PoE
powering device such as PoE injector, PoE switch or Reolink NVR
(not included in the package).
Ethernet Cable
Ethernet Cable
PoE IP Camera
Power Adapter
Router
PoE Injector*
• On Smartphone
• On PC
Scan to download the Reolink App.
Download path of the Reolink Client: Go to https://reolink.com > Support
> App & Client.
*You may also connect the camera to a PoE switch or Reolink PoE NVR.
NOTE: If you are connecting the camera to a Reolink PoE NVR, please
set up the camera via the NVR interface.
Available on the
 Loading...