English English5 6
Connection Diagram
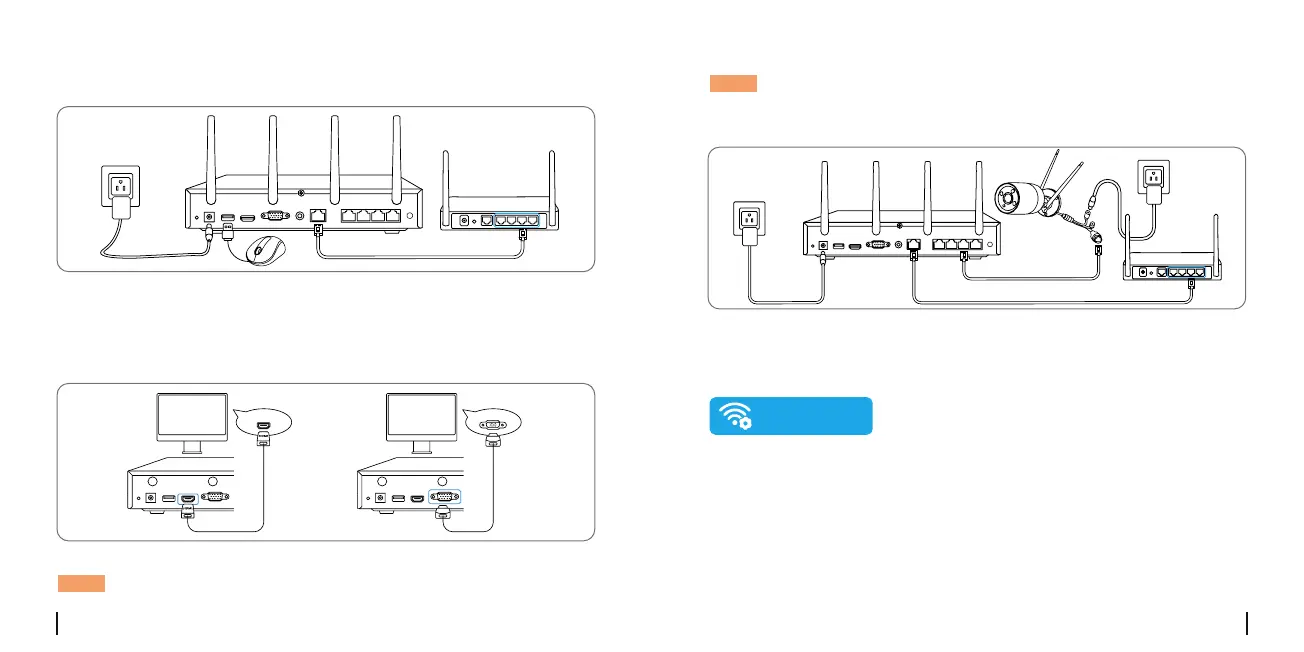
1.Connect the included power adapter to the NVR and a power outlet.
2.Connect the NVR to your router with an Ethernet cable (if you hope
to use it remotely).
Next, connect the mouse to the USB port of the NVR.
3.Connect the NVR to the monitor with a VGA or HDMI cable.
NOTE: There is no VGA cable and monitor included in the package.
4.Follow the steps on the monitor to complete the initial setup.
NOTE: In the second step, UID is disabled by default. You’re
recommended to enable it for remote access on smartphones or
computers. Or you can set it later in “Settings > System >Info”.
5.Power on your WiFi cameras and connect them to the LAN ports
(for IPC) on the NVR via Ethernet cables.
6.Click Sync WiFi Info to connect the cameras to the NVR’s WiFi.
7.After the sychronization succeeded, remove the Ethernet cables
and wait for a few seconds for them to be reconnected wirelessly.
installedatthedesiredlocation.
8.Afterthewirelessconnectionissuccessful,thecamerascanbe
HDMI
VG
A
Sync Wi-Fi info
NVR
NVR
Router
Router
 Loading...