English English3 4
How to Install
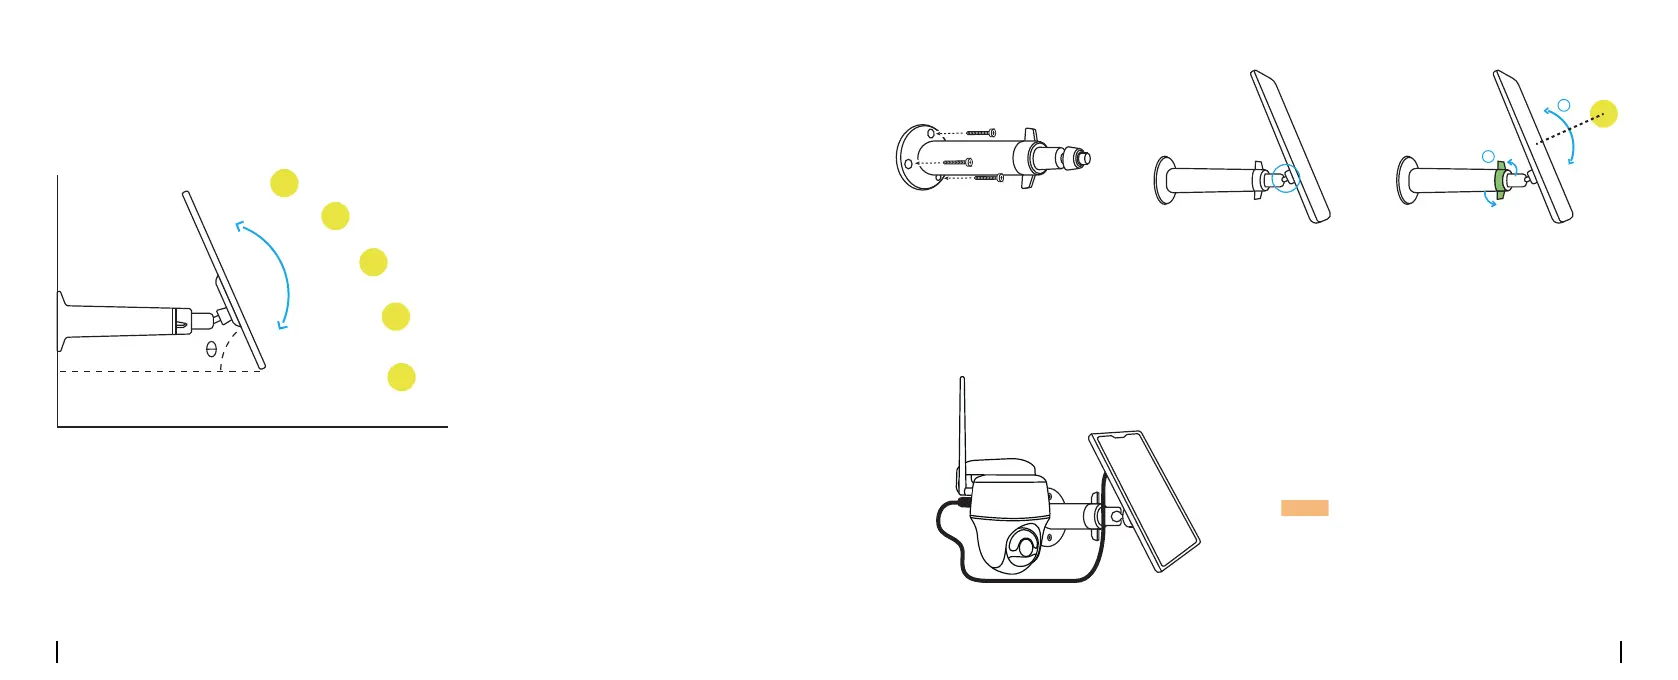
Install the Solar Panel with Screws
Ideal Angle = Local Latitude + 5°
1. Please choose a location for your solar panel that gets the most sunlight throughout the year.
The Reolink solar panel needs only a few hours of direct sunlight to suciently power up your
camera daily. The amount of energy that the solar panel can produce is aected by weather
conditions, seasonal changes, geographic locations, etc.
2. Mount the bracket with
the mounting template and
the screws provided in the
package.
3. Slot the solar panel into
the bracket and make sure
it’s secure.
4. Loosen the adjustment
knob on the bracket, and
adjust the angle of the
solar panel to receive the
most direct sunlight. Then
re-tighten the adjustment
knob to secure the panel.
5. Connect the solar panel to the Reolink
battery-powered camera.
NOTE: Make sure the USB-C connector is
plugged in all the way for a weatherproof
seal.
2
1
 Loading...