75
Appendix
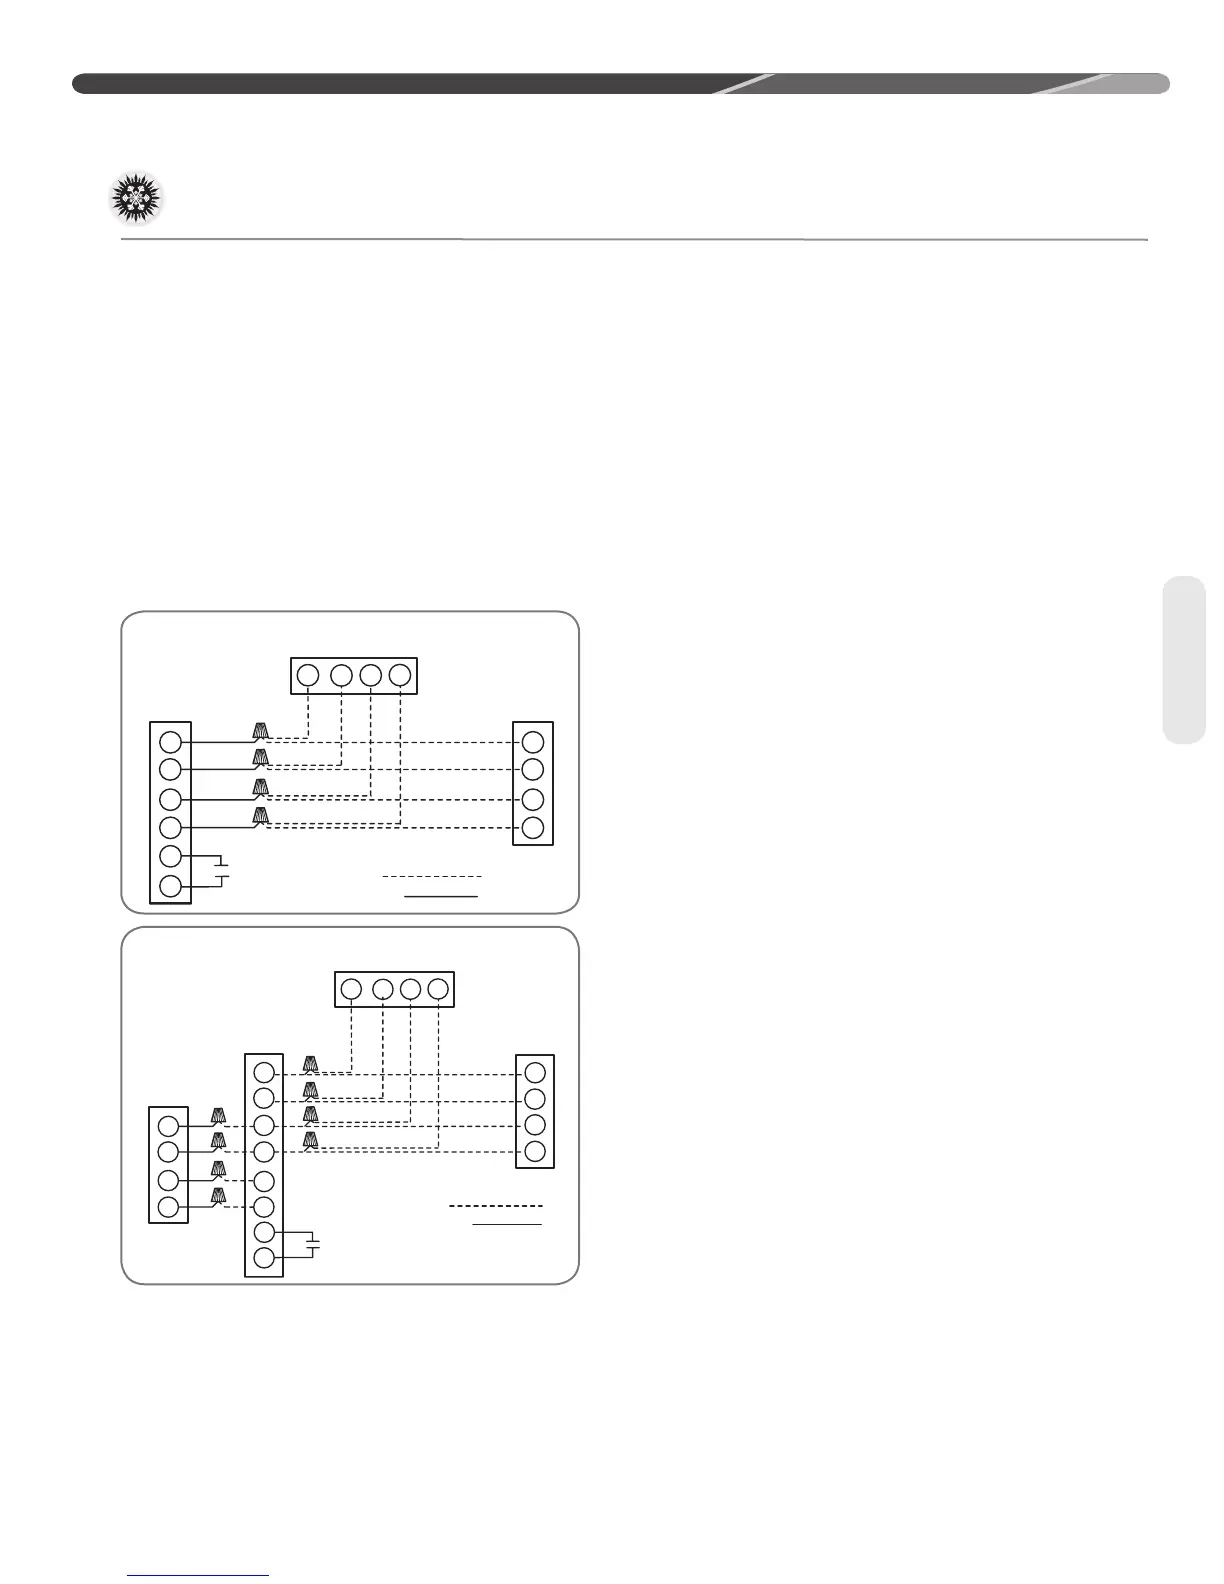
(-)HMV
Air Handler
BR/W
PR
R
BR
E1
E2
C
R
Communicating
Thermostat
(-)P20
Heat Pump
E1
E2
C
R
E1
E2
C
R
Field-Installed
Factory Standard
AUX
C
AUX
1
(-)CF
Coil w/EEV
E1
E2
C
R
Communicating
Thermostat
(-)P20
Heat Pump
E1
E2
C
R
R
C
Y2
Y1
Field-Installed
Factory Standard
E1
E2
C
R
Y1
Y2
AUX
C
AUX
1
EcoNet
Enabled
Furnace
Performance audit testing a (-)P20 variable
speed heat pump rated combination requires
an EcoNet™ Control Center (according to the
AHRI rating database) as an accessory to obtain
the rated performance. Utilize the following
instructions to properly operate the system during
audit tests.
1. Install the rated system consistent with this
manual and ASHRAE 37.
2. Leak check and charge the rated system per
the instructions found in this manual.
3. Wire the outdoor unit, indoor air mover/furnace,
indoor coil EXV control (when necessary), and
EcoNet™ Control Center according to the
following wiring diagrams.
4. Supply high and low voltage to the system.
5. Once each control is powered turn off the
Dehumidification feature:
a. Pressing the “Settings” button on the home
screen followed by pressing the “humidity”
button.
b. Once in the “humidity” screen, select “Yes”
next to the “Enable Dehumidification ?”
label.
c. To turn dehumidification off press the orange
up or blue down arrows once.
d. The “Yes” should turn to a value of “No.”
6. Once the dehumidification feature is turned
off, the Aux 1 configuration needs to be set to
normally closed (N.C.) as to permit a closed
switch attached to the Aux 1 contacts to keep
the system operating. Thereby an open switch
would indicate to the system to shut down:
a. Press the back arrow in the bottom left of
the dehumidification screen to return to the
“settings” screen.
b. Press the “installer” button in the bottom
right corner of the “settings” screen.
c. Press the “air handler” or “furnace” button.
d. Once in the “air handler settings” or
“furnace settings” screen select “N.C.” next
to the “Aux Input #1 Config” label.
e. Change the “Aux #1 Config” type to “N.C.”
by pressing the orange up or blue down
arrows at the bottom of the screen twice.
f. Select “Off” next to the “Aux Input #1
Config” label.
g. Change the “Aux #1 Config” value from
“Off” to “Shutdown” by pressing the orange
up button at the bottom of the screen two
times. After each press of the orange up
button the value next to the “Aux #1 Config”
label should change.
7. Entering the Test Mode
a. Press the back arrow in the bottom left of
the screen 3 times to return to the home
screen showing the inside temperature.
b. Press the “Service” button on the home
screen.
c. Press the “odu check-out” button in the
bottom right corner of the “service” screen
to enter the “installer checkout” screen.
d. Select the desired mode of operation by
pressing “Off” next to the “Var Speed ODU
Test” label and then the orange up arrow
or blue down arrow at the bottom of the
“installer checkout” screen.
NOTE: Any faults must be resolved
before the system will start. See the
troubleshooting guide in this manual for
assistance.
NOTE: If the unit does not start when the
“start” button is pushed verify the switch
attached to the Aux 1 input on the air
handler or furnace control board is closed
and no alarms are active.
12.1 Agency Performance Audit Test Instructions
12.0 APPENDIX
 Loading...