7
'VOLTAGE DECREASING CHECK
1. Turn the power ON, and set the stabilized power
supply's voltage to +5.5V. When Fig.8 appears on the
display, it means that the unit is normal.
If not, please check IC23 and the circuit around it.
After you have checked Fig.8 on the display, turn off
the unit's power.
Then set the Stabilized power supply's voltage back
to +9.0V.
'MUTE AND OUTPUT WAVEFORM CHECK
1. Turn the VOLUME knob to the MAX position.
Turn ON the power while pressing down both [KICK2]
and [SNARE2] button. Fig.7 will appear on the
display.
2. If any sound over -80 dBm in JIS-A (IHF) mode on
noise meter comes out immediately after the power
ON, it is No Good.
Please check the circuit around muting.
3. Notice that the volume level gradually increases.
4. Make sure that no wave form appears on the
oscilloscope, when the VOLUME knob is at the MIN
position.
5. Turn the VOLUME knob to the MAX position, the
LOW knob to the FLAT, and see if the proper sine
wave (-26.0(
±1.5) dBm, 130(±2) Hz) appears in JIS-A
(IHF) mode on noise meter and oscilloscope.
6. Turn the VOLUME knob to the MAX position, the
LOW knob to the CUT, and see if the proper sine
wave (-32.0(
±1.5) dBm, 130(±2) Hz) appears in JIS-A
(IHF) mode on noise meter and oscilloscope.
7. Turn the VOLUME knob to the MAX position, the
LOW knob to the BOOST, and see if the proper sine
wave (-20.0(
±1.5) dBm, 130(±2) Hz) appears in JIS-A
(IHF) mode on noise meter and oscilloscope.
8. Turn OFF the power.
'RESIDUAL NOISE AND PLAYING CHECK
1. Turn the power ON without pressing any pads.
After a few moments, Fig.9 appears on the display.
2. Turn the VOLUME knob to the MIN position, the LOW
knob to the FLAT, and measure the residual noise
without pressing any pad. The noise level should be
under -78.0 dBm for both LINE OUT L and R,
measured with noise meter in JIS-A (IHF) mode.
3. PLAYING CHECK
Connect the headphones and press the [START]
button, when Fig.9 is on the display.
4. Turn the VOLUME knob to the MAX position. Make
sure that the sound from the headphones or the
monitor speakers is not distorted. Also make sure
that you don't hear any noise from the both output.
5. Lift up the unit to about 10cm height. Drop it for 2 or 3
times add a shock and see if the pattern stops or the
note skips will not occur.
6. If the pattern is played correctly, press the [STOP]
button and turn the power OFF.
'RESIDUAL NOISE AND PLAYING CHECK
1. Connect the stabilized power supply (+9.0V) to the
BATTERY TERMINAL's(+) and (-), then turn the
power ON.
2. When you see Fig.9 on the display, turn the power
OFF.
This is the end of the test.
1. There would be an error when Fig.10-14 appears on
the display. Please check the related part and repair.
Be sure to BULK DUMP the data before removing the
Lithium Battery or examining the circuit upon
repairing.
2. If Fig.10 appears:
-> BULK DUMP the data first, then exchange the
Lithium Battery.
If the alert sign still keeps showing up, please
check the circuits around BATTERY.
3. If Fig.11 appears:
-> Check whether the MIDI IN and OUT jacks are
connected by a single MIDI cable.
If the alert sign still appears, please check the
circuits around MIDI.
4. If Fig.12 appears:
-> This sign appears when 2 or more switches are
pressed at he same time.
If the sign appears when pressing only one
Switch, please check the Diodes in the SW
scanning line.
ERROR MESSAGE
Backup Battery
Low !
Fig.10
CAUTION !
DOUBLE SW ERROR
Fig.12
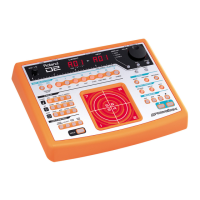
DR-202
Jul, 1998
 Loading...