Do you have a question about the Russell Hobbs 10968S and is the answer not in the manual?
Essential safety precautions and warnings for operating the coffee maker.
Steps to take before using the coffee maker for the first time, including cleaning.
Step-by-step instructions for filling water, coffee, and starting the brewing process.
How to set the clock and program the coffee maker to brew coffee at a later time.
Step-by-step guide for cleaning the coffee maker parts after use.
Instructions on how to remove scale build-up to maintain performance.
Details the warranty period, coverage, and exclusions.
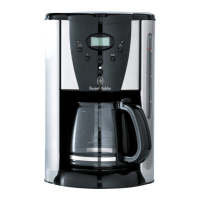
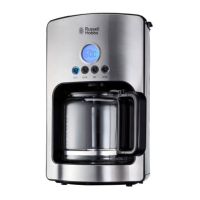
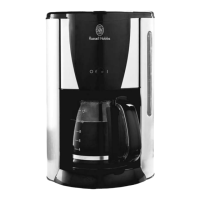
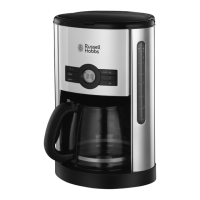
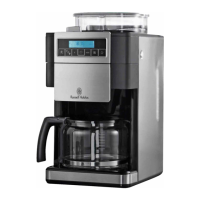
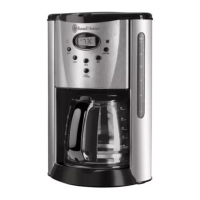
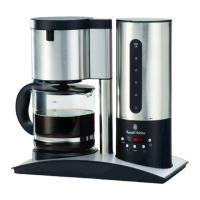
The Russell Hobbs Filter Coffee Maker 10968S is a 10-12 cup stainless steel coffee maker with a digital timer, designed for ease of use, safety, and reliability. This appliance is intended for domestic use and offers various features for brewing and maintaining your coffee.
The primary function of this device is to brew filter coffee. It utilizes a cone-shaped filter system, allowing for the use of either standard #4 paper filters or permanent nylon filters. The coffee maker is designed to work exclusively with cold water, which is poured into a water reservoir and then heated to brew the coffee. The brewed coffee drips into a glass carafe, which is placed on a hotplate. The hotplate's function is to keep the coffee warm after brewing is complete.
The coffee maker includes a digital timer, offering both immediate brewing ("COFFEE NOW") and delayed brewing ("COFFEE LATER-USING THE TIMER") options. The timer allows users to set a specific time for the coffee maker to start brewing automatically. An auto shut-off feature is also integrated, which automatically turns off the coffee maker once the brewing cycle has completed, enhancing safety and energy efficiency.
A "Pause and Pour" (drip stop) feature is included, which allows the user to remove the carafe during the brewing process to pour a cup of coffee without drips. However, it is important to replace the carafe within 25 seconds to prevent overflowing.
To operate the coffee maker, it should be placed on a flat, level, heat-resistant surface near an electrical power supply. The mains lead should be routed to avoid accidental snagging or tripping.
Before first use, it is recommended to unpack the machine, wipe the exterior with a damp cloth, and wash the removable parts (carafe, lid, and filter holder) with warm, soapy water, then rinse and dry. A preliminary rinse cycle, running water through the machine without coffee, is also advised to remove any dust.
To brew coffee, the water tank lid is pressed up and back to open. Cold water is filled into the water tank using the carafe, ensuring not to exceed the 'max' level. Alternatively, the water tank can be unlocked by turning it clockwise, lifted off, filled with cool water, and then re-locked by aligning the slot with the latch and turning anti-clockwise to clockwise. The carafe is then placed on the hotplate, ensuring it is correctly aligned to push up the non-drip valve.
The filter basket is accessed by pulling a tab, swinging it out to expose the filter. The desired amount of medium-ground filter coffee is placed into the filter basket. The manual suggests starting with two rounded teaspoons per cup, but this can be adjusted based on personal taste for stronger or milder coffee. After adding coffee, the basket is swung back into place. It is crucial not to overfill the filter.
For immediate brewing, the power cord is plugged into a 230-240V AC power outlet and turned on. The clock will flash 12:00. The brew button is then pressed, activating the brewing light, and coffee will begin to drip into the carafe shortly.
For delayed brewing, the clock is set using the 'h' and 'min' buttons (the pm light indicates afternoon). The timer is then set in the same manner, with the timer button pressed. After releasing the timer button, the auto button is pressed to activate the timer, and the auto light will illuminate. The brewing will then start at the pre-selected time. It is important to note that coffee cannot be made when 'auto' is on. To cancel the 'auto' setting, the timer button is pressed for a few seconds until the 'auto' light goes off. The display retains its settings until the machine is unplugged, at which point it resets to 12:00.
When pouring coffee during brewing, the carafe can be removed, and the non-drip valve will prevent dripping. However, the carafe must be replaced within 25 seconds to avoid overflow. Once the carafe is empty, the brew button is pressed, the machine is unplugged, and allowed to cool down before cleaning or refilling.
For brewing a second pot of coffee, it is recommended to allow the coffee maker to cool down for at least 10 minutes between cycles. During this time, the used coffee filter should be disposed of (if using a paper filter), and the carafe and removable filter basket rinsed with water. A fresh filter is then placed in the basket, and the brewing procedure is repeated.
Regular cleaning and maintenance are essential for ensuring the longevity of the coffee maker and for making great-tasting coffee. Before any cleaning operation, the machine must be unplugged from the mains supply and allowed to cool down completely.
The cleaning process involves:
It is crucial not to wash any part of the coffee maker in a dishwasher, nor to immerse the machine in any liquid. Harsh or abrasive cleaners or solvents should not be used. The carafe and carafe lid should be cold before cleaning. The base plate can be wiped with a clean damp cloth. The inside of the water reservoir should not be cleaned with a cloth, as this might leave fuzzy deposits; instead, it should be rinsed with cold water periodically.
Descaling is a vital maintenance task to prevent scale build-up, which can overheat the element, reduce its working life, and cause it to cut out prematurely. Descaling should be done frequently using a de-scaler suitable for plastic-bodied products, following the descaler's instructions. After descaling, the carafe should be emptied, and the machine run twice without coffee to ensure no chemical residues are left. Products returned under warranty with faults due to scale will be subject to a repair charge.
For optimum coffee flavor, it is recommended to use fresh, cool water and finer granules of coffee, as they promote a fuller extraction and rich, full-bodied coffee. Storing unused coffee in a cool, dry place, preferably sealed in the refrigerator or freezer, helps maintain its freshness. Re-using coffee granules or re-heating brewed coffee is not recommended as it impairs the flavor. Small oil drops on the surface of brewed black coffee are normal due to oil extraction, especially with heavily roasted coffee, but excessive oiliness might indicate a need for cleaning.
| Type | Filter Coffee Maker |
|---|---|
| Power | 1000 Watts |
| Keep Warm Function | Yes |
| Water Level Indicator | Yes |
| Programmable Timer | Yes |
| Cups | 12 Cups |
| Anti-Drip System | Yes |
| Removable Filter Holder | Yes |
| Permanent Filter | Yes |
| Cord Storage | Yes |