3
English
GB
FR DE ES IT NL PT DK SE FI NO RU PL CZ HU RO LV LT EE HR SI SK GR TR
Rated speed 11,000 min
-1
11,000 min
-1
Overall length 310 mm 310 mm
Net weight 2.35 kg 2.4 kg
NOTE: Be sure to check the nameplate on the product,
because the voltage is subject to change depending on
the area in which the product is to be used.
Maximum circumferential speed of grinding wheel: 4,800
m/min
Example of calculation:
3.14 x 125 x 11,000/1,000
=
4,320
Circumferential speed of
grinding wheel
4,320
Wheel diameter 125
Rated speed of grinder 11,000
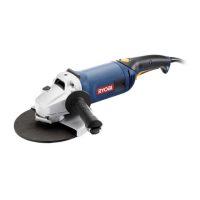
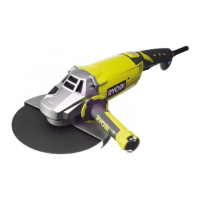
STANDARD ACCESSORIES
Auxiliary handle
Wrench
A grinding wheel is included in the standard accessories
for some countries.
OPERATION
See Figure 3.
WARNING
Keep safety guards in place. Never cover the air vents
since they must always be open for proper motor
cooling.
The key to ef cient operating is controlling the pressure
and surface contact between the disc and work piece. Flat
surfaces are ground at an acute angle, usually 10 to 20
degrees with the work piece. Allow the disc to reach full
speed before starting to grind. Too great an angle causes
concentration of pressure on a small area which may
gouge or burn work surface.
SWITCH
See Figure 2.
This tool is started and stopped by sliding and
releasing the switch.
For the convenience of continuous operation, slide the
switch along then press the front end down to lock it.
To release the lock, press the rear end of the switch.
MOUNTING THE GRINDING WHEEL
See Figure 4-5.
Attach the disc flange and the wheel on the spindle
before fitting the clamp nut.
Ensure that the wheel is correctly seated over the boss
on the disc flange and clamp nut.
Depress the lock button located on the right side of
gear case.
Using the wrench provided, tighten the clamp nut in a
clockwise direction.
WARNING
Check carefully whether or not there are cracks in the
wheel. Replace a cracked wheel immediately.
TOOL-LESS WHEEL GUARD
See Figure 6-7.
Release the wheel guard lock lever then turning the tool-
less wheel guard to the desired position. The maximum
turning axle is 90° on either side; otherwise the guard can't
be locked.
LIVE TOOL INDICATOR
This tool features a live tool indicator which illuminates as
soon as the tool is connected to the supply. This warns the
user that the tool is connected and will operate when the
switch is pressed.
MAINTENANCE
After use, check the tool to make sure that it is in good
condition.
It is recommended that you take this tool to a Ryobi
Authorized Service Center for a thorough cleaning and
lubrication at least once a year.
WARNING
Do not make any adjustments while the motor is in
motion.
Always disconnect the power cord from the socket
before changing removable or expendable parts
(grinding disc, cutting disc, etc.), before lubricating or
working on the unit.
WARNING
To ensure safety and reliability, all repairs should be
performed by an authorized service center or other
quali ed service organization.
 Loading...