4
ELECTRICAL ADJUSTMENT
PLAYBACK PHASE
ADJUSTMENT PROCEDURE
1. Play back the test tape. (DP-2)
2. Set the oscilloscope to the CHOP mode. Connect CH1 to the SW PULSE (PIN 3 of PT01)
3. Connect CH2 to the ENVE signal (PIN4 of PT01)
4. Insert PATH JIG and press "REC" button on the remote control.
5. Check the position of the V-sync from the rising edge of the SW pulse.
(Standard : 6.5H
±
0.5H)
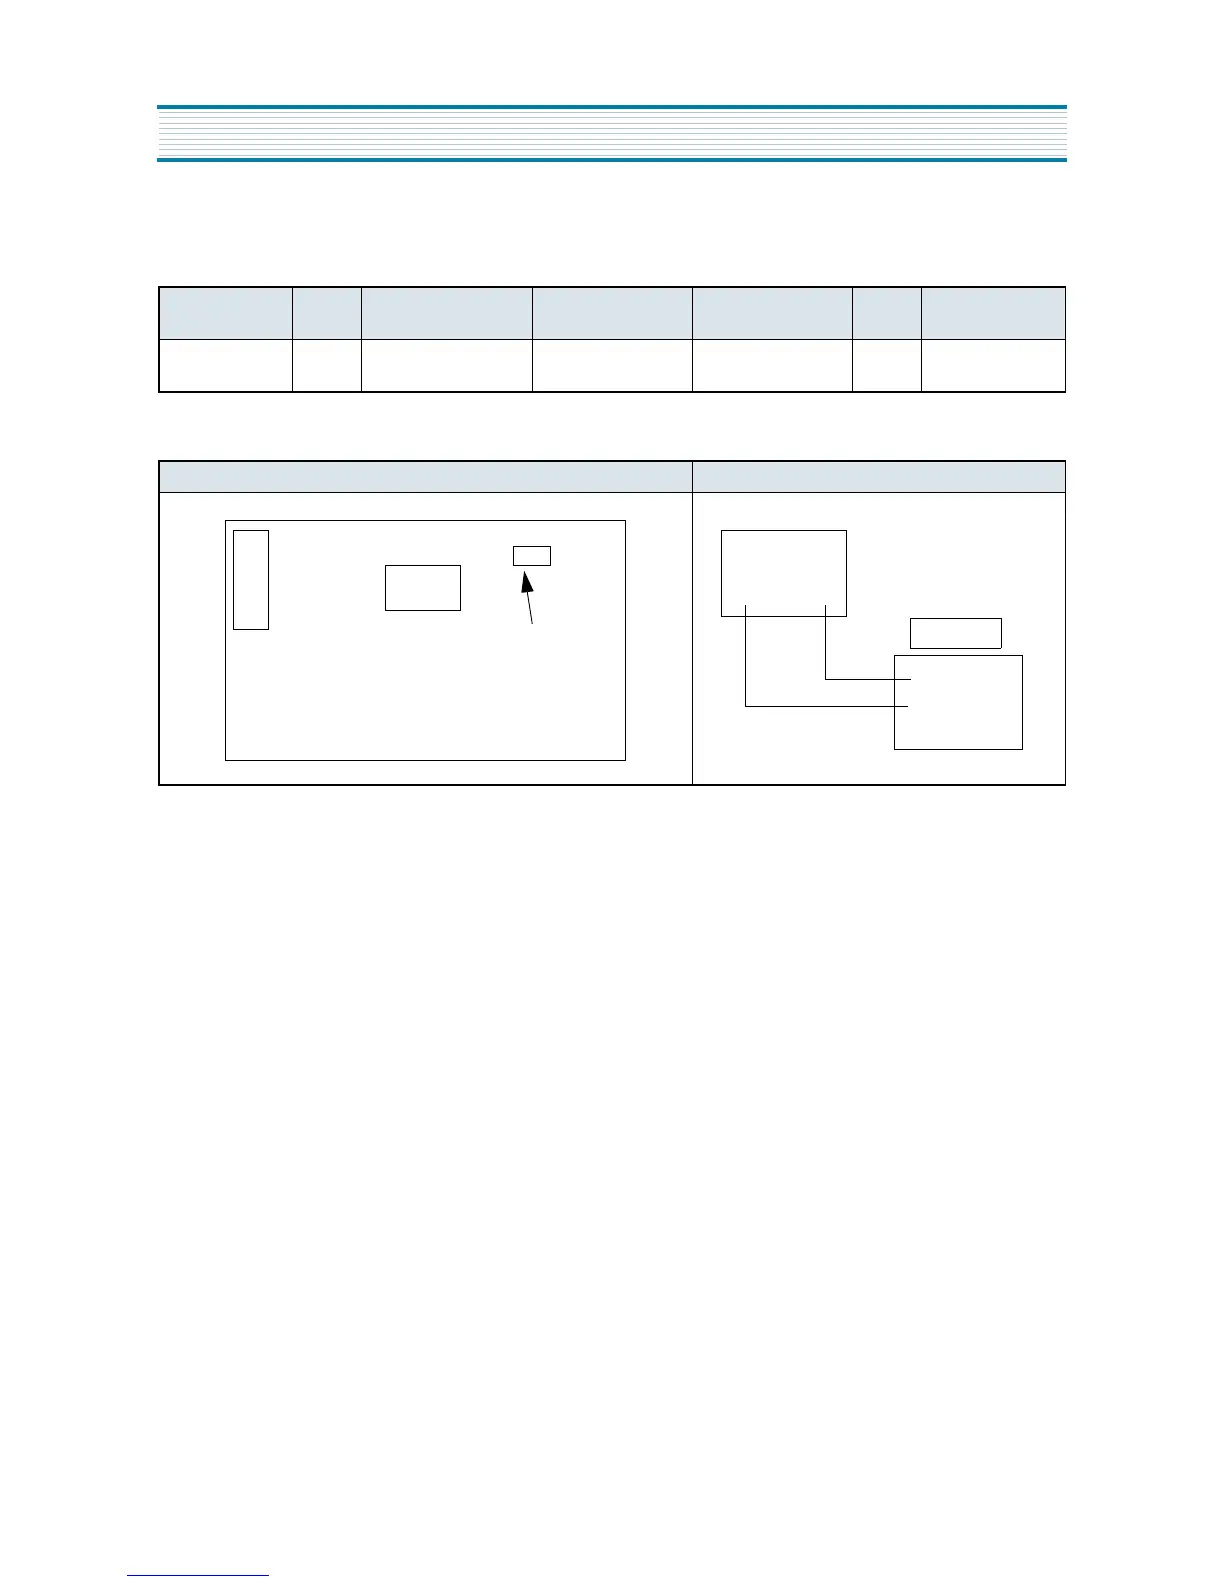
ITEM MODE
ADJUSTMENT
POINT
CHECK POINT
TEST
EQUIPMENT
TEST
TAPE
INPUT
SIGNAL
6.5H
ADJUSTMENT
PLAY [REC] BUTTON
PIN 3 & PIN 4
OF PT01
OSCILLOSCOPE DP-2 NO SIGNAL
ADJUSTMENT PARTS MEASURING POINT
PCB : MAIN - TOP VIEW
TMI
BLOC
PRE-
AMP
PT01
TO PATH JIG
OSCILLOSCOPE
CH1 CH2
PATH JIG
 Loading...