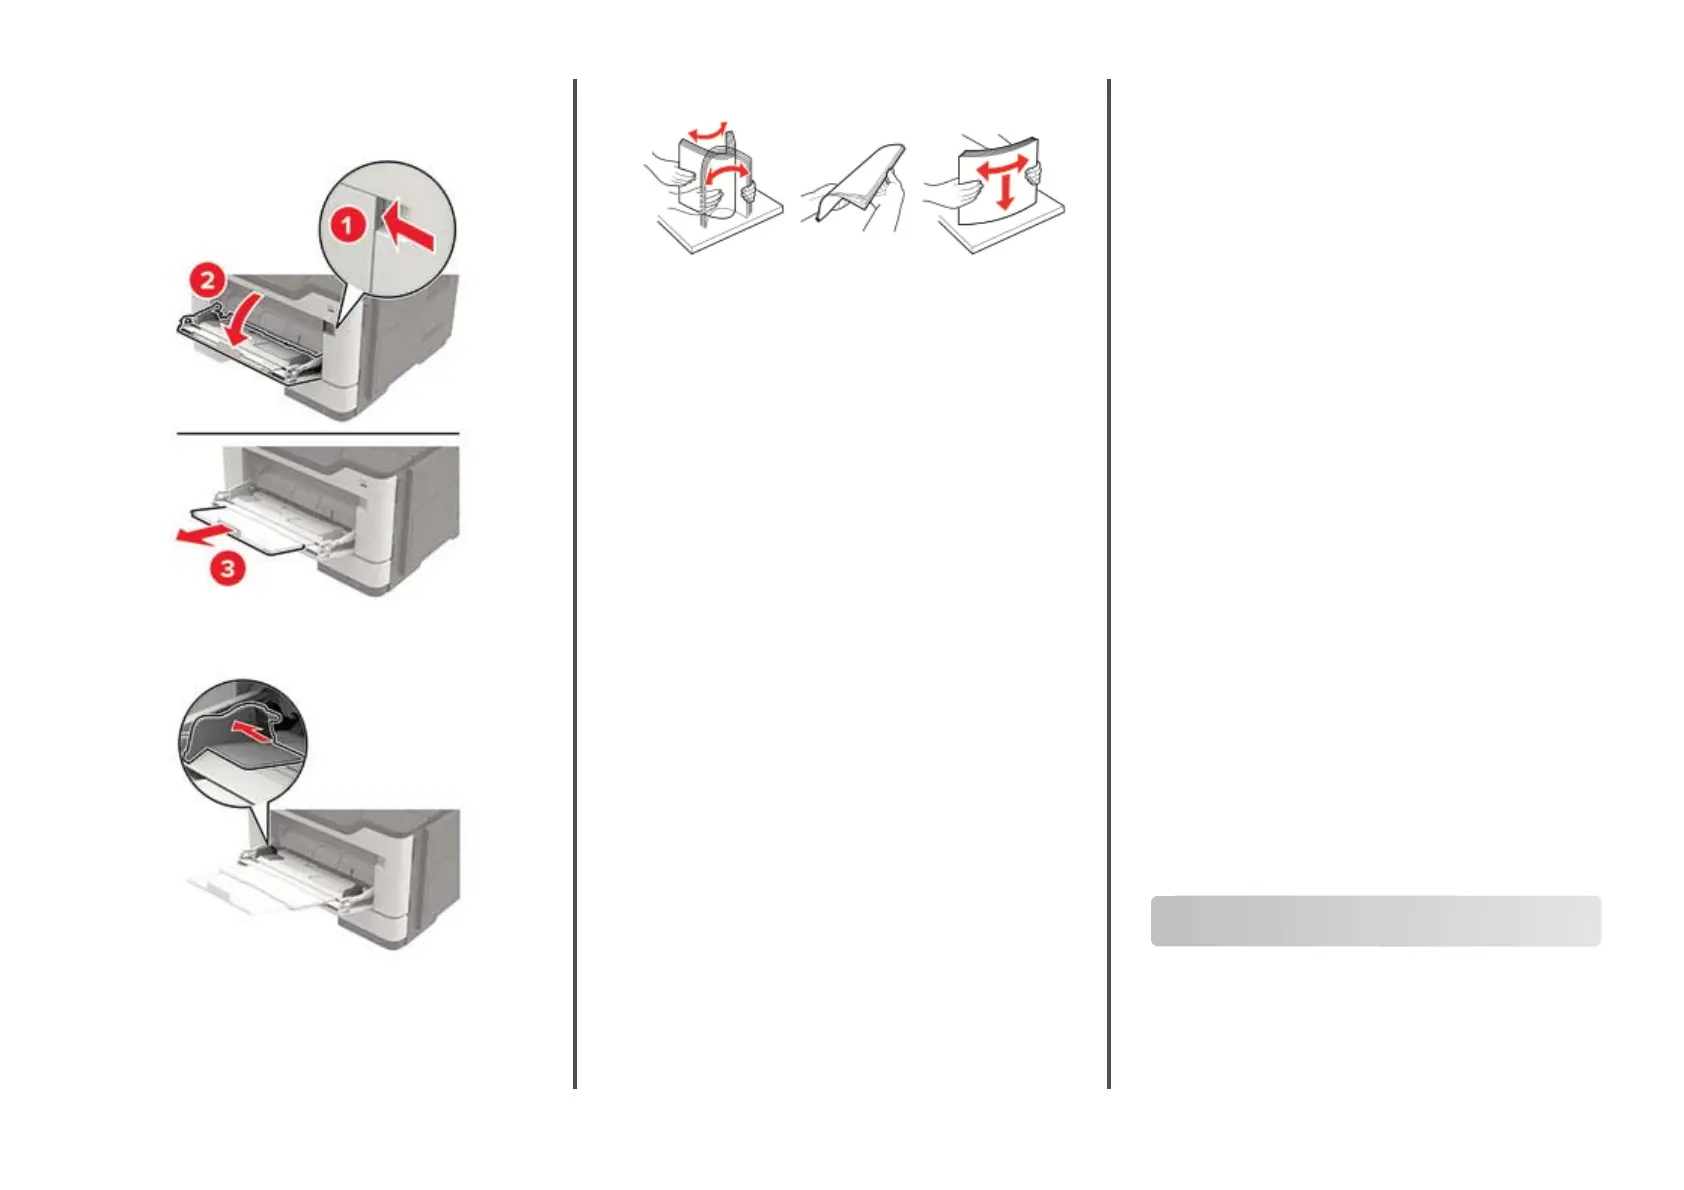
Loading the multipurpose feeder
1
Open the multipurpose feeder.
2
Adjust the guide to match the size of the paper that you are
loading.
3
Flex, fan, and align the paper edges before loading.
4
Load paper with the printable side faceup.
Notes:
•
Load letterhead faceup with the top edge of the sheet
toward the front of the tray for one
‑
sided printing.
•
Load letterhead facedown with the bottom edge of the
sheet toward the front of the tray for two
‑
sided printing.
•
Load envelopes with the flap facedown on the left side.
•
Load European envelopes with the
flap
facedown and
entering the printer first.
Warning—Potential Damage: Do not use envelopes with
stamps, clasps, snaps, windows, coated linings, or self
‑
stick
adhesives.
5
From the control panel, set the paper size and paper type to
match the paper loaded.
Setting the paper size and type
1
From the home screen, navigate to:
Settings > Paper > Tray
Configuration
> Paper Size/Type >
select a paper source
2
Set the paper size and type.
Connecting a mobile device to the
printer
Before connecting your mobile device, make sure to do the
following:
•
Enable Wi
‑
Fi Direct in the printer. From the control panel,
navigate to: Settings > Network/Ports > Wireless > Enable
Wi
‑
Fi Direct.
•
Show the preshared key (PSK) on the Network Setup Page.
From the control panel, navigate to: Settings > Network/Ports
> Wi
‑
Fi Direct > Show PSK on Setup Page.
•
Print the Network Setup Page. From the control panel, navigate
to: Settings > Reports > Network > Network Setup Page.
Connecting using Wi‑Fi Direct
1
From the mobile device, go to the settings menu.
2
Enable Wi
‑
Fi, and then tap Wi
‑
Fi Direct.
3
Select the printer SSID.
4
Confirm the connection on the printer control panel.
Connecting using Wi‑Fi
1
From the mobile device, go to the settings menu.
2
Tap Wi
‑
Fi, and then select the printer SSID.
Note: The string DIRECT-xy (where x and y are two
random characters) is added before the SSID.
3
Enter the PSK.
Note: The PSK is the password.
Notes:
•
You can change the SSID on the control panel. Navigate to:
Settings > Network/Ports > Wi
‑
Fi Direct > SSID.
•
You can also change the PSK on the control panel. Navigate
to: Settings > Network/Ports > Wi
‑
Fi Direct > Set PSK.
Connecting the printer to a Wi‑Fi
network
Make sure that Active Adapter is set to Auto. From the home
screen, touch Settings > Network/Ports > Network Overview >
Active Adapter.
1
From the home screen, touch Settings > Network/Ports >
Wireless > Setup On Printer Panel > Choose Network.
2
Select a Wi
‑
Fi network, and then type the network password.
Note: For Wi
‑
Fi
‑
network
‑
ready printer models, a prompt for
Wi
‑
Fi network setup appears during initial setup.
Clearing jams
Avoiding jams
Load paper properly
•
Make sure that the paper lies
flat
in the tray.
6

 Loading...