18
OVEREDGING
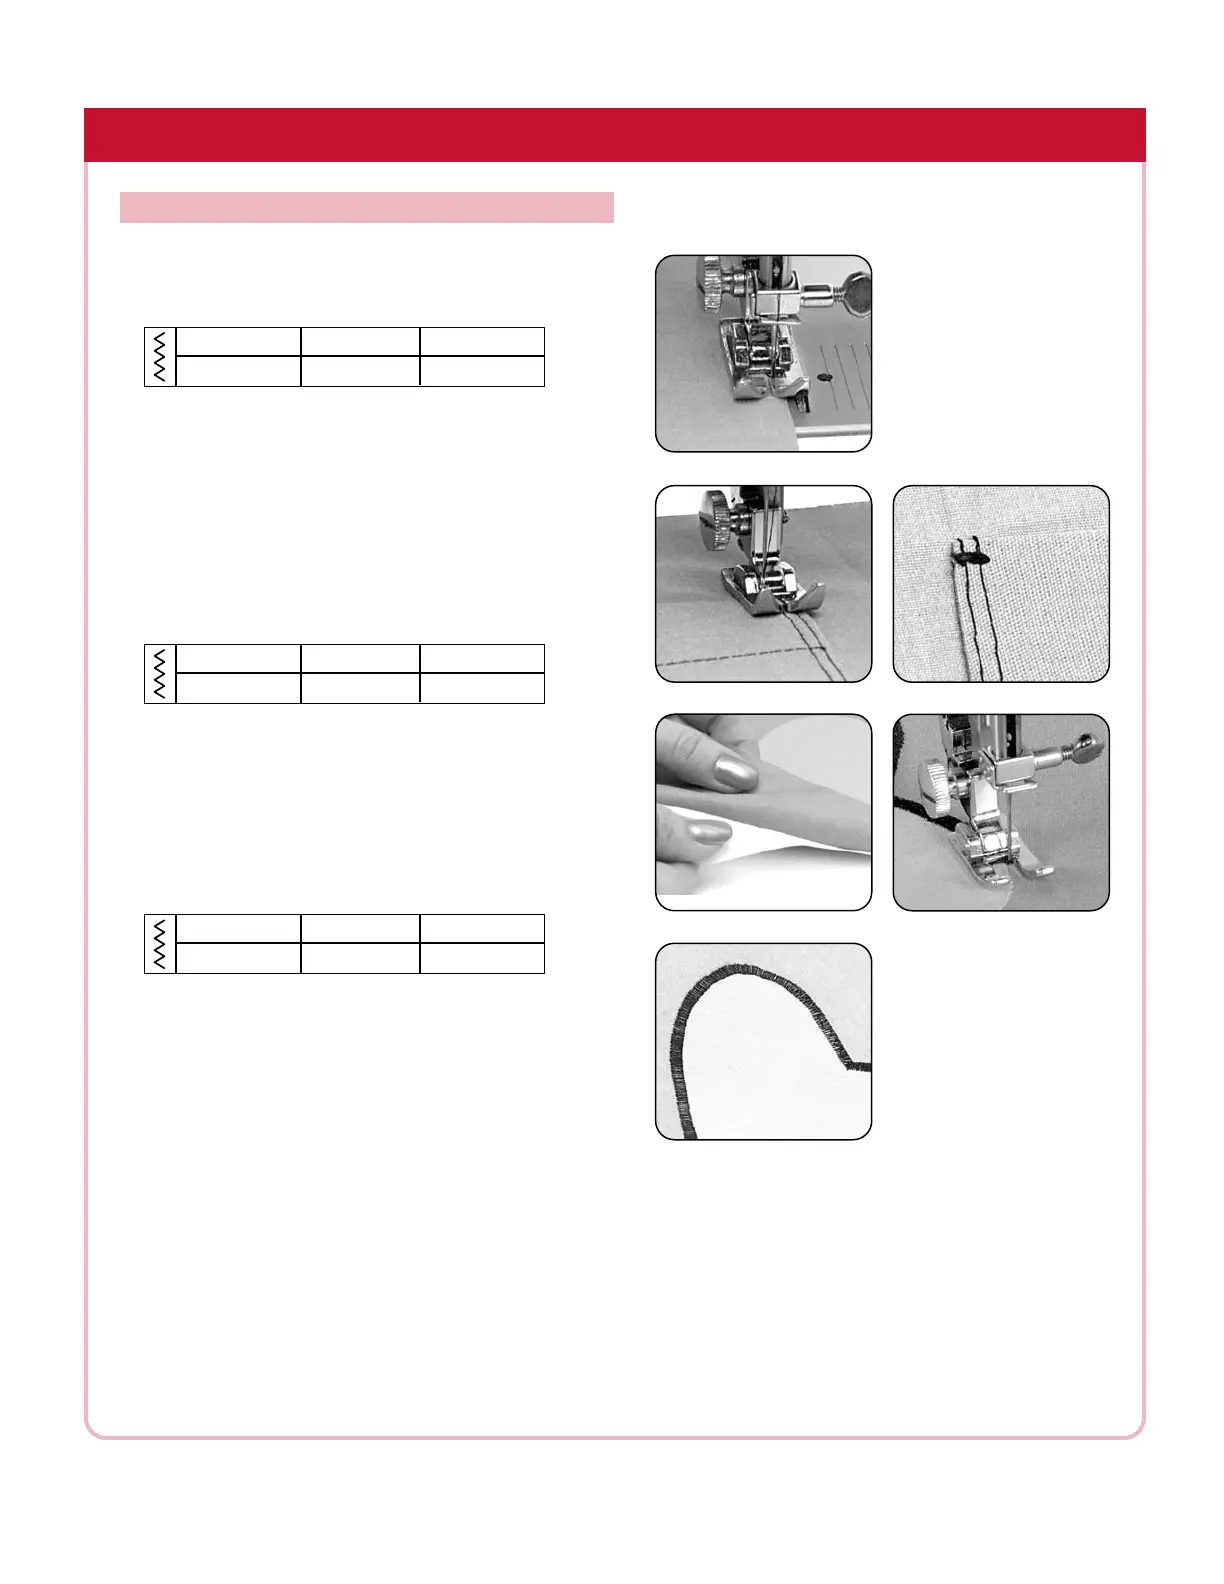
The zigzag stitch is handy for overedging facings, hems,
and seam allowances to minimize raveling.
Position the fabric under the presser foot so the right
swing of the stitch forms just inside the edge of the fabric
[Fig. 1]. Test the position by turning the handwheel
toward you and manually "walking" the needle before
you begin sewing. Sew, guiding the fabric evenly.
BARTACKING
This stitch is excellent for reinforcing pocket corners and
belt loops. Because the feed teeth are lowered, there is
no need to make stitch length adjustments.
Determine the location for the bar tac
k and position the
fabric under the needle.
Sew 4-6 stitc
hes [Fig. 2].
Raise the needle to its highest position.
Turn the stitch
width dial to 0 and sew 3-4 stitches to secure the stitch.
SATIN STITCH for APPLIQUÉ
Use this popular, zigzag stitch creatively to sew appliqués.
Fuse a fabric appliqué shape to a base fabric. Place a
stabilizer beneath the base fabric [F
ig. 3].
Satin stitch around the cut edges of the appliqué shape
guiding the fabric so the right swing of the stitch falls just
ov
er the appliqué edge and into the base fabric [Fig. 4].
BUILT-IN STITCHES
ZIGZAG STITCH
Fig. 1
Fig. 2
Bartacking
Fig. 3
Fig. 4
Appliqué
STITCH WIDTH STITCH LENGTH PRESSER FOOT
3-5 2 All-purpose
STITCH WIDTH DROP FEED PRESSER FOOT
4-5 Lowered All-purpose
STITCH WIDTH STITCH LENGTH PRESSER FOOT
3-5 0.5-1 Open Toe
 Loading...