User's Manual
Congratulations
on
your
new
purchase
of
a
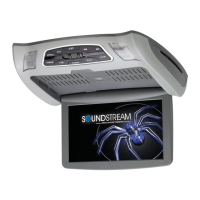
Overhead
Entertainment
System, Please
take
a
moment
to
fully
review
this
owner's
manual
thoroughly
prior
to
the
initial
operation,
which
will
provide
you
with
the
best
understanding
to
properly
opeate
your
new
Overhead
Entertainment System.
ASPECT
Adjust
screen
aspect
ratio
as
16:9and
4
:3
EXIT
Ex
it
from
the
NENU
or return to previous folder
EJECT
E
jec
t
the
Disc
from
the
unit
PREV
Previouschapterormo
ve
up
on
USB/SO
mode
NEXT
Next
chapter or
move
down
on
USB/SO
mode
D
IMM
ER
DimmerON
and
OFF
V.S
EL
Select
Video
mode
from
USB,
SO,
AV
AV2
,S
MART
and
OTV(optional)
POWER
Power
ON
and
OFF
PLAY
Playorpau
se
thefile
on
the
USB
/
SO
STOP
Stopplayingthefileonthe
USB
/S
O
0 0 0
c:::JSMART
VIDEO
l AUOI
OR
USB
Slot & Smart Phone Charging
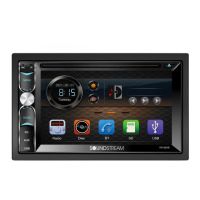
This
unit
has 7
different
Modes.
DVD,USB,SD, AV, AV2, SMART, DTV
t
I
1.
DVD
1) Put DVD
or
CD
on
the
slot
located
on
Right side panel
2) Press
V.SEL
button
on
the
unit
or
Remote
to
move
cursor
to
DVD
on
the
screen
3) Select desired
features
using Play
button
the
on
unit
or
Enter
button
on
the
Remote
4) Press "PLAY"
button
on
the
unit
or
remote
to
play & pause
the
file
5) Press "STOP"
button
on
the
unit
or
remote
to
stop
paying
the
file
6) Press "PREV","NEXT"
button
on
the
unit
or
remote
to
go
to
PREV
file
or
NEXT
file
7) Press "REW"
or
"FF"
button
on
the
unit
or
remote
to
rewind
or
fast
forward
8) Press
"EJECT"
button
on
the
unit
or
remote
to
take
the
DISC
out
from
unit
2.
USB
1) Put
USB
memory
on
the
port
located
on
left
side
panel
2)
Press
V.SEL
button
on
the
unit
or
Remote
to
move
cursor
to
USB
on
the
screen
3) Select desired
features
using Play
button
the
on
unit
or
Enter
button
on
the
Remote
4) Press "PLAY"
button
on
the
unite
or
remote
to
play
& pause
the
file
5) Press "STOP"
button
on
the
unit
or
remote
to
stop
paying
the
file
6) Press "PREV","NEXT"
button
on
the
unit
or
remote
to
go
to
PREV
file
or
NEXT
file
7) Press "EXIT"
button
on
the
unit
or
remote
to
move
to
previous
folder
or
screen
3.
SD
1) Put
SD
Memory
on
the
slot
located
on
the
side panel (Left side
of
the
unit)
2) Press
V.SEL
button
on
the
unit
or
remote
to
move
cursor
to
SD
on
the
screen
3)
Select
target
file using
I«
I
»I
buttons
on
the
unit
or
remote
4) Press "PLAY"
button
on
the
unit
or
remote
to
play & pause
the
files.
5) Press "EXIT"
button
on
the
unit
or
remote
to
move
to
previous
folder
4.AV
1) AV
input
locate
on
the
Side Panel (Left side
of
the
unit)
2) You can
simply
connect
Portable
or
Handheld
devices
to
this
front
AV
input
5.AV2
1) AV2
input
locate
on
the
top
of
unit
(marked
as
AV 2 IN)
2)
This
input
designed
for
slave
external
devices such
as
TV
tuner
or
Game console
6.SMART
1) Please
connect
SMART LINK cable
from
external
unit
to
Overhed's SMART
input
port.
2)
Please change
Video
mode
to
SMART
3)
Operate
External device (especially
video).
Same
picture
as
external
device
will
be
shown
on
the
Overhed
screen
7.DTV
1) This
input
designed
for
Digital TV.
2)
Only
able
to
watching
Digital TV
Conmect
with
TV-300
tuner
box
(sold seperately).
3) Defail Position
method
is
explained
on
TV-3
00
Manual.
••
ii•••
••••
SET-UP page
is
consist
with
4
different
settings. It's
General
Set up page, Audio Set up page,
Video
Set up
page and Prefere
nc
e page
*
Preference
page
only
able
to
OPEN
when
DVD
is
completely
"STOP" or "No
Di
sc
" position
When
DVD
is
playing
or
only
temporary
stop,
"Preference
page"
will
not
able
to
reach.
Please press "STOP" 2 t
ime
s to make Disc
completely
stop
or
OPEN
Monitor
flip
to
reach
"Preference
page"
1.
General
Set up Page
Please use-4 ,
..
,,
.
.A
buttons
and ENTER
button
to
go inside
of
detail
MENU
and
exit
from
detail
menu
1-
M
_
E
_
N
_
U
_~---j
DetaiiSelection
Default
Setting
TV Display
Select
Normai/PS,Normal
LB
or
Wide
Normai/LB/Wide
Angle
Mark
Select On or
Off
ON
OSD
Language Select
one
Language.Slanguages
are
available
English, English
Caption
Screen
Last
Memory
Chi
mese, French, G
erma
n,lta lia n,Span ish, Portuguese and Russian.
Select On or
Off
ON
SaverSelect On
or
Off
, ON
Select On
or
Off
[
oN
---~
Detail Selection
Default
Setting
Select
LT
/R
T or Ste_re_o
____________
~
__
ccStcce~recco
__
_,
3. Video Set up Page
MENU
Brightness
Contrast
Hue
Saturation
I Detail Selection
I -
16
-+16
-16
"'+16
-9-+9
-9-
+9
Default
Setting
00
00
00
00
4. Preference Set up Page
MENU
TV
Dype
Audio
Subtitle
Di
sc
MENU
Parental
Pass
Word
Defaul t
I DetaitSelection I
Default
Se
tt
ing
Select P
AL
TV,
Multi,
NT
SCTV
I
Multi
Select Audio
langage
from
English,French,Spanish,Romania or
Others
i English
Select
Audio
Langage
from
English French,Spanish,Romania or OFF English
Select
Audio
Language
from
English French,Spanish,Romania
or
Others
I ADULT
Select
one
from KID
SAF/G/PG/PG13/PGR/R/Nc17/
ON
Password
ON/OFF
SelectionS Password Change
Default
is
8888
1
RESET
. Press ENTER
to
I
'
RESET
•
Smart
phone
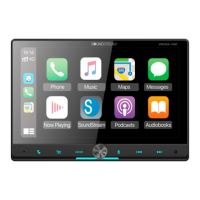
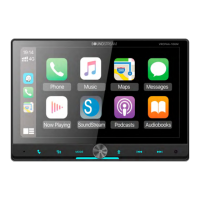
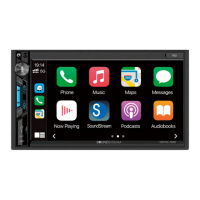
Interface
1) Basically,
operation
for
SMART LINK
function
of
Smart
phone
is
same
as
above
2) To
operate
your
Smartphone,
please
connect
the
specific cable
shown
below
3) Please
make
sure
USB
needs
to
be
connected
on
the
port
to
activate
SMART LINK
function
on
the
smart
phone
4) Please chose
one
cable
among
the
below
4 types
which
matching
with
your
smart
phone
type.
Model
No
.
Descriptions
SH-MU05-1500
Compatible
with
the
most
of
Android
phone
SH
-M
Ull-1500
Compatible
with
the
Galaxy
S3/Note2
SH
-IP30-
1500
Compatible
with
the
iPhone
4
SH-IPOS-1500
Compatible
with
the
iPhone
5
 Loading...