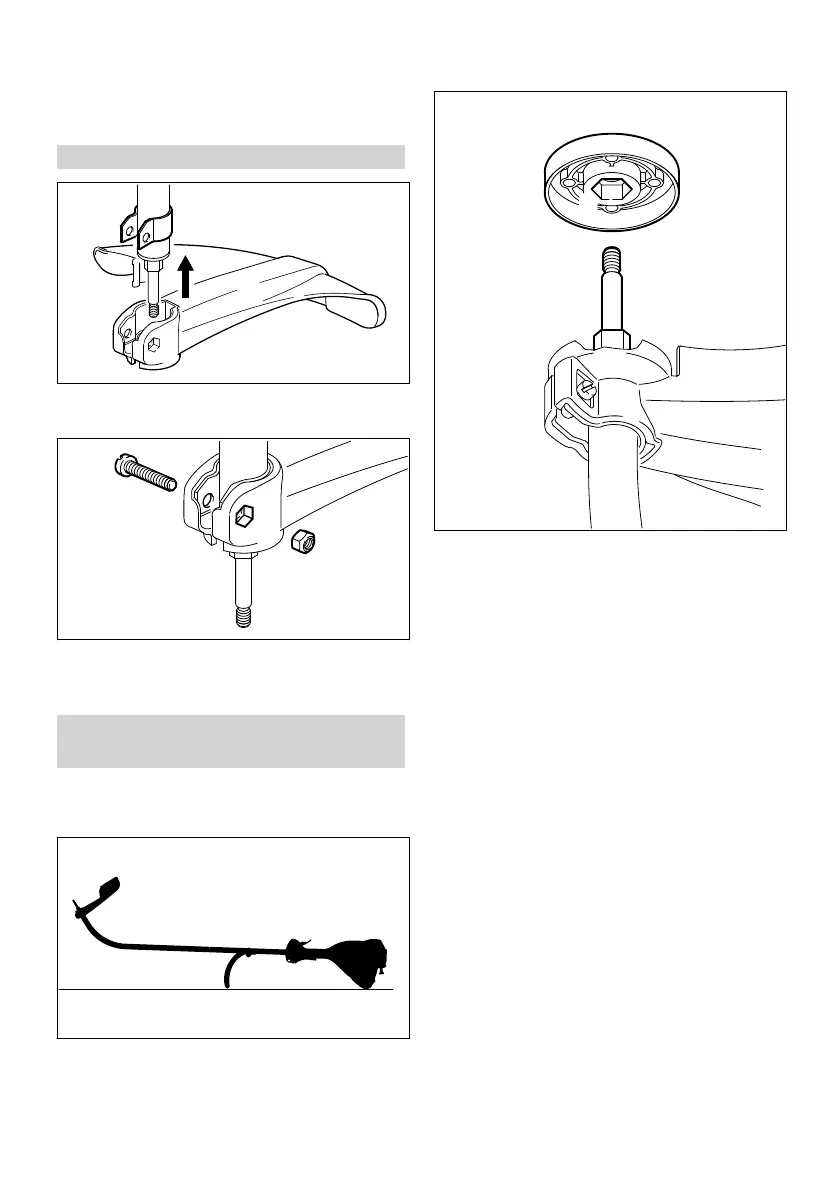
► Slide the handle to the required position.
► Tighten down the screw with the combination
wrench so that the handle cannot be rotated
on the drive tube.
5 Mounting the Deflector
► Push the deflector (1) over the clamp (2) as far
as stop.
► Insert the nut (3) in the hex recess in the
deflector – make sure the holes line up.
► Insert the screw (4) and tighten it down firmly.
6 Mounting the Cutting
Attachment
6.1 Placing power tool on the
ground
► Switch off the engine.
► Lay your trimmer on its back with the loop
handle and shroud pointing down and the out‐
put shaft facing up.
6.2 Thrust Plate
The thrust plate (1) is shipped with the Duro‐
Cut 5‑2 and PolyCut 6‑3. It is only required for
these mowing heads.
STIHL AutoCut 5-2 mowing head, STIHL Auto‐
Cut C 5-2 mowing head
► Pull the thrust plate (1), if fitted, off the shaft
(2).
STIHL PolyCut 5‑2 mowing head, STIHL Fix‐
Cut 6‑3 mowing head
► Slip the thrust plate (1) over the shaft (2) and
engage the hex recess (3) on the external
hexagon (4).
5 Mounting the Deflector English
0458-232-0121-F 11
 Loading...