95
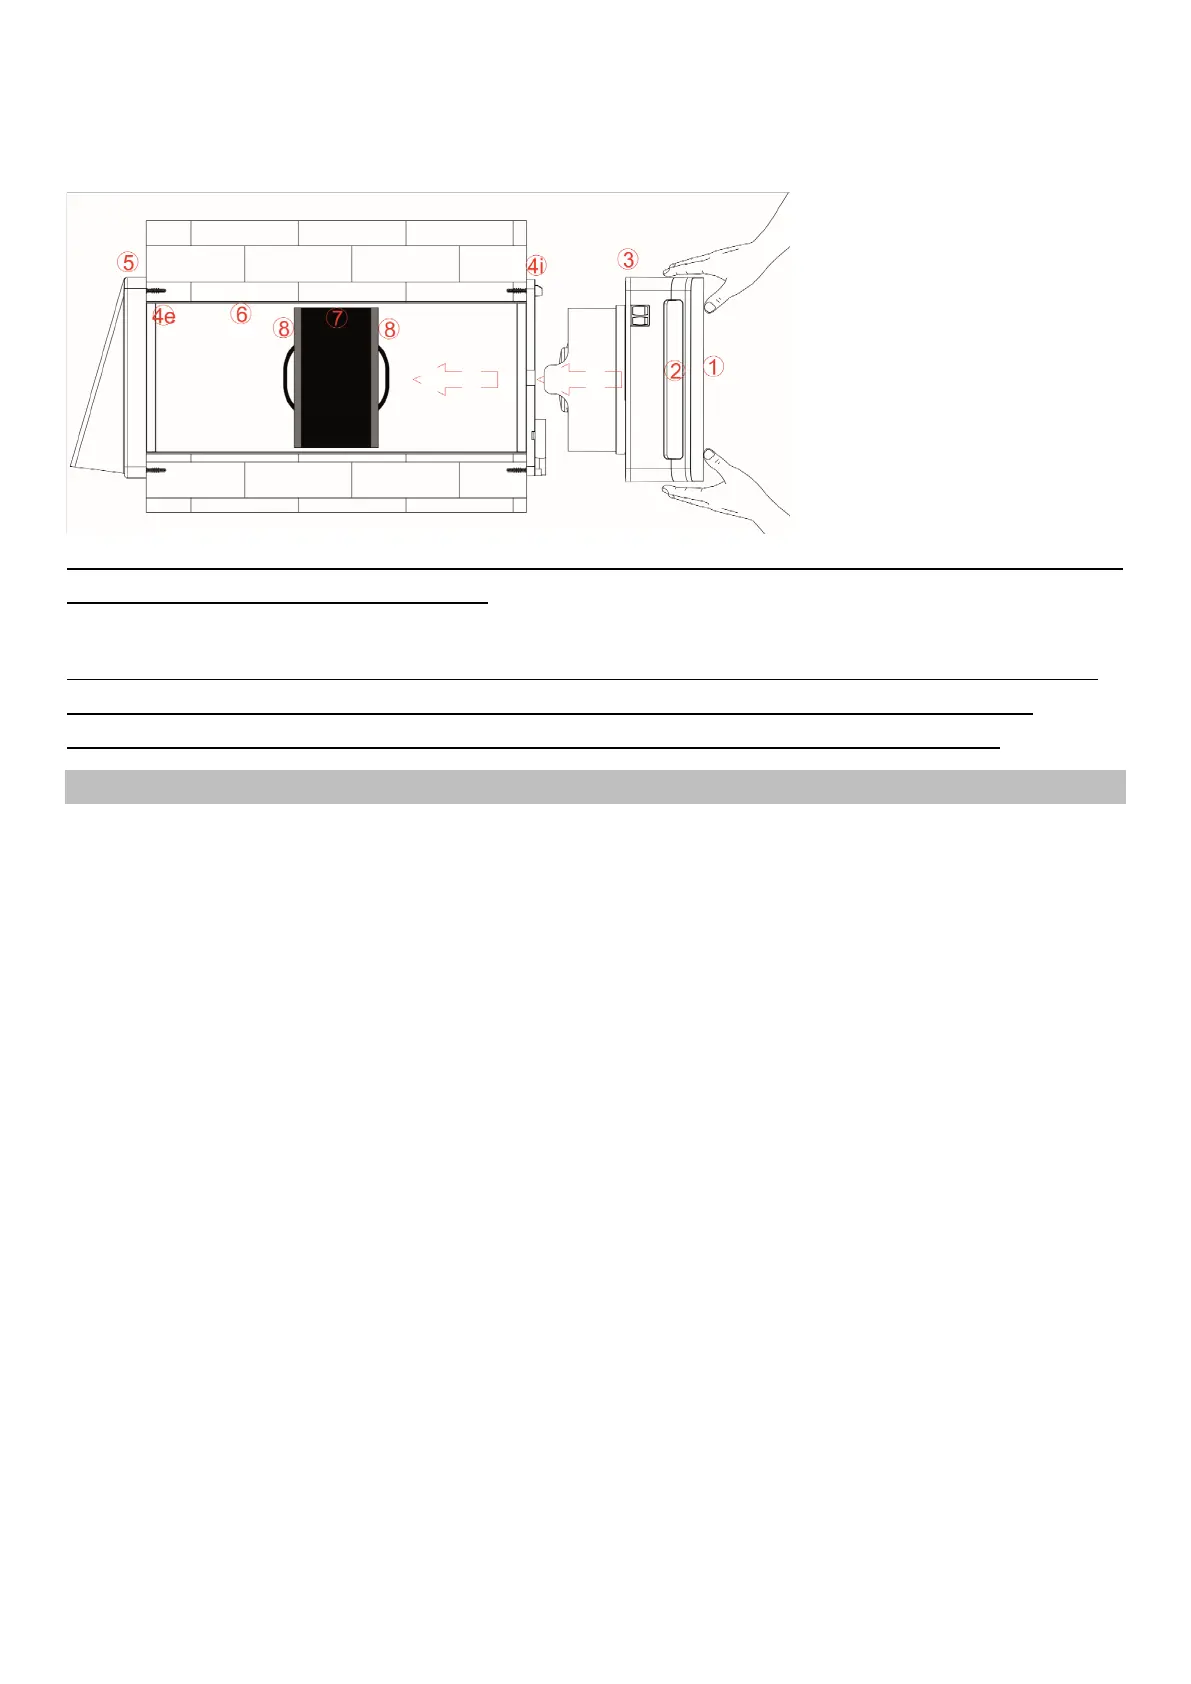
teeth.Make sure to have installed the main unit onto the wall, by turning on the switches on the
left.
Optional: pollen filter can be replaced by 2 black original filters. We recommend to use of pollen filter
as it might influence the device´s usage.
Optional: The silencer reduces noise from the outside by 20 percent. It’s placed between the heat
exchanger and the inner product. (P.S. is placed between heat exchangers and interior unit.
(Attention: The reduction of outside noise without silencer shall be approximately 40dB)
5.0 CONFIGURATION PRODUCTS MASTER SLAVE - ADVANCED
Chapters 3.4 and 3.5. explain the device´s power connection and configurations: Ensure that at the
master unit are no other connected devices between the clamps.
Follow the instructions for a correct configuration (given example: 3 units connected to master
slave):
1.) Press the switch (Master) on the left outside
2.) Other devices must set switch on “0”
3.) On the right side at the bottom a red light is flashing: wait for 10 seconds
4.) After 10 seconds the LED-light blanks out. Fast light impulses will appear for 2 seconds
(indicating the device´s configuration)
5.) Press AUTO on the remote control to activate the automatic service
(Once the red LED is turned off, press "AUTO"; if the LED gives the signal corresponding to
the AUTO mode, the product is configured correctly as MASTER.)
6.) Wait for 40 seconds until the closure cooled down and open the cover grill.
7.) After opening the cover grill the ventilator
8.) will be switched on automatically.
Only when the product is identified as the main unit MASTER, you can start configuring SLAVE1.
Ensure that the master unit is working correctly, before you switch on the downstream unit (SLAVE)
by turning on the switch “0/1”. Thereby the master unit is given enough time to configurate the
SLAVE-units in the requested order.
9.) Turn on switch on the left side (Slave 1)
 Loading...