12
&RPSRVLWH9LGHR&RQQHFWLRQ*RRG
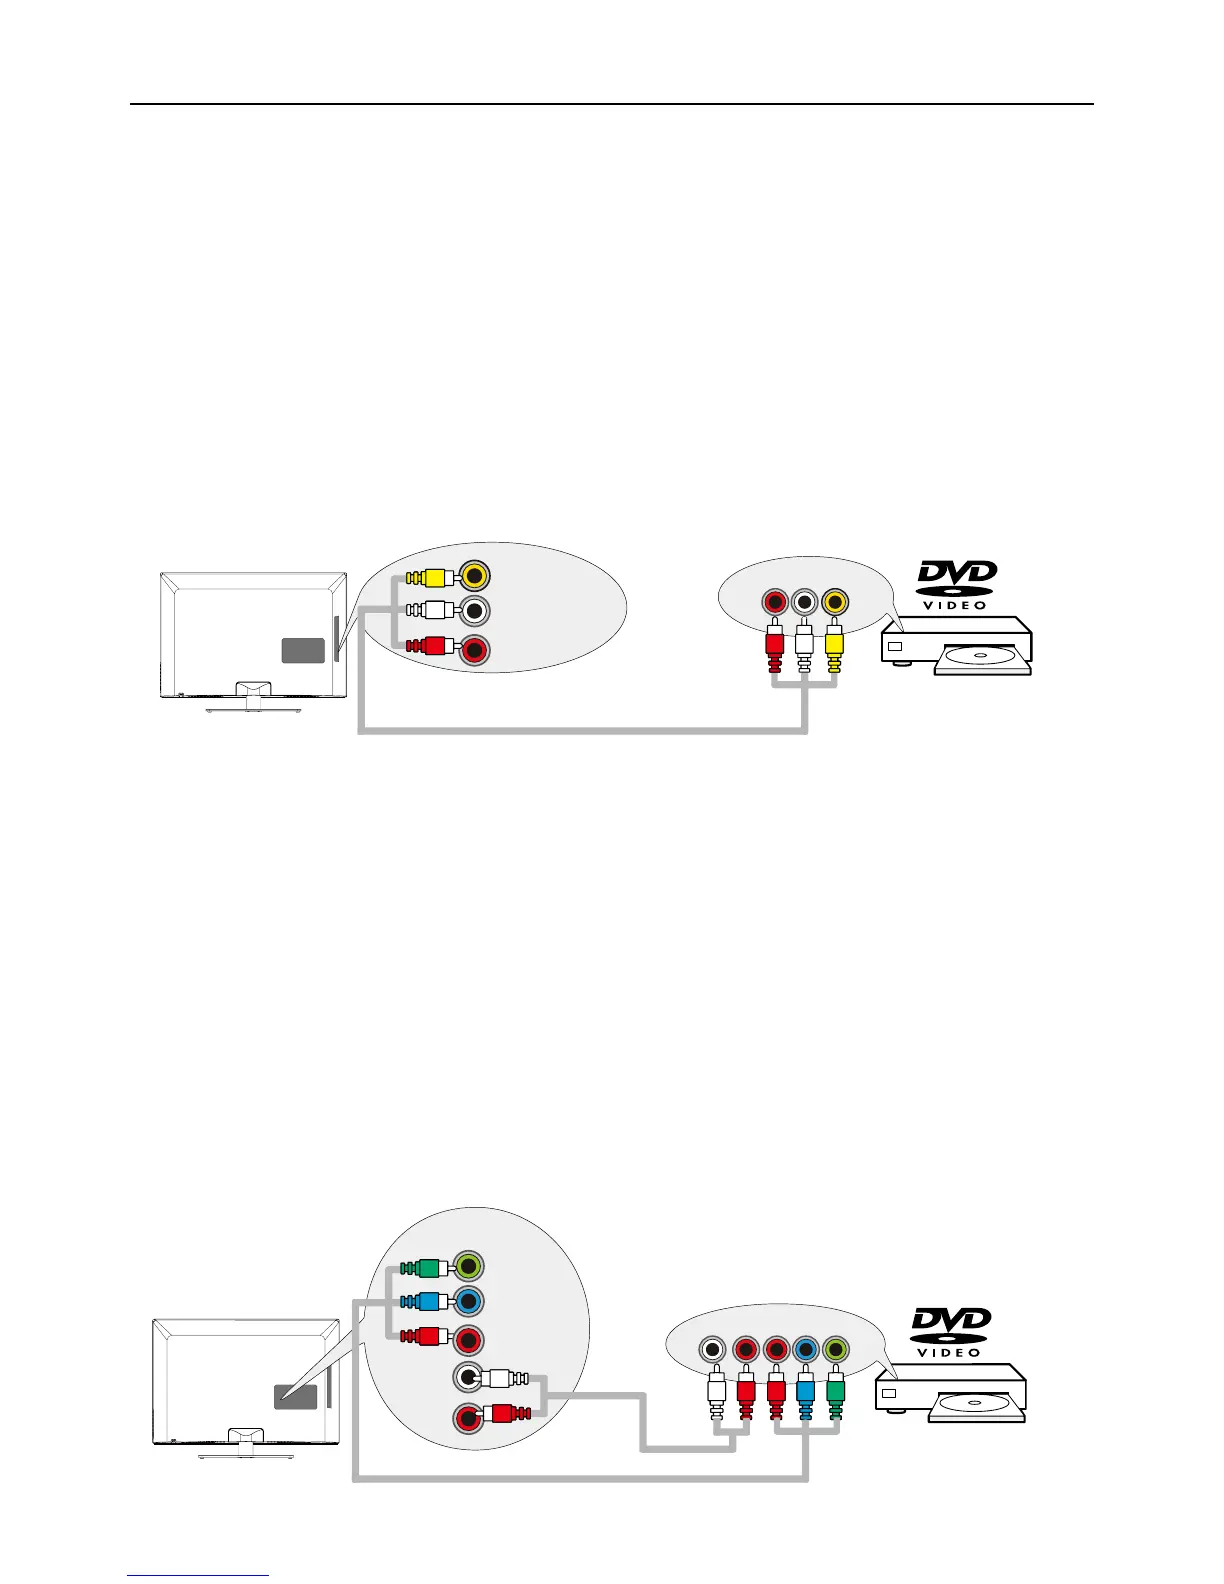
7RFRQQHFWDFRPSRQHQWZLWKDYLGHRRXWSXWMDFNVXFKDVD'9'SOD\HUIROORZWKHVHVWHSV
([DPSOH'9'3OD\HU
&RQQHFW\RXUFDEOHDQGRURIIDLUDQWHQQDDVGHVFULEHGRQSDJH
2. Connect the yellow video cable to the (AV2) VIDEOMDFNRQWKHVLGHRIWKH79DQGWRWKHYLGHR
RXWSXWMDFNRQWKH'9'SOD\HU
3. Connect the red and white audio cables to the (AV2ULJKWDQGOHIWDXGLRMDFNVRQWKHVLGHRIWKH79
DQGWRWKHDXGLRRXWSXWMDFNVRQWKH'9'SOD\HU
7XUQRQ\RXU79WKHQWXUQRQWKH'9'SOD\HU
5. Press the INPUT button on the remote control to open the Input list. Once open, press the INPUT
button repeatedly to select AV2.
Note: same operation for connection to the AV1RQWKHEDFNRIWKH79
7KLVLVDQH[DPSOHRIDFRQQHFWLRQXVLQJWKHFRPSRVLWHYLGHRMDFN
&RPSRQHQW9LGHR&RQQHFWLRQ%HWWHU
Component video connection offers better picture quality for video devices connected to the unit. To
FRQQHFWDFRPSRQHQWWKDWKDV<3E3UMDFNVVXFKDVD'9'SOD\HUIROORZWKHVHVWHSV
([DPSOH'9'3OD\HU
&RQQHFW\RXUFDEOHDQGRURIIDLUDQWHQQDDVGHVFULEHGRQSDJH
2.
Connect three video cables or special Y Pb Pr cables to the COMPONENT IN 1 (CMPT 1) Y Pb Pr
MDFNVRQWKHEDFNRIWKH79DQGWRWKH<3E3URXWSXWVRQWKH'9'SOD\HU
3. Connect your red and white audio cables to the COMPONENT IN 1 (CMPT 1) R and L AUDIO
MDFNVRQWKHEDFNRIWKH79DQGWRWKHDXGLRRXWSXWMDFNVRQWKH'9'SOD\HU
7XUQRQ\RXU79WKHQWXUQRQWKH'9'SOD\HU
5. Press the INPUT button on the remote control to open the Input list. Once open, press the INPUT
button repeatedly to select CMPT1.
Note: same operation for connection to the COMPONENT IN 2 (CMPT 2) on the back of the TV.
7KLVLVDQH[DPSOHRIDFRQQHFWLRQXVLQJWKHFRPSRQHQWYLGHRMDFNV
VIDEO
L
AUDIO
R
AUDIO/VIDEO
IN 2 (AV 2)
VIDEOLR
AUDIO
AUDIO/VIDEO OUT
LRPrPbY
COMPONENT
IN 1 (CMPT 1)
L
AUDIO
R
Y
Pb
Pr
COMPONENT OUT
 Loading...