14
Plug in the TV
3OXJWKHHQGRIWKHSRZHUFRUGRQWKHEDFNRIWKH79LQWRDQRXWOHW
LQVHUWLQJ WKH SOXJFRPSOHWHO\ 'RQRWSOXJWKH79LQWRDQRXWOHW
controlled by a light switch.
Put Batteries in the Remote
5HPRYHWKHEDWWHU\FRPSDUWPHQWFRYHUIURPWKHEDFNRIWKHUHPRWHFRQWUROE\SXVKLQJWKHWDEDQG
lifting off the cover.
,QVHUW$$$EDWWHULHVPDNLQJVXUHWKHSRODULWLHVDQGDUHDOLJQHGFRUUHFWO\
5HSODFHWKHFRYHU
Turn on the TV
7XUQRQ\RXU79E\SUHVVLQJWKH EXWWRQRQWKHVLGHRIWKH79RUWKH button on the remote control.
Using the Remote Control to Complete the Initial Setup
<RXZLOOQHHGWRXVHWKHUHPRWHFRQWUROWRFRPSOHWHWKHVHWXSRI\RXU797KHUHPRWHFRQWURODOORZV
\RXWRQDYLJDWHWKURXJKDQGVHOHFWLWHPVWKDWDSSHDULQWKHRQVFUHHQPHQXV7KHSURFHVVZRUNVWKH
same on all menu screens: highlight your choice and select it.
To highlight an item in the menu list, press the up or down arrow (
) to move up or down. Use the
left or right arrows (
) to view other selections for the highlighted menu choice or to display a sub-
menu.
Note: Highlighted items stand out from other menu items on the list (appear darker, brighter, or a
different color).
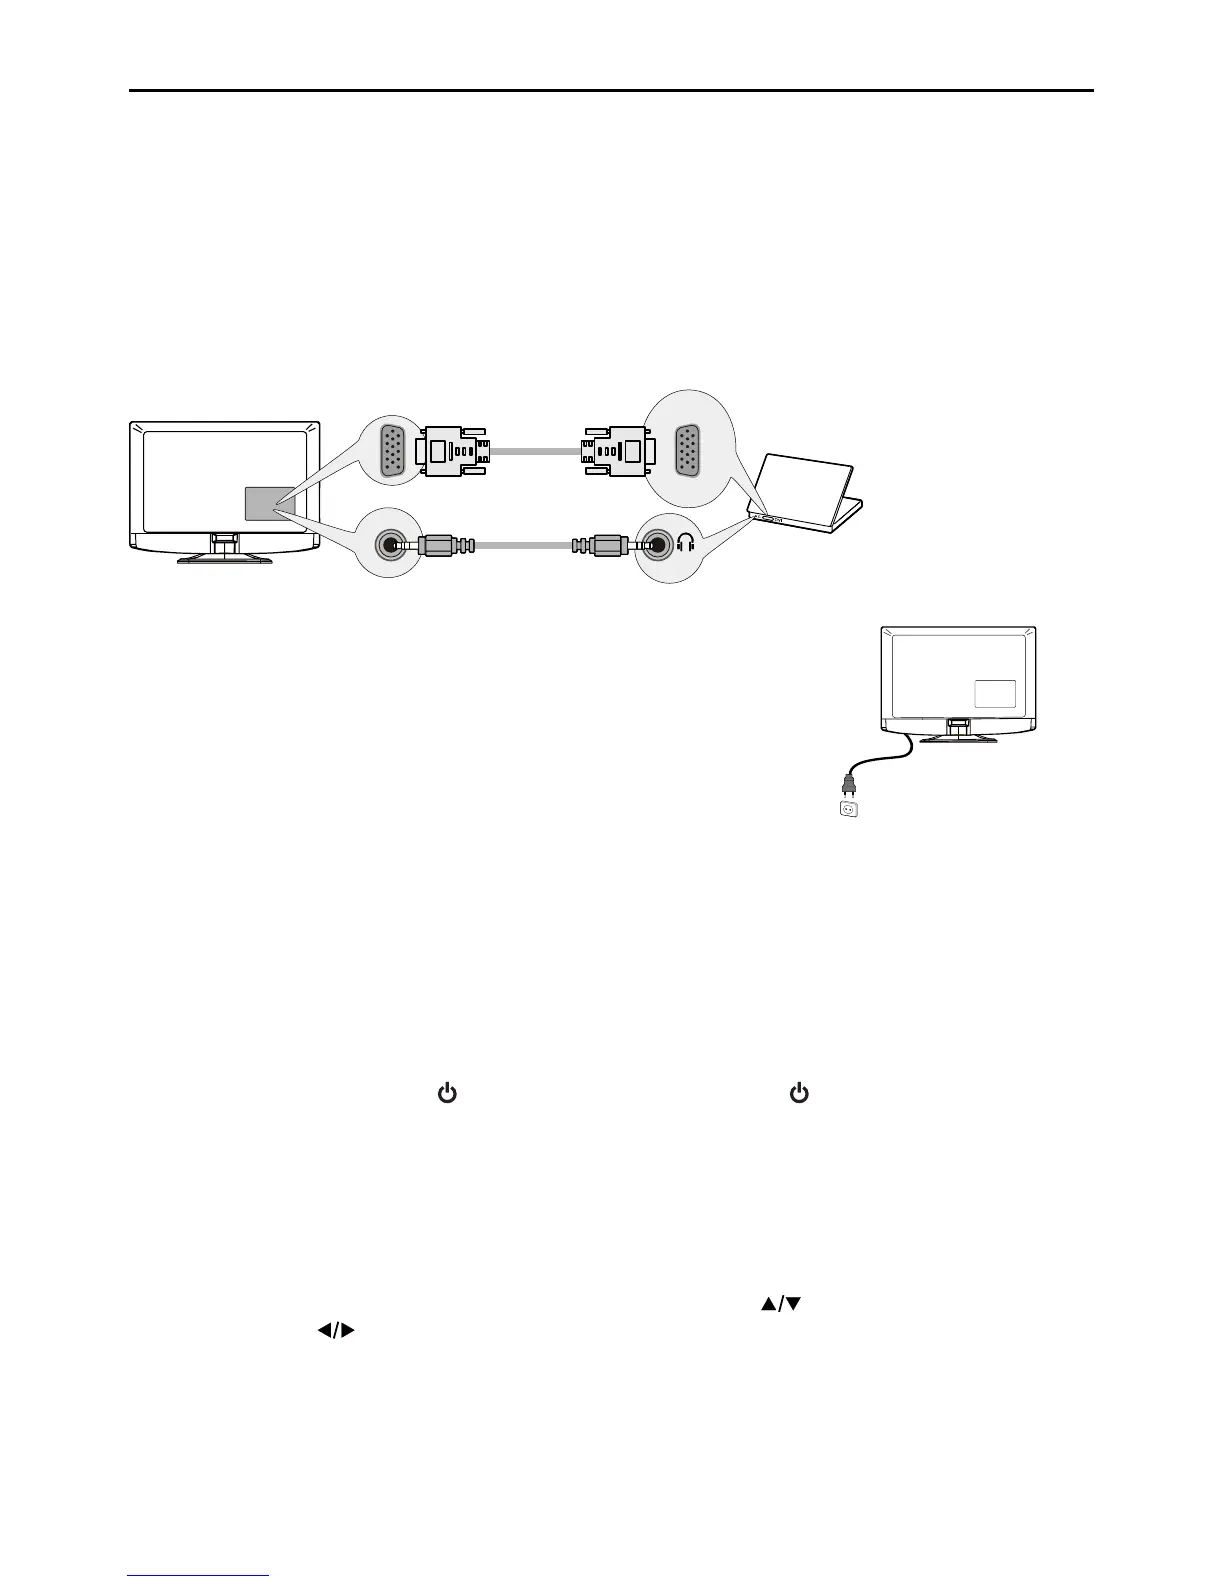
PC Connection
7RFRQQHFWDSHUVRQDOFRPSXWHUDQGXVH\RXU79DVDPRQLWRUIROORZWKHVHVWHSV
&RQQHFWRQHHQGRIDSLQPRQLWRUFDEOH9*$FDEOHWRWKHPC IN VGAMDFNRQWKH79DQGWKH
RWKHUHQGWRWKH3&¶VYLGHRRXWSXWMDFN
2. Connect an audio cable to the PC AUDIO INMDFNRQWKHEDFNRIWKH79DQGWKHRWKHUHQGWRWKH
DXGLRRXWSXWMDFNRQWKH3&
7XUQRQ\RXU79WKHQWXUQRQWKH3&
4. Press the INPUT button on the remote control to open the Input list. Once open, press the INPUT
button repeatedly to select PC.
Rear of this unit
To PC VIDEO
IN (VGA)
VGA cable
Audio cable
DVI/PC AUDIO IN
VGA
 Loading...