10
Control reference guide (Continued)
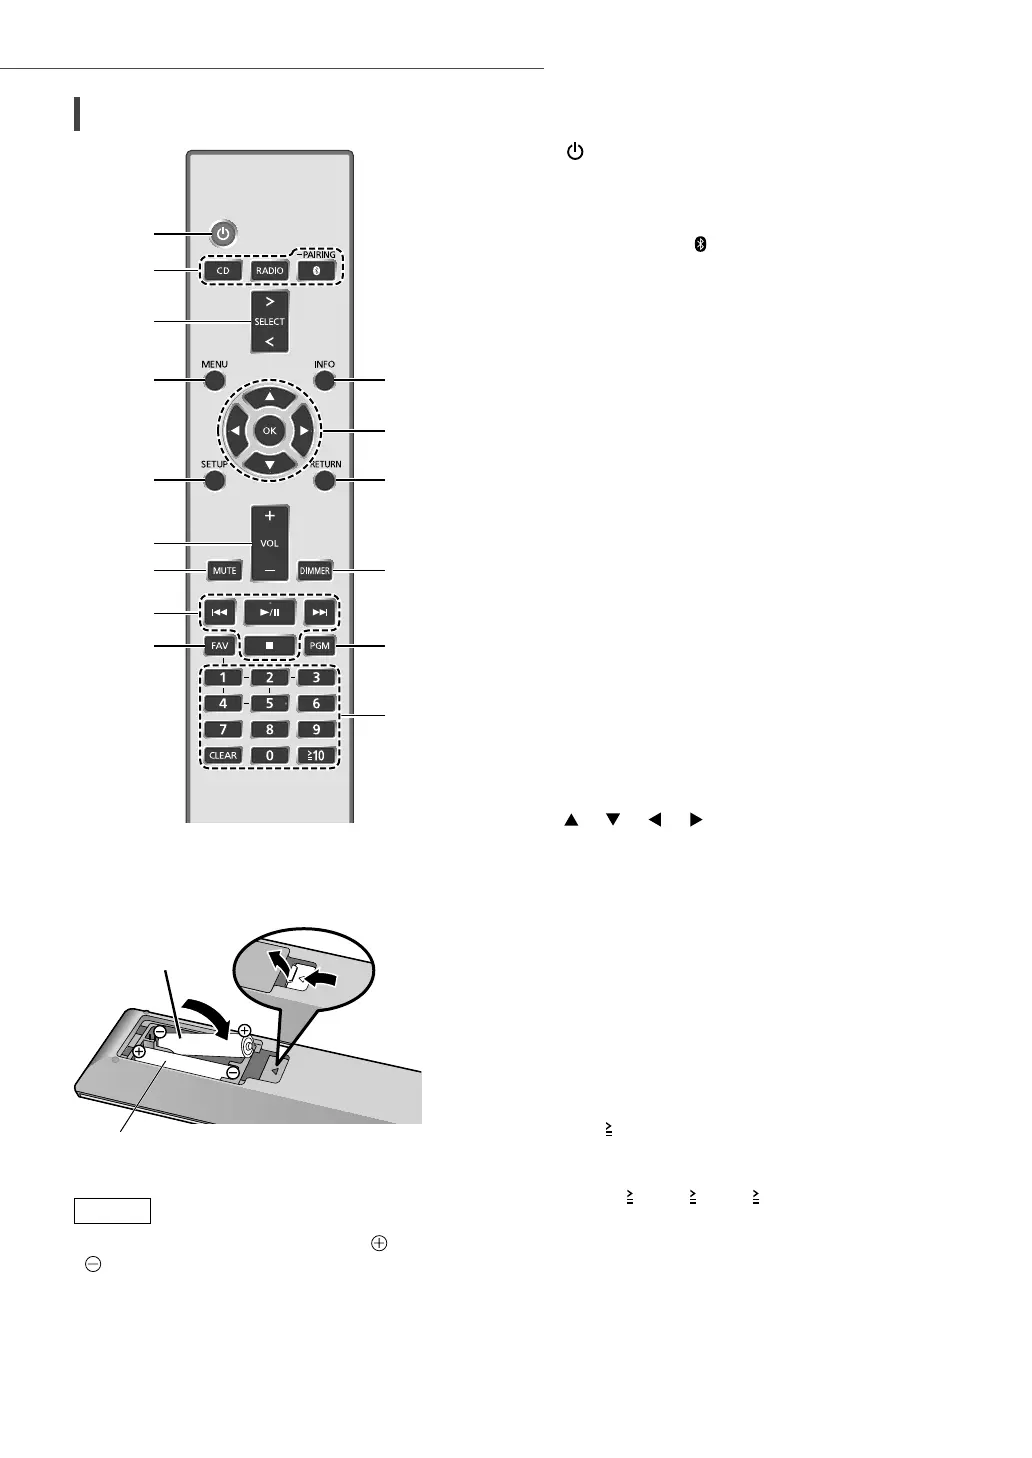
01 [ ]: Standby/on switch
• Press to switch the unit from on to standby
mode or vice versa. In standby mode, the unit is
still consuming a small amount of power.
02 [CD]/[RADIO]/[
-PAIRING]: Select the device
to be operated ( 17, 18, 19)
03 [>SELECT<]: Switch the input source
04 [MENU]: Enter menu ( 17, 18, 19)
05 [SETUP]: Enter setup menu
06 [+VOL-]: Adjust the volume
• 0 (min) to 100 (max)
07 [MUTE]: Mute the sound
• Press [MUTE] again to cancel. “MUTE” is also
cancelled when you adjust the volume or when
you turn the unit to standby.
08 Playback operation buttons
09 [FAV]: Select the favourite radio station or
playlist (DAB/DAB+ / FM / Internet Radio /
Spotify).
• You can register up to 5 favourite stations.
To register, press and hold [FAV] while the
favourite station or playlist is played back, select
the number to register and then press [OK].
10 [INFO]: View content information
• Press this button to display the track, artist, and
album names, file type, sampling frequency,
and other information. (The information varies
depending on the input source.)
11 [
], [ ], [ ], [ ]/[OK]: Selection/OK
12 [RETURN]: Return to the previous display
13 [DIMMER]: Adjust the brightness of the
display, etc.
• When the display is turned off, it will light up for
a few seconds only when you operate this unit.
Before the display turns off, “Display Off” will
be displayed for a few seconds.
• Press repeatedly to switch the brightness.
14 [PGM]: Set the programme function
15 Numeric buttons, etc.
• To select a 2-digit number
Example:
16: [
10] > [1] > [6]
• To select a 4-digit number
Example:
1234: [
10] > [ 10] > [ 10] > [1] > [2] > [3] > [4]
• [CLEAR]: Clear the entered value.
■
Using the remote control
2
1
R03/LR03, AAA
(Alkaline or manganese batteries)
Note
• Insert the battery so the terminals (
and
) match those in the remote control.
• Point it at the remote control signal sensor on
this unit. ( 8)
• Keep the batteries out of reach of children to
prevent swallowing.
Remote control
 Loading...