EasyManuals Logo
Home>Technics>CD Player>SL-PG450

Technics SL-PG450 User Manual

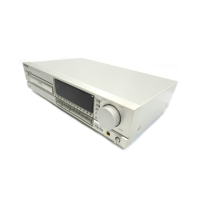
Technics SL-PG450
48 pages
To Next Page IconTo Next Page
To Previous Page IconTo Previous Page
Page #38 background imageLoading...
Page #38 background image
Disc
Link
Enlace
de
discos
:
'
.
The
function
allows
you
to
perform
edit
re¬
cording
of
multiple
discs,
either
in
their
origi¬
nal
order
or
for
tracks
you
select,
in
accor¬
dance
with
the
specified
tape
length.
Editing
in
the
disc’s
original
track
order
Example:
Recording
a
disc
with
nine
tracks
on
a
C-60
tape,
and
recording
another
disc
in
the
extra
space
on
side
B.
1
Prepare
the
cassette
deck.
Perform
step
1
on
page
30.
2
Press
TAPE
LENGTH
and
spec¬
ify
the
length
of
the
tape.
Perform
step
2
on
page
30.
3
Press
DISC
LINK.
4
Adjust
the
recording
level.
Perform
steps
3
and
4
on
page
30.
5
Press
PLAY.
Recording
on
the
cassette
deck
will
start
at
the
same
time.
If
the
cassette
deck
is
set
to
the
auto-reverse
mode,
recording
on
tape
side
B
will
be
auto¬
matically
made.
When
recording
on
tape
side
B
has
finished,
the
CD
player
will
automatically
stop
and
the
cassette
deck
will
switch
to
recording
standby
mode.
•If
the
cassette
deck
has
no
SYNCHRO
EDIT
terminal,
see
page
32.
6
Press
A
OPEN/CLOSE
to
open
the
tray,
and
change
the
disc.
The
tracks
which
can
be
recorded
in
the
time
remaining
are
displayed,
If
u
0"
appears
on
the
display,
the
first
track
on
that
disc
is
longer
than
the
remaining
space
of
the
tape.
In
this
case
press
STOP
to
cancel
the
edit
mode,
or
change
the
track
which
better
matches
the
remain¬
ing
time.
7
Adjust
the
recording
level.
Perform
steps
3
and
4
on
page
30.
8
Press
PLAY.
To
record
three
or
more
discs,
perform
steps
6
to
8.
To
cancel
CD
editing
mode:
Press
STOP.
Notes
•When
a
new
disc
is
inserted
close
to
the
end
of
side
A
of
the
tape
and
the
time
remaining
on
side
A
is
shorter
than
the
next
track,
advance
the
tape
to
the
begin¬
ning
of
side
B
and
begin
recording
again.
•The
cassette
deck
which
has
no
SYNCHRO
EDIT
terminal
continues
to
ad¬
vance
the
tape
even
after
disc
playback
has
ended.
Don't
forget
to
stop
the
tape
and
rewind
It
to
the
point
where
recording
ended.
•If
the
cassette
deck
is
not
equipped
with
an
auto
reverse
mode,
change
the
tape
over
to
side
B
when
the
recording
on
side
A
is
finished.
Esta
funcidn
ie
permite
realizar
la
grabacibn
con
edicidn
de
multiples
discos,
blen
en
su
orden
original
o
seleccionando
las
melo-
dias
que
usted
desee,
de
acuerdo
con
la
duraclbn
especificada
de
la
cinta.
Edicion
en
el
orden
original
de
las
melodias
del
disco
Ejemplo;
Grabacibn
de
un
disco
con
nueve
melodias
en
una
cinta
C-60,
y
grabacibn
de
otro
disco
en
el
espacio
extra
del
iado
B.
1
Prepare
la
platlna.
Reallce
el
paso
1
de
la
pagina
30.
2
Pulse
TAPE
LENGTH
y
espe-
cfflque
la
duracldn
de
la
cinta.
Realice
el
paso
2
de
la
pagina
30.
3
Pulse
DISC
LINK.
4
A
juste
el
nlvel
de
grabacldn.
Realice
los
pasos
3
y
4
de
la
pagina
30.
5
Pulse
PLAY.
La
grabacibn
en
la
platina
empezara
al
mis-
mo
tiempo.
Si
la
platina
se
ajusta
al
modo
de
inversibn
automdtica,
la
grabacibn
en
el
Iado
B
de
la
cinta
se
hard
automdticamente.
Cuando
termine
la
grabacibn
en
el
Iado
B
de
la
cinta,
el
reproductor
de
discos
compactos
se
parara
automaticamente
y
la
platina
se
pondra
en
el
modo
de
espera
de
grabacibn.
•Si
la
platina
no
tlene
terminal
SYNCHRO
EDIT,
consults
la
pagina
32.
(Continued
on
next
page)

Questions and Answers:

Question and Answer IconNeed help?

Do you have a question about the Technics SL-PG450 and is the answer not in the manual?

Technics SL-PG450 Specifications

General IconGeneral
BrandTechnics
ModelSL-PG450
CategoryCD Player
LanguageEnglish

Related product manuals