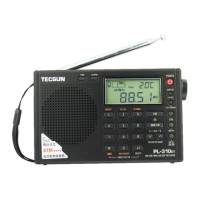
GETTING STARTED continued
The included AC Adaptor/Charger may be Once charging is finished, 'CHARGE' will
used to charge 4 Ni-MH rechargeable stop flashing and the charging indication
batteries (included) when installed onto bars in the upper left corner will stay full.
the PL-600's battery compartment. Before
Charging time varies depending on the
charging, the PL-600 must be set up for
milliamp-hour rating of the batteries. The
use with Ni-MH batteries and the correct
charging circuit automatically senses the
charging rate must be selected for them
milliamp-hour rating of the batteries and
to be charged. Ni-MH batteries are
will charge them for the correct amount of
manufactured with specific capacities
time. Charging time can take from 5.5
rated in milliamp-hours (mAh). These
hours for 1000 mAh batteries to 13 hours
capacities vary from about 1000 mAh up
for 2300 mAh batteries. The charging
to 2400 mAh at the time of this writing
circuit will sense when the batteries are
(usually printed on the batteries). For
fully charged and automatically go into
proper charging without damage to the
trickle-charge mode, thus safeguarding
batteries, the correct charging rate must
the batteries from being overcharged.
be set. To set the charging rate, plug in
Disconnecting the adaptor/charger DC-06
the AC adaptor and turn the PL-600 off.
from the PL-600 or pressing the
Then follow the instructions below.
CHARGE ON/OFF button will also stop
1. Enter SYSTEM SET CODE 28. See charging.
instructions in the section titled
SYSTEM SET CODES.
2. While '1000' flashes in the display, use
the UP /DOWN buttons to select the
mAh rating of your Ni-MH batteries.
To charge Ni-MH batteries:
1. Install 4 Ni-MH AA batteries.
2. Connect the adaptor/charger to the AC
wall.
3. Press/release the CHARGE ON/OFF
button. 'CHARGE' will flash in the
display and the charge indication bars
will advance from bottom to top in the
upper left corner of the display. The
digits in the upper right corner of the
display will change to 00:00 and will
count up in minutes and hours until
charging is finished.
MEMORY AUTO-SCAN DELETING ALL MEMORY PAGE
CONTENTS
Memory Auto-scan enables scanning
through the memories within the selected 1. Press/release the FREQ/PRESET
button (11).
memory page. Each filled memory is
2. Press/hold the DELETE button (20) for
accessed for about 5 seconds, after
5 seconds and then release it. 'dEL'
which the scan moves on to the next
and PAGE (45, 46) appear flashing in
used memory automatically, staying on it
the display.
for about 5 seconds. This continues
3. Within 2 seconds, press/release the
indefinitely on the selected page until
DELETE button.
deliberately stopped. Unused memories
are not accessed.
1. Press/release FREQ/PRESET (11)
button.
2. Press/hold either the UP or DOWN
button for about a second. Then
release it. Note that PRESET flashes
under the memory number, indicating
that memory scanning is functioning
with each memory being scanned for
about 5 seconds. It then moves on to
the next memory for another 5
seconds. To stop memory preset auto-
scan, press/release either the UP or
DOWN button.
DELETING A MEMORY'S CONTENTS
1. Press/release the FREQ/PRESET
button (11).
2. Use the UP or DOWN button (5,6) to
select the memory preset location of
the frequency that you wish to delete.
Alternately, use the numeric keypad to
enter the memory number.
3. Press/hold the DELETE button (20) for
about 2 seconds and then release it.
'dEL' appears flashing in the display.
4. While 'dEL' is still flashing,
press/release the DELETE button.
MOVING A STORED FREQUENCY
A stored frequency can be moved to a
different memory or memory page.
1. Turn on the radio.
2. Press/release the PAGE button.
3. Within 3 seconds, use the UP or
DOWN button to select the required
memory page.
4. Press/release the MEMORY button
twice.
5. Within 5 seconds use the numeric
keypad to enter the memory number
that you wish to store the station
into.
6. Within 5 seconds press/release the
MEMORY button.
CUSTOMIZING MEMORY PAGES
The PL-600 is configured at the
factory with 10 memory pages (from
01~10), each page having 50
memories plus 100 memories in page
00, in total 600 memories. You can
change the set up of page 01~10 via
the SYSTEM SET CODES, shown
below.
WORKING WITH MEMORY continued
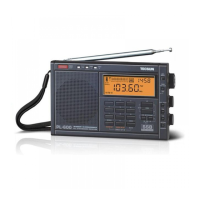
PL-600 OWNER'S MANUAL
 Loading...