Installation instructions
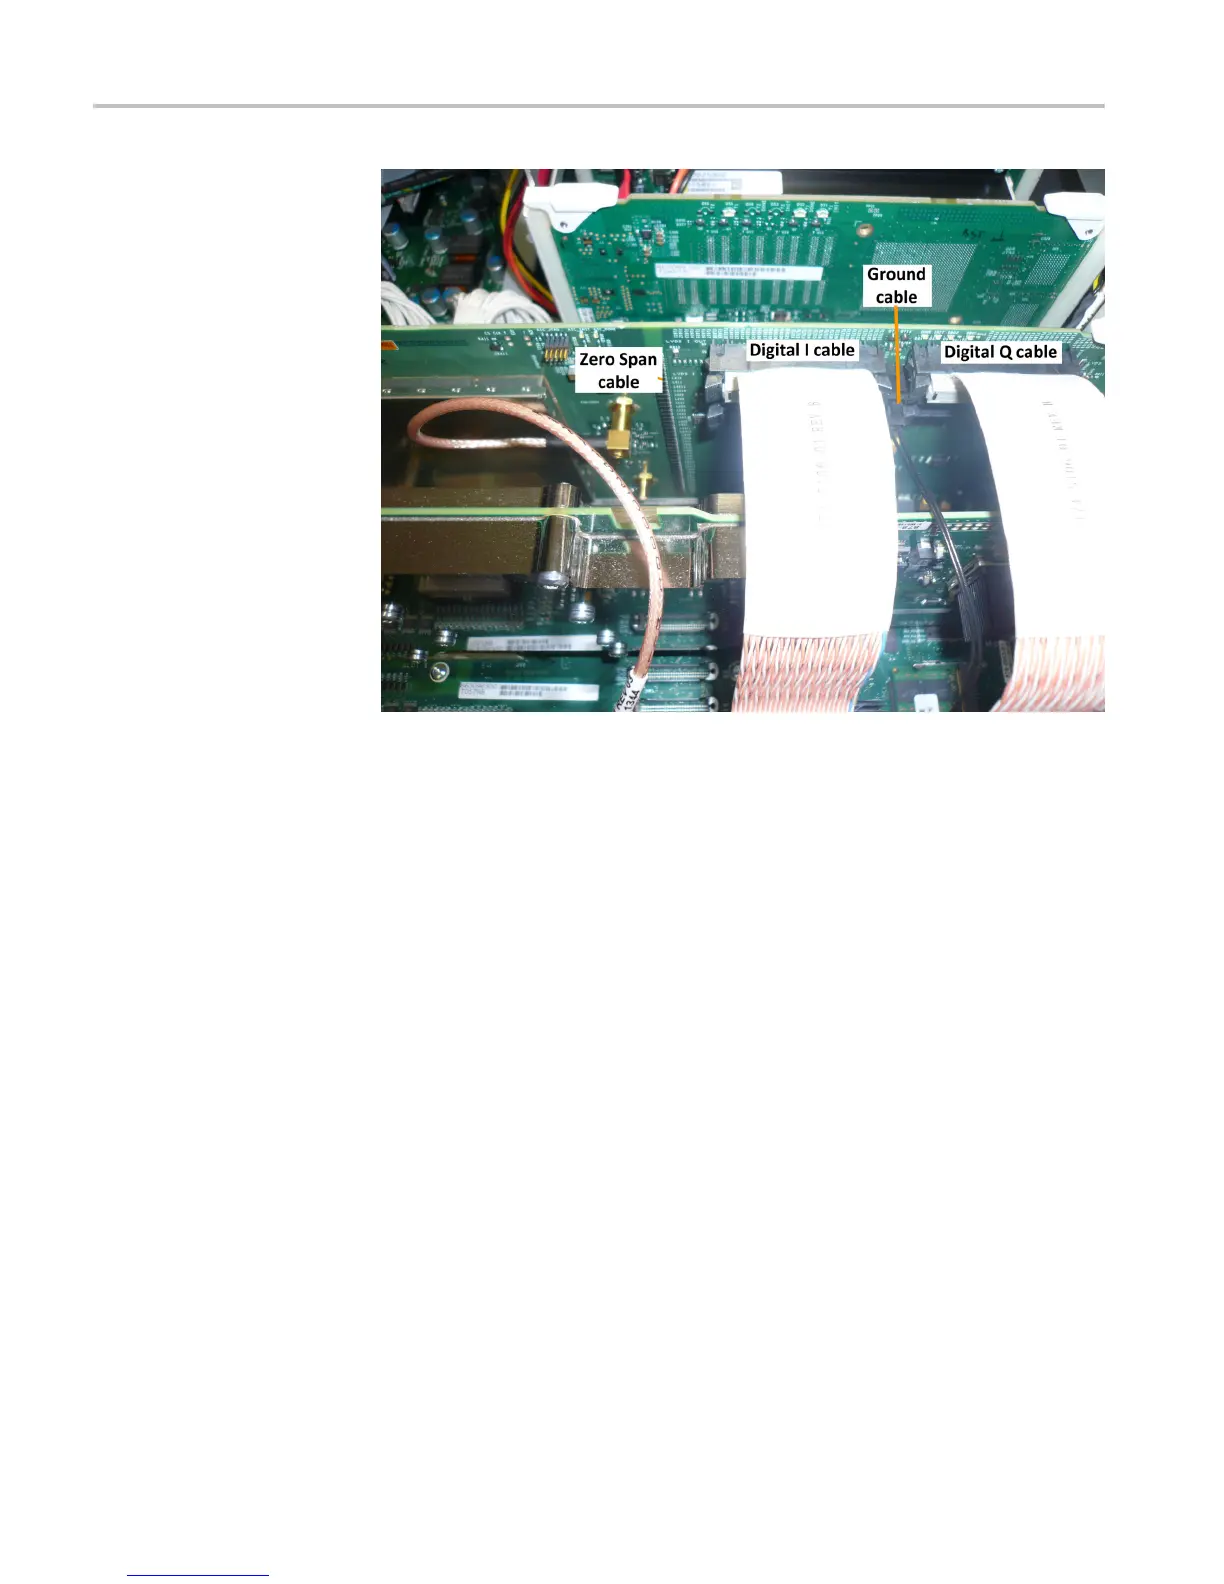
Figure 5: Connecting the output cables
Reinstall top shield and cosmetic covers
1. Place t
he instrument on its bottom feet.
2. Place the top shield on top of the instrument and reinstall the e ighteen T15
Torx-
head screws.
3. Place the instrument on its rear feet, so the front panel is facing up and the
top i
s toward you.
4. Place the top cover over the top of the instrument and slide it toward the
fro
nt panel. Make sure that the top cover wraps around the flanges on the
rear panel on all three sides.
5. Re
install the four T20 Torx-head screws (two on each side) near the front
edge of the top cover (next to the folding handles) that secure the top cover to
the instrument. Torque these screws to 8.0 in/lb.
6. Rotate the instrument so the bottom faces you.
7
.
P
lace the bottom cover on the instrument, with the flip feet towards the front.
10 RSA5100A/B Series Digital I/Q and Zero Span U pgrades
 Loading...