TI Graphing Calculator Test Preparation
Press-to-Test Key Sequence
Use special key sequence to temporarily disable applications (Apps), programs and other files that may not be allowed on
graphing calculators during testing. Similar to the [2nd-MEM-Reset] option, the Press-to-Test key sequence is the fastest way to
configure student calculators on the day of an exam. Apps and programs can be quickly restored.
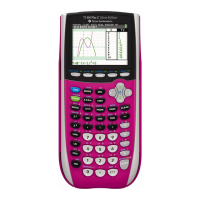
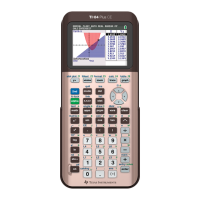
The Press-to-Test key sequence works on TI-84 Plus family models running operating system 2.40 and later versions.
• Power [OFF] the graphing calculator.
• Press and hold these three keys simultaneously: Left arrow, right arrow and [ON] button.
• The Reset Options screen will appear on screen.
• By default, the angle mode is set to Degree and Stat Diagnostics are on.
• Press OK. The “Reset Complete” screen displays the options you have selected.
Cho
ose either of the options listed here to re-enable graphing calculators quickly and easily:
able and transfer a file between the connected units.
• Link together student graphing calculators with a unit-to-unit c
• Use the “re-enable” option in the TestGuard 2.0™ Software.
TI TestGuard 2.0™ Software
Configure TI-84 Plus family graphing calculators by using this exclusive TI software to disable* or delete specific Apps not
allo
wed on exams. Other disabled programs, data and files can also be cleared.
• Download TI TestGuard Software onto your (the educator’s) graphing calculator.
• Connect the educator’s calculator to individual student graphing calculators using a unit-to-unit cable (not USB).
• A “Transfer Complete” message will appear on screen with a confirmation code on both educator and student units.
Cho
t-to-unit cable and transfer a file between the connected units.
tor™ classroom learning system.
estGuard 2.0 Software and at no cost. To request a free download and operating
d 2.0
deleted instead, with a configuration comparable to what was specified.
lculator Maintenance & Care
• Configure each student unit one at a time (takes less than 10 seconds).
ose any of the options listed here to re-enable graphing calculators quickly and easily:
• Link together student graphing calculators with a uni
• Download a computer file to a graphing calculator.
• Send a file to a graphing calculator using the TI-Naviga
• Use the “re-enable” option in the TestGuard 2.0 App.
nly educators are eligible to receive TO
instructions, email ti-cares@ti.com.
*The disable feature works only on student TI-84 Plus calculators with operating system version 2.40 or later. If TI TestGuar
set up to disable programs and/or applications and the student has a TI-83 Plus or a TI-84 Plus with an earlier operating
is
system, the programs and/or applications will be
TI Graphing Ca
ecially for long-term storage (more than one
graphing calculator’s slide case over the front of each unit.
by avoiding exposure of graphing calculators to extremely warm/hot or highly humid environments.
Clea rotection
n the graphing calculator’s screen. Do not use solvents or other cleaning
lay.
jects from penetrating or obstructing the connective ports of the calculator.
raphing calculators purchased in TI’s EZ-Spot bright yellow back covers and slide cases distinguish school-issued graphing
calculators from student-owned units. To learn more, visit education.ti.com/us/ezspot
Storage Tips
• Remove the four (4) “AAA” batteries from each graphing calculator unit, esp
month).
If any of the batteries has a leak, be sure to dispose the entire battery set. •
• Place the
Battery Life
Depending on usage, graphing calculator back-up batteries should be replaced every 3-4 years. •
• Maximize battery life
ning & P
• Use a cloth, lightly dampened with water, to clea
liquids.
• Avoid applying pressure to the screen/disp
• Keep foreign ob
• Keep liquids from getting inside the unit.
Security & Safety
G
.

 Loading...