Step 2
Step 5
Restore Instructions for Disable Mode
RESTORE OPTION 1
1. Using an I/O unit-to-unit cable or USB cable (which comes with
TI-84 Plus models), connect together two graphing calculators –
at least one of the two units must be “temporarily disabled.”
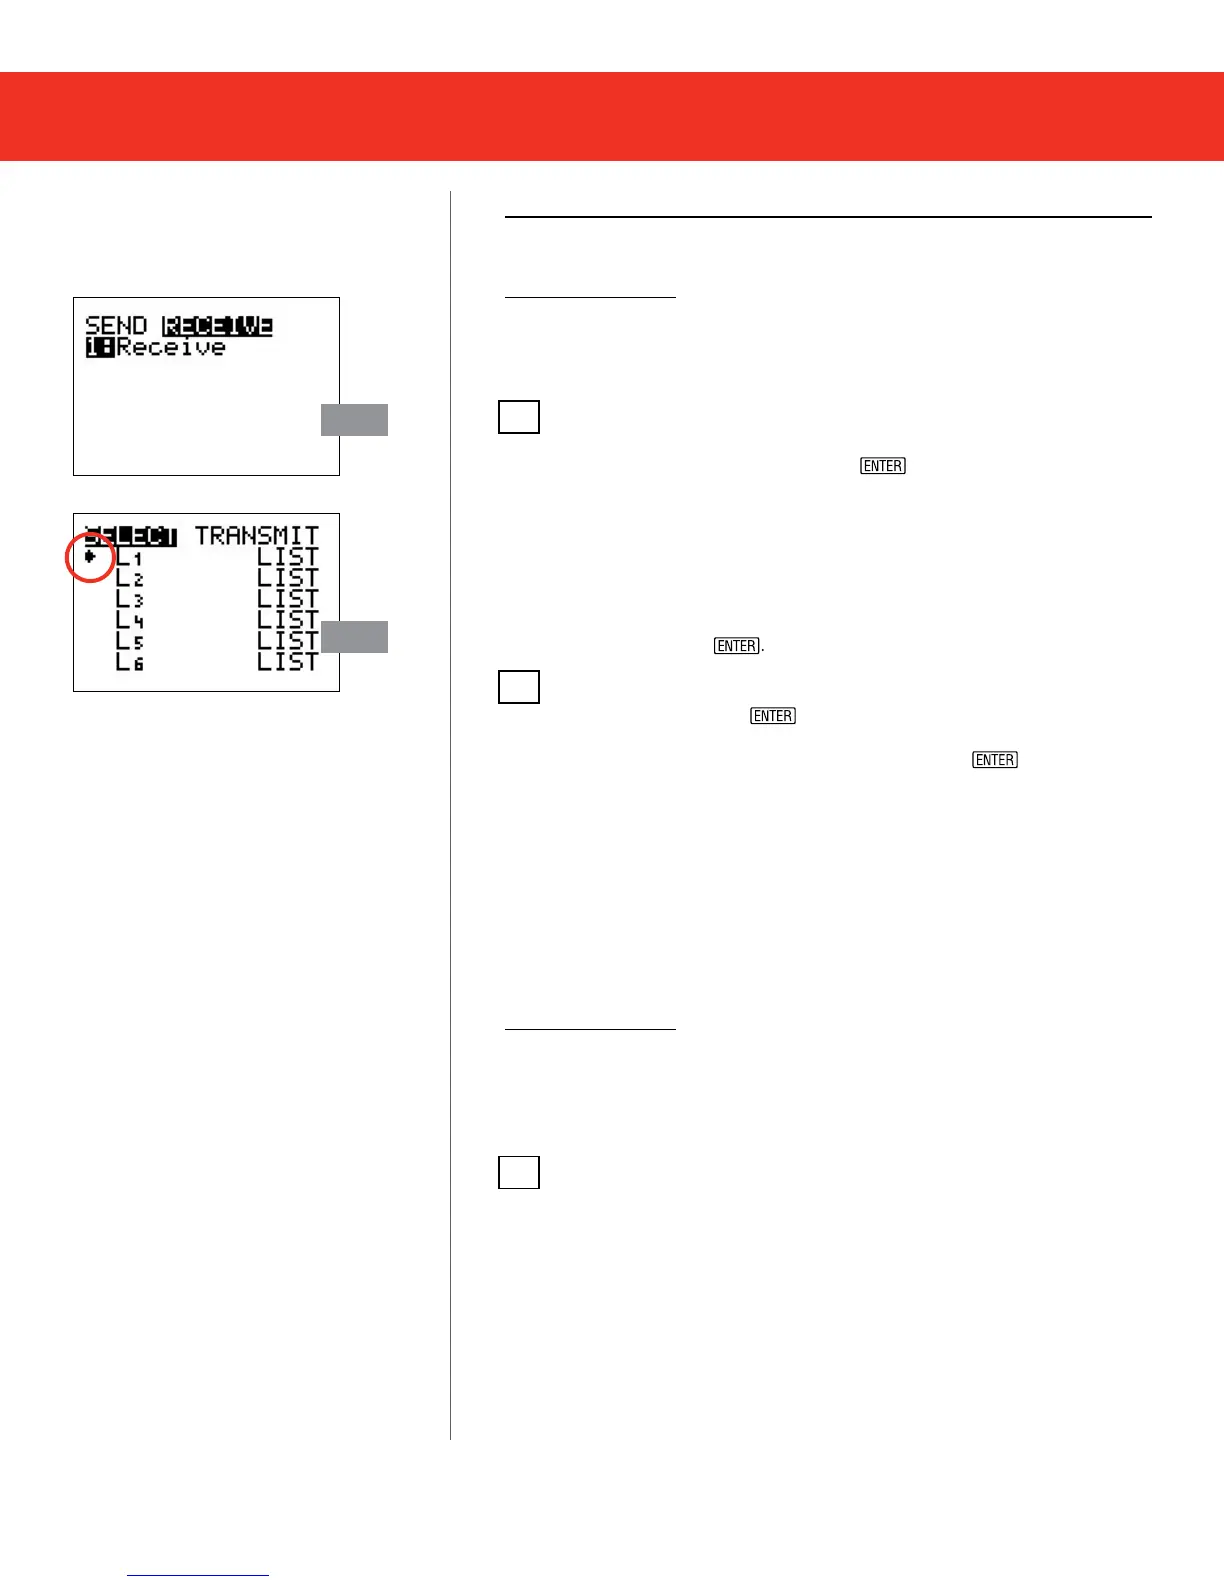
2. On the Receiver’s unit:
a. Press the 2
ND
-LINK function to go to the SEND / RECEIVE screen.
b. Highlight RECEIVE but DO NOT press
yet.
3. On the Sender’s unit:
a. Press the 2
ND
-LINK function to go to the SEND / RECEIVE screen.
Send will be highlighted be default.
4. On the Receiver’s unit:
a. Once the receivers unit has been prepared to RECEIVE
(see Step 2), press
5. On the Sender’s unit:
a. Select 4:LIST and press L1
*
.
Note the arrow that appears next to L1.
b. Highlight TRANSMIT (press RIGHT arrow key) Press
on
the receiving calculator rst and then on the sending unit.
c. An on-screen “Waiting” message will appear.
If you select L1 you may be prompted to overwrite the variable.
Select the overwrite option to continue.
6. Upon successful transmission, a DONE message will appear on
both screens. Devices are now restored from the disabled mode
and have full access to previous Apps and Programs.
RESTORE OPTION 2
1. Using an I/O unit-to-unit cable (which comes with the Testing
Solutions Tool Kit), or USB cable (which comes with TI-84 Plus
models), connect together two graphing calculators – at least one
of the two units should be “temporarily disabled.”
2. From the TESTGUARD 2.0 Apps Home Screen select option 4:REENABLE
on the non-disabled unit.
= illustration shown.
* Any le can be selected, we are demostrating with L1.
Press-to-Test for TI-84 Plus & TI-84 Plus Silver Edition (Continued)

 Loading...