2
InstallingtheDischargeChute
Partsneededforthisprocedure:
3
Screws
1
Chuteassembly
Procedure
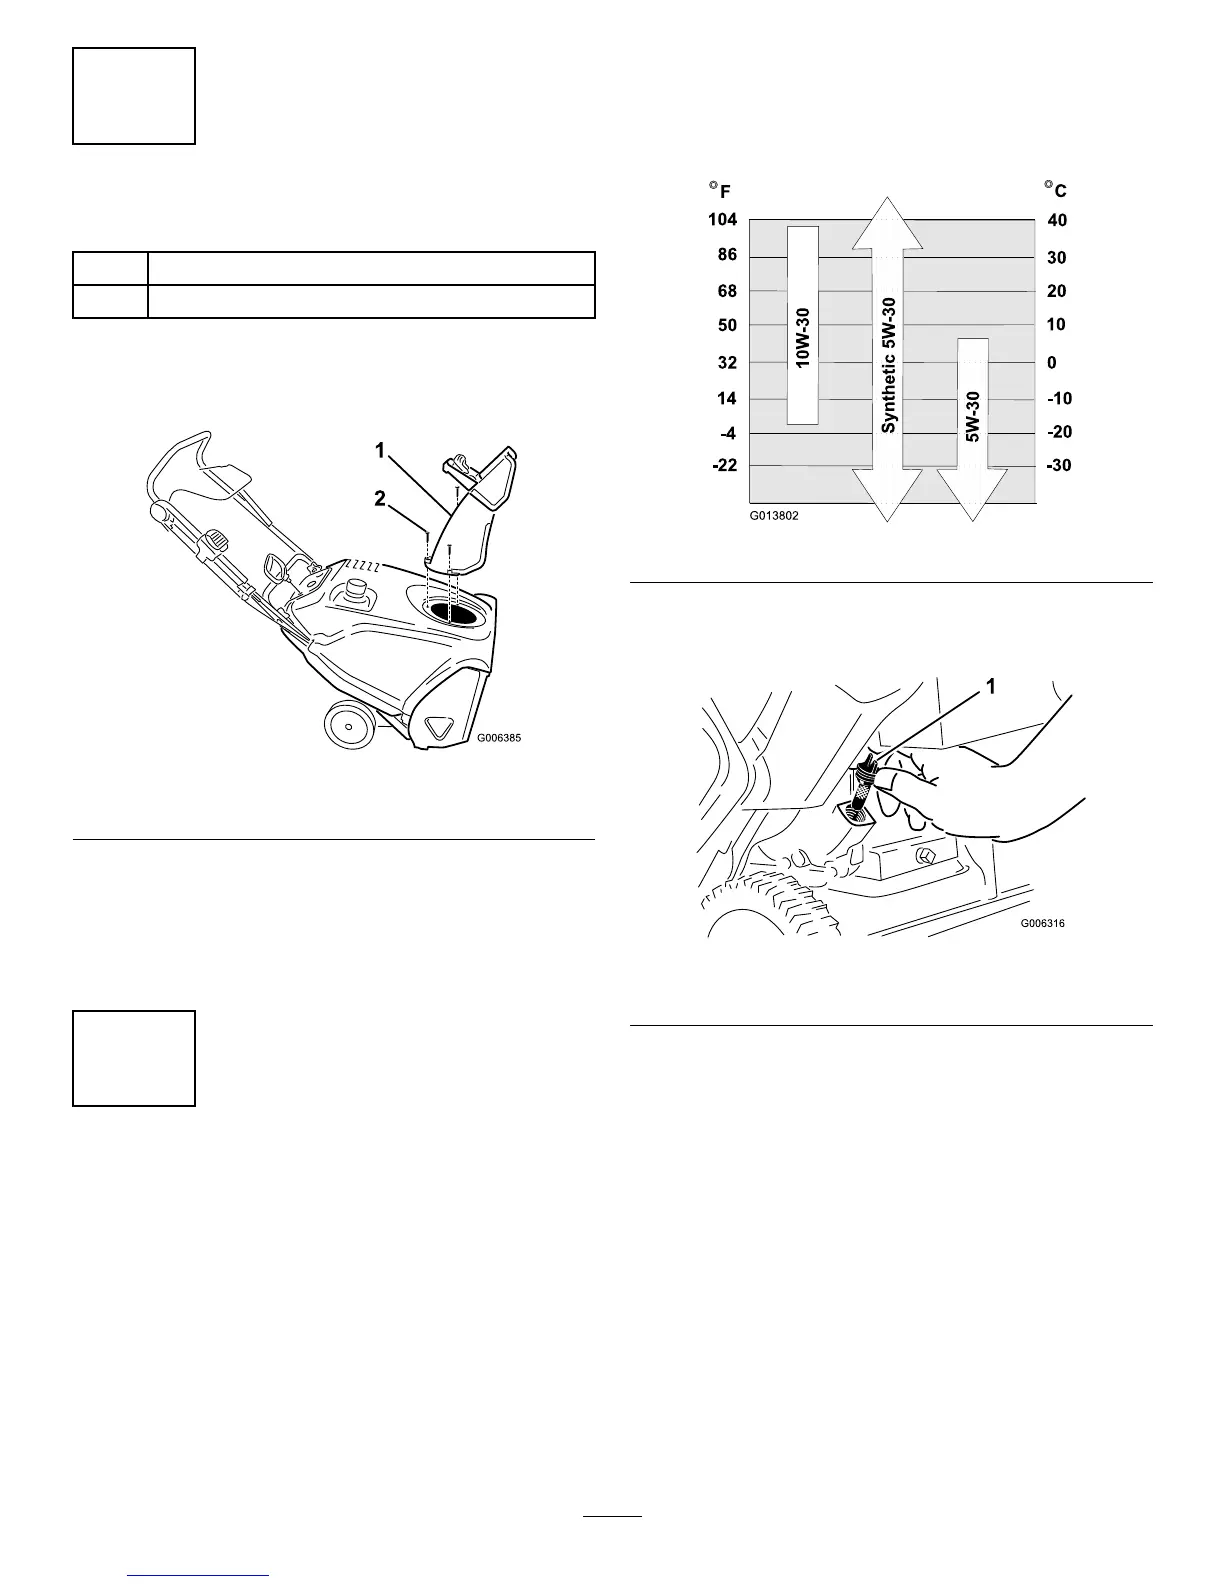
Installthedischargechuteasshown(Figure7).
Figure7
1.Dischargechute
2.Screw(3)
Note:Foreasierinstallation,useasmallratchetwrenchto
tightenthescrews.
Important:Donotovertightenthescrews;otherwise
youmaydamagethedischargechuteandpreventit
fromturningfreely.
3
FillingtheEnginewithOil
NoPartsRequired
Procedure
Yourmachinedoesnotcomewithoilintheengine,butit
doescomewithabottleofoil.
Important:Beforestartingtheengine,lltheengine
withoil.
Note:Thebottleofoilmaycontainanounceortwomore
thantheenginerequires.Donotoverllorunderllthe
engine.
Maxll:20oz.(0.6l),type:automotivedetergentoilwithan
APIserviceclassicationofSJ,SL,orhigher.
Use
Figure8belowtoselectthebestoilviscosityforthe
outdoortemperaturerangeexpected:
Figure8
1.Movethemachinetoalevelsurface.
2.Cleanaroundtheoilllcap(Figure9).
Figure9
1.Oilllcap
3.Unscrewtheoilllcapandremoveit.
4.Withthemachineintheoperatingposition,carefully
pouroilintothecrankcase.Wait3minutesfortheoil
tosettleandaddenoughtobringittothepointof
overow .Thereshouldbeverylittle,ifany,oilleftin
thebottle.
Note:Youmaytipthemachineforward(handleup)
tomakeaddingoileasier.Remembertoreturnthe
machinetotheoperatingpositionbeforecheckingthe
oillevel.
Important:Donottipthemachinealltheway
forwardontoitsnose,orfuelmayleakoutofthe
machine.
5.Screwtheoilllcapintotheoilllholeandtightenit
securely.
6
 Loading...