12
Installing the Anti-siphon Fill
Receptacle
1. Remove the rubber cap from the stud on the tank strap
(Fig. 2).
1865
1
6
5
4
2
3
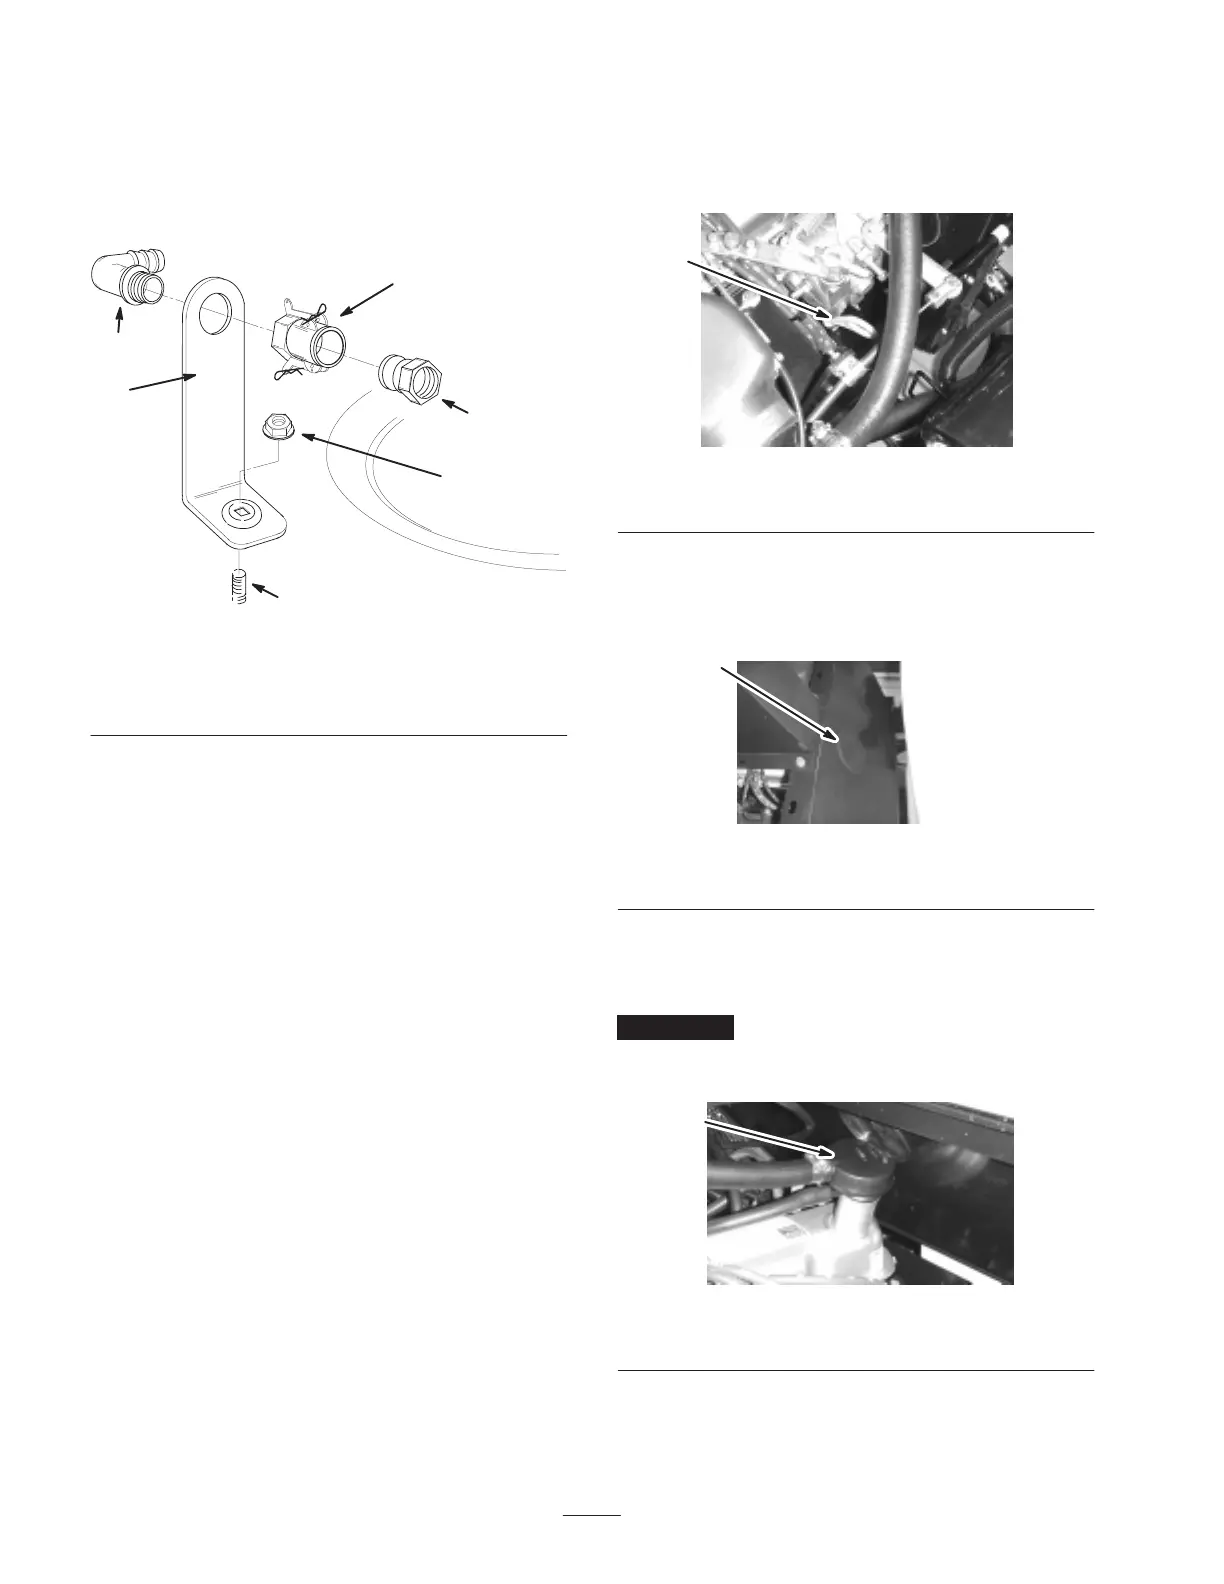
Figure 2
1. Fill receptacle bracket
2. Stud
3. Flange nut, 5/16 inch
4. 90 degree elbow fitting
5. Quick coupler
6. Hose adapter
2. Place the fill receptacle bracket over the stud and secure
it with a flange nut (5/16 inch) (Fig. 2).
3. Place the threaded end of the 90 degree elbow fitting
through the bracket and thread the quick coupler onto it,
securing it to the bracket (Fig. 2).
Note: Install the elbow fitting with the open end pointing
toward the tank opening so the water will arc into the tank
when you fill it.
4. Install the hose adapter into the quick coupler (Fig. 2).
5. Lock the adapter into place by swinging the levers
toward the adapter and then secure them with the
hairpin cotters.
Before Operating
Checking the Engine Oil
The engine is shipped with oil in the crankcase; however,
the level of oil must be checked before you first start the
engine and after you have run it.
1. Position the sprayer on a level surface, set the parking
brake, stop the pump, stop the engine, and remove the
ignition key.
2. Remove the dipstick, located under the passenger seat,
and wipe it with a clean rag (Fig. 3). Insert the dipstick
into the tube and make sure it is seated fully. Remove
the dipstick and check the oil level.
1
Figure 3
1. Dipstick
3. If the oil level is low, add oil as follows:
A. Remove the access plug in the wall behind the
engine (Fig. 4).
1
Figure 4
1. Oil access plug
B. Remove the filler cap from the valve cover (Fig. 5)
and pour oil into the opening until the oil level is up
to the Full mark on the dipstick.
Important Refer to Servicing Engine Oil, page 26, for
the proper oil type and viscosity. Add the oil slowly and
check the level often during this process. Do not overfill.
1
Figure 5
1. Oil filler cap
C. Install the filler cap and access plug.
4. Install the dipstick firmly in place.
 Loading...


