19
Maintenance
Maintenance
WARNING:
Do not at any time let brake uids, gasoline,
petroleum-based products, penetrating lubricants,
etc., come in contact with plastic parts. Chemi-
cals can damage, weaken or destroy plastic which
could result in serious personal injury.
Cleaning the Product
1.Stop the product before cleaning.
2.Clean the exterior of the product with a damp cloth.
3.Avoid using solvents when cleaning plastic parts. Most
plastics are susceptible to damage from various types of
commercial solvents and may be damaged by their use.
4.Wipe or scrape the trimmer head and spool area when
they accumulate dirt or clippings.
5.Scrape debris away from air intake vents on both sides
of engine housing.
NOTICE:
Keeping air intake vents free of grass and debris
prevents engine overheating and possible engine
damage.
Servicing the Product
Check and tighten all fasteners. If any part is damaged or
lost, repair it or replace it.
Checking the Fuel Cap, Tank, and Lines
WARNING:
Check for fuel leaks. A leaking fuel cap, tank,
or line is a re hazard and must be replaced
immediately. If you nd any leaks, correct the
problem before using the product. Failure to do
so could result in a re that could cause serious
personal injury.
The fuel cap contains a non-serviceable lter and check
valve. A clogged fuel lter causes poor engine performance.
If performance improves when the fuel cap is loosened,
the check valve may be faulty or the lter may be clogged.
Replace the fuel cap if necessary.
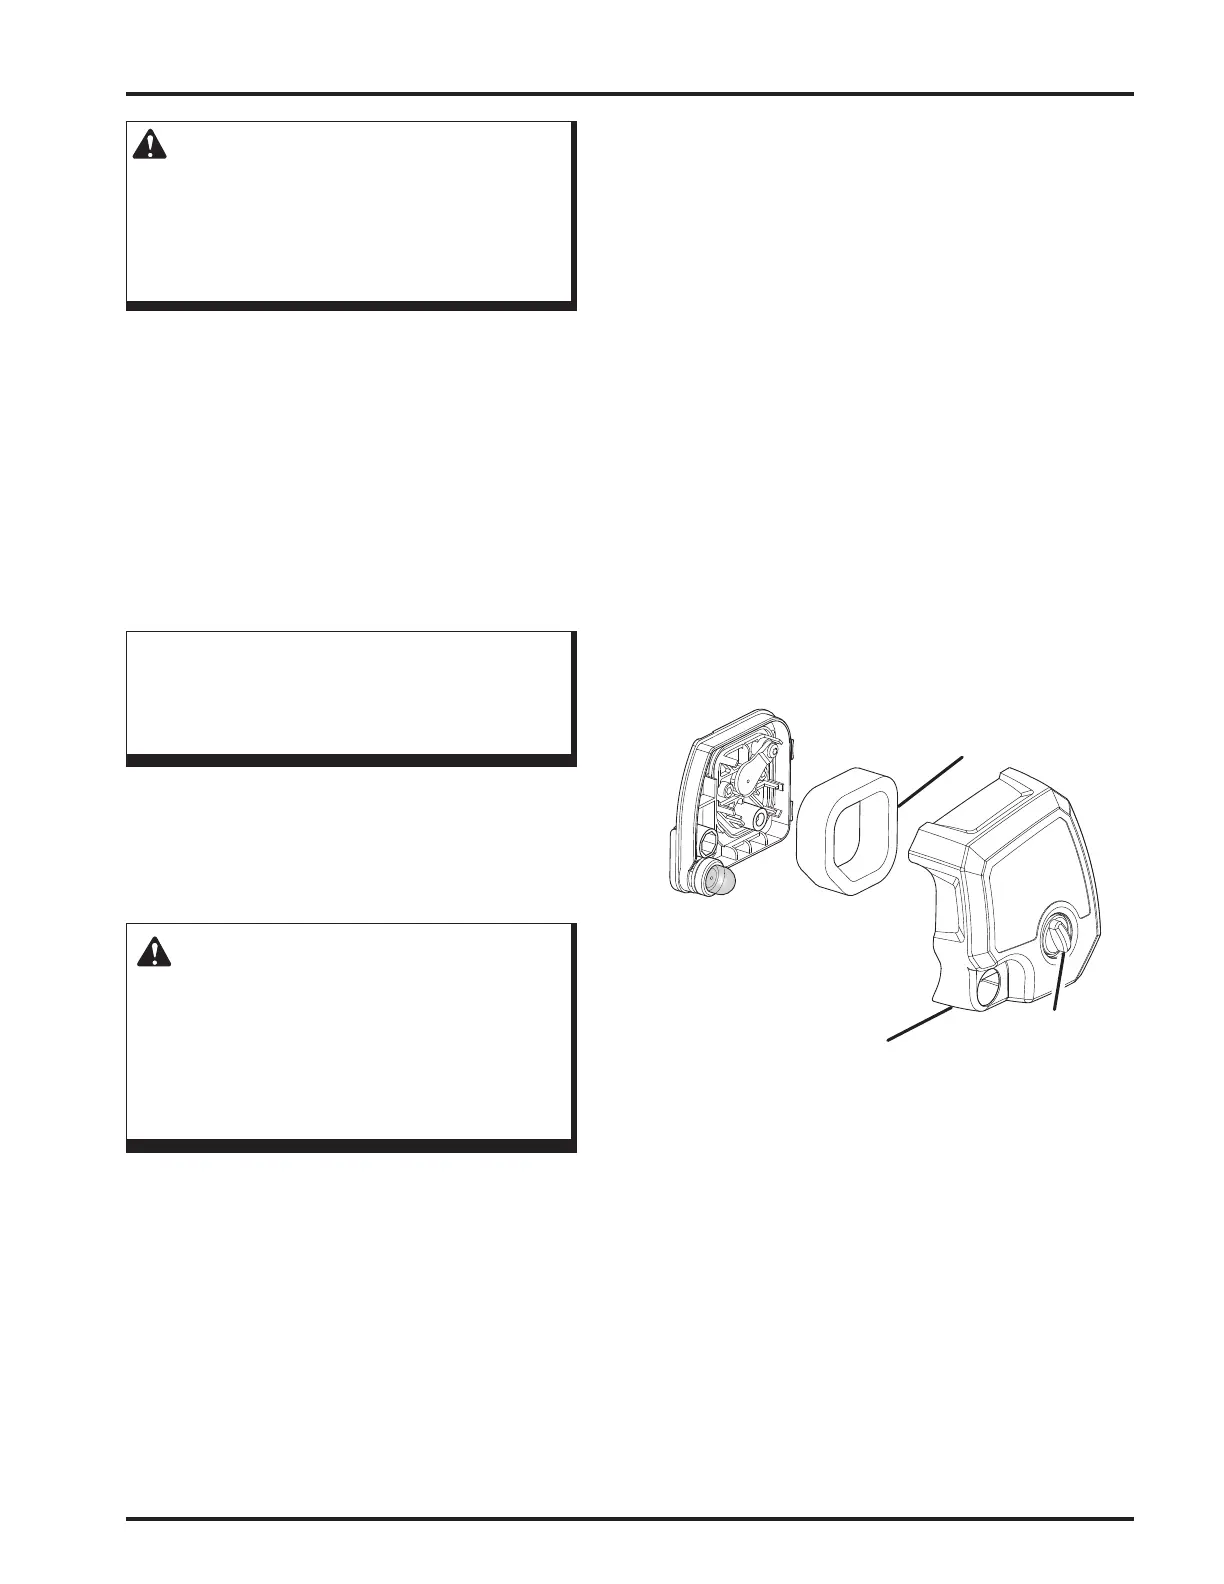
Air Filter
Air Filter
Cover
Knob
Figure 16
Cleaning the Air Filter
See Figure 16 - 18.
Clean the air lter as indicated by the maintenance schedule.
Follow these steps to clean the air lter.
1. Stop the trimmer.
2. Remove the spark plug boot.
3. Loosen the air lter cover by turning the knob counter-
clockwise.
4. Remove the air lter cover.
5. Remove the air lter.
6. Clean the air lter with warm soapy water.
7. Rinse the air lter and let it dry completely.
8. Work two drops of oil into the air lter.
9. Replace the air lter (ts only one way).
10. Replace the air lter cover.
11. Tighten the air lter cover by turning the knob clock-
wise.
12. Replace the spark plug boot.
Note: Replace the air lter as indicated by the maintenance
schedule.
 Loading...