Maintenance
Aftereachuseofthetrimmer,completethefollowing:
1.Removethebatteryfromthetrimmer.
2.Wipethetrimmercleanwithadampcloth.Do
nothosethetrimmerdownorsubmergeitin
water.
CAUTION
Thelinecutoffbladeonthedeectoris
sharpandcancutyou.
Donotuseyourhandstocleanthe
deectorshieldandblade.
3.Wipeorscrapecleanthecuttingheadareaany
timethereisanaccumulationofdebris.
4.Checkandtightenallfasteners.Ifanypartis
damagedorlost,repairorreplaceit.
5.Brushdebrisawayfromairintakeventsand
exhaustonmotorhousingtopreventthemotor
fromoverheating.
ReplacingtheString
Useonly2mm(0.080inch)monolamentstring
(ToroPartNo.88201)or2.4mm(0.095inch)twisted
monolamentstring(T oroPartNo.88202).
1.Removethebatterypack.
2.Removeanyoldstringonthespoolby
repetitivelypressingthebumpbuttonwhile
pullingthelineoutequallyfrombothsidesofthe
trimmer.
3.Cut1pieceofstringaccordingtothefollowing
specications.
•Ifyouareusing2mm(0.080inch)string,cut
onepieceoflineapproximately4.9m(16ft).
•Ifyouareusing2.4mm(0.095inch)twisted
string,cutonepieceoflineapproximately3
m(10ft).
Important:Donotuseanyothergauge
ortypeofstring,asthiscoulddamagethe
trimmer.
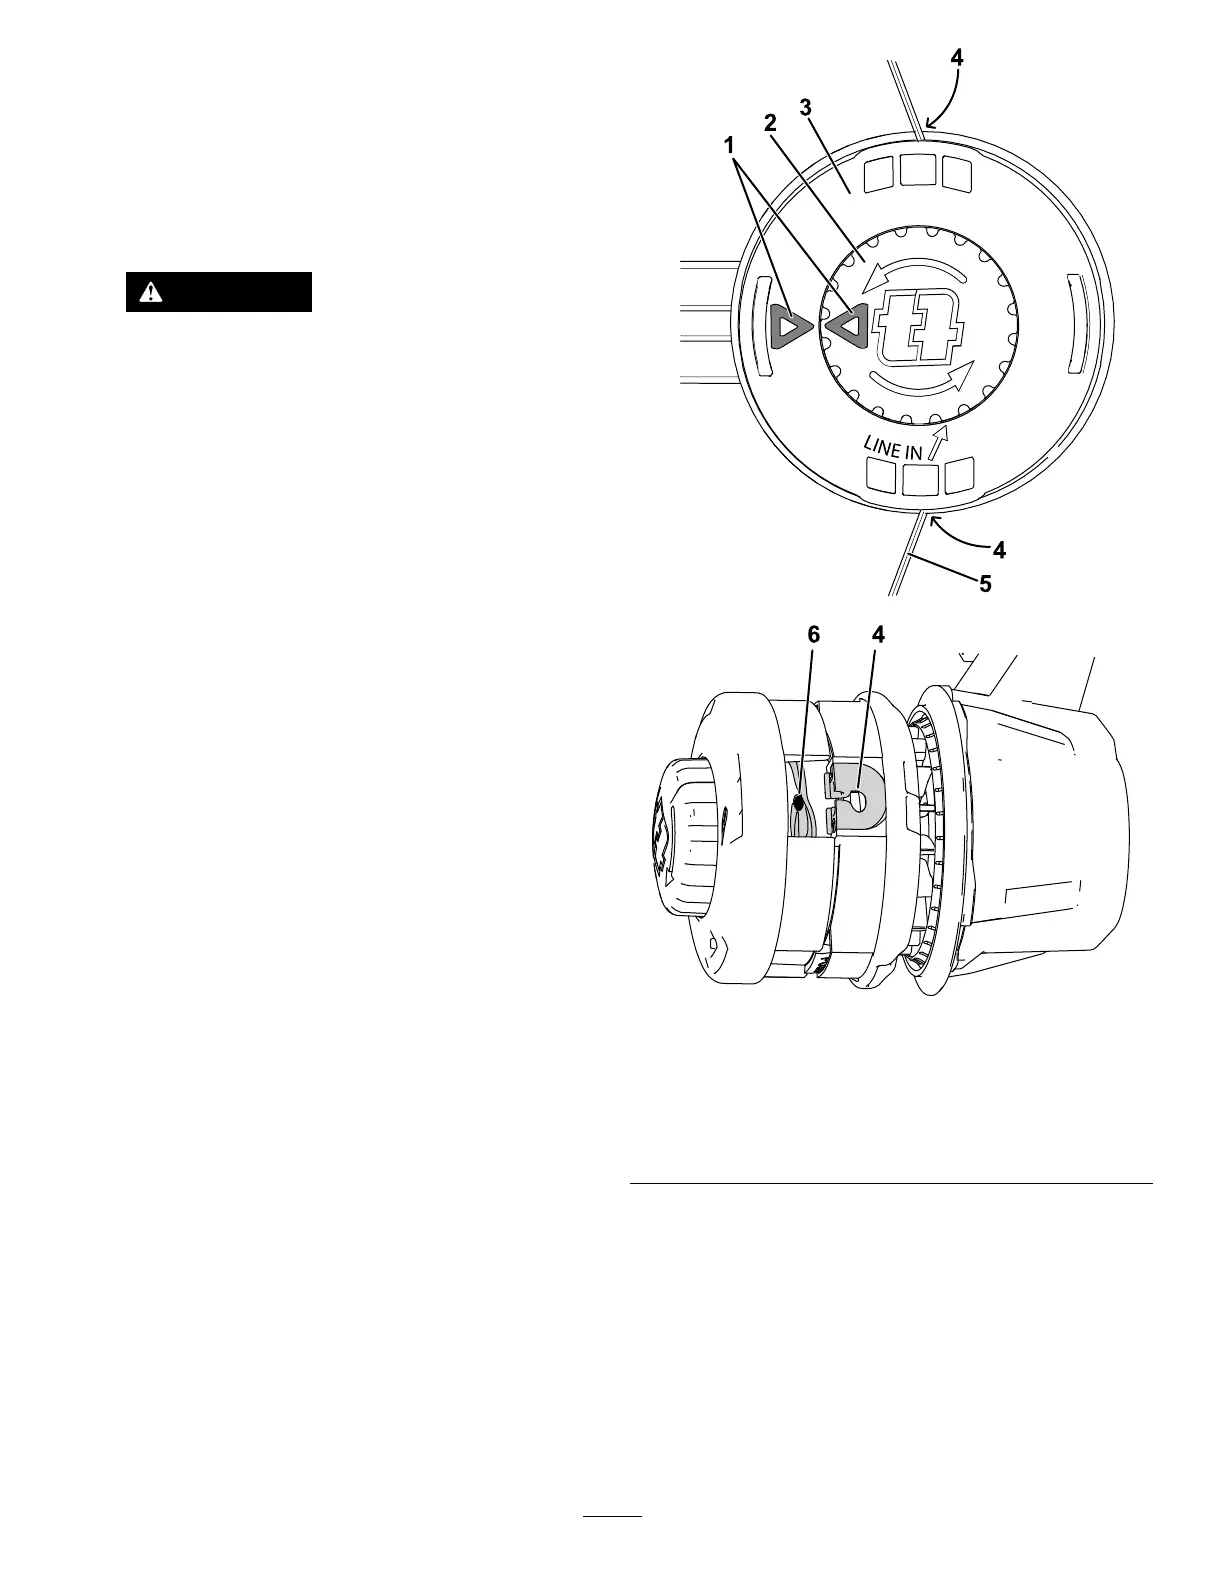
4.Pressandturntheknobonthestringheaduntil
arrowontheknobalignswitharrowonthestring
head(Figure12).
5.Insert1endofthelineatanangleintotheLINE
INeyeletandpushthelinethroughthestring
headtrackuntilitcomesoutthroughtheeyelet
ontheotherside.Pullthelinethoughthestring
headuntilthelineoutsidethestringisevenly
dividedoneachside.
g278518
g285202
Figure12
Disassembledviewshownforclarity
1.Arrows4.Eyelet
2.Knob
5.String
3.Stringhead
6.Track
Important:Donotdisassemblethetrimmer
head.
6.Holdthestringheadinplacewithonehand.With
yourotherhand,rotatetheknobinthedirection
shownbythearrows(counterclockwise).
7.Windtheline,leavingabout102mm(4inches)
extendingbeyondtheeyeletoneachside.
14
 Loading...